Instrument cluster repair
Instrument cluster repair
I am now working on my 66 Corsa and have completed to engine, transaxle, transmission repairs and moving on to the body / interior. It’s all out and I would like to check the instruments out prior to reinstalling the cluster panel in the dash. Is there a company that you can suggest or give me a procedure??! 
- Attachments
-
Ed ( my65 )
65 Monza Convertible
110 HP 4 Speed
63 Monza Coupe
140 HP 4 Speed
66 Corsa Coupe
140hp 4 speed
Porter, Texas
65 Monza Convertible
110 HP 4 Speed
63 Monza Coupe
140 HP 4 Speed
66 Corsa Coupe
140hp 4 speed
Porter, Texas
-
bbodie52

- Corvair of the Month

- Posts: 11971
- Joined: Mon Aug 06, 2012 12:33 pm
- Location: Lake Chatuge Hayesville, NC
- Contact:
Re: Instrument cluster repair
I can't imagine a "simulator" that would truly test the instruments in the instrument panel in the vehicle operating environment. A physical inspection and cleaning, and a physical inspections of the wiring and connectors , plus possible paint, if needed, of the instrument cluster is appropriate. The ground connection for the panel must be properly connected to provide an essential ground. The instruments depend on external connections to drive the speedometer and provide essential signals from sending units and engine components, and a good wiring harness with multi-connectors that are in good condition are a part of the system that would be hard to simulate.
If you wish to fit new modern aftermarket instruments to your Corsa instrument panel, Performance Corvair offers the necessary hardware kit to simplify such an upgrade...

 Corsa speedometers are mechanical devices that are more than 55 years old. Some of the internal components — including the odometer drive — often wear out and there are no replacements available for some of the small internal components. The internal lubricating grease is also probably dried out or inadequate, causing further wear. A CORSA magazine article on speedometer repair is attached below, for your information.
You might consider modifying/upgrading your Corsa instrument panel to utilize a GPS (Global Positioning System) satellite-based electronic speedometer, which eliminates all of the mechanical drive and aging speedometer and replaces it with a modern, accurate, electronic GPS speedometer.
Of course other instruments can also be upgraded to modernize your Corsa instrument panel. A matching voltmeter, oil pressure gauge, and tachometer can also be considered. Unless you have a turbocharged Corsa, the old manifold vacuum/pressure gauge is a candidate for removal, as is the ancient, unreliable and likely broken clock. The fuel level gauge and cylinder head temperature gauge should be retained. Both can be located together on the same level of the instrument panel.

The cost for a Standard 3-3/8" (85mm) dial speedometer unit can be less than $100. Seth Emerson offers a Corsa Dash - Gauge mounting plate set that allows fitting modern instruments to the Corsa instrument panel.
 https://www.perfvair.com/dash-parts-steering-columns/


MOTOR METER RACING W Pro GPS Speedometer Odometer Waterproof for Car Boat Motorcycle Black Dial White LED Included GPS Sensor
https://www.amazon.com/dp/B081JLJWD3?ta ... scomp&th=1
More info on aftermarket electronic GPS speedometers...

 https://www.google.com/search?q=gps+spe ... e&ie=UTF-8
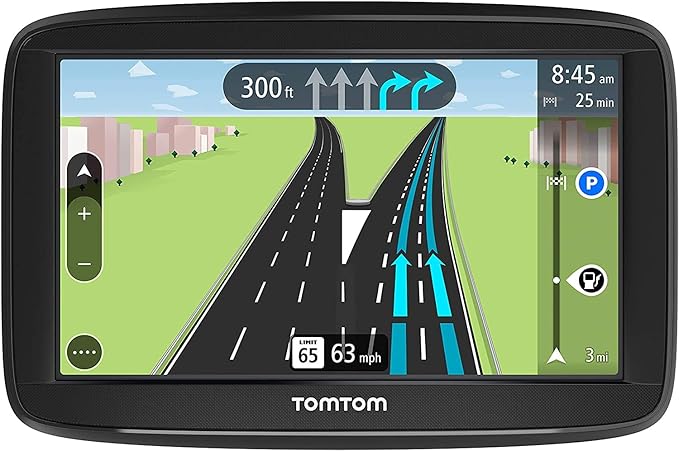
Note that most Navigation GPS units also include a very accurate digital clock and a continuous digital GPS speed display, and a record of accumulated total and current trip distance. A windshield-mounted GPS is a useful addition to any Corvair that you may want to consider.
https://www.google.com/search?q=gps&rlz ... nt=gws-wiz
The Corsa and Monza instrument panels can also develop problems with the electric instruments. The panels are plastic, so a metal conductive grounding strap links the electric gauges together and then ties them to chassis ground at a single point. If the single screw that attaches that grounding strap to the metal dashboard becomes loose or corroded, the electrical ground to the instrument panel components may be lost and this can disrupt the operation of the electric gauges and illumination lights.
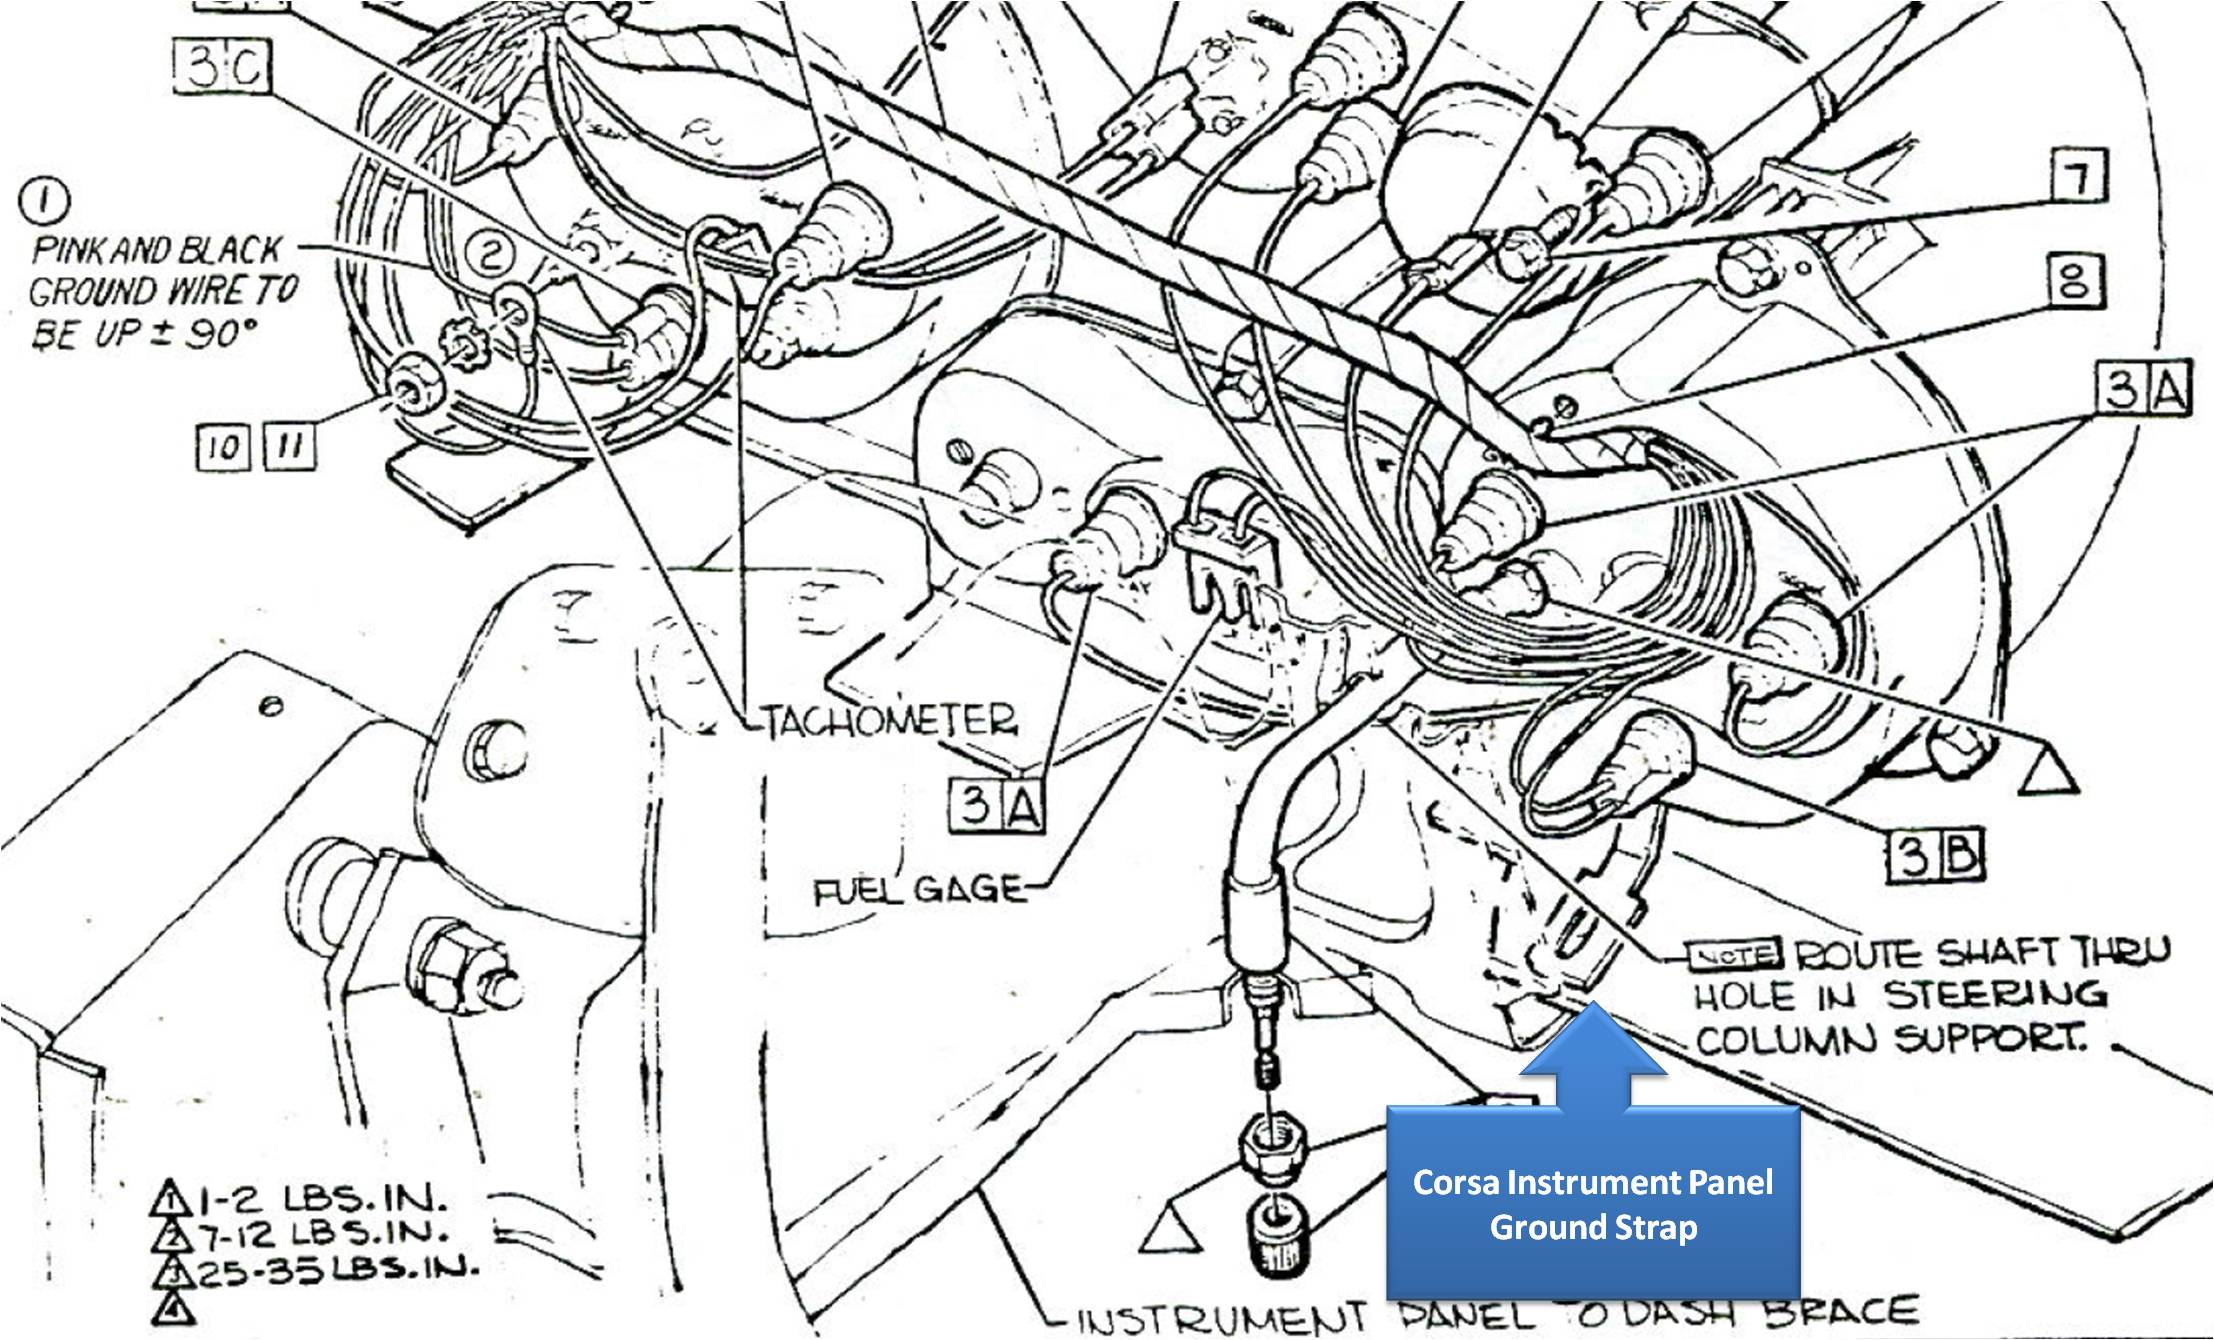

What the Corsa ground strap spider looks like...

The first two attachments are from the 1965 Corvair Assembly Manual. These assembly manuals contain many detailed engineering drawings and diagrams that provide details not usually found in the Corvair Shop Manuals. The applicable assembly manual for your model year Corvair is often a good addition to the factory shop manual and shop manual supplement (if there is one). Clark's Corvair Parts sells these Assembly Manual reprints, and I highly recommend them as a useful addition to your personal technical library.
 https://ssl.corvair.com/user-cgi/catalo ... _page=243B

If you wish to fit new modern aftermarket instruments to your Corsa instrument panel, Performance Corvair offers the necessary hardware kit to simplify such an upgrade...
You might consider modifying/upgrading your Corsa instrument panel to utilize a GPS (Global Positioning System) satellite-based electronic speedometer, which eliminates all of the mechanical drive and aging speedometer and replaces it with a modern, accurate, electronic GPS speedometer.
Of course other instruments can also be upgraded to modernize your Corsa instrument panel. A matching voltmeter, oil pressure gauge, and tachometer can also be considered. Unless you have a turbocharged Corsa, the old manifold vacuum/pressure gauge is a candidate for removal, as is the ancient, unreliable and likely broken clock. The fuel level gauge and cylinder head temperature gauge should be retained. Both can be located together on the same level of the instrument panel.
The cost for a Standard 3-3/8" (85mm) dial speedometer unit can be less than $100. Seth Emerson offers a Corsa Dash - Gauge mounting plate set that allows fitting modern instruments to the Corsa instrument panel.
Performance Corvair Corsa Dash - Gauge mounting plates
Performance Corvairs wrote: Kit includes 4 separate plates, Speedo/Tach/Upper center gauge pair/Lower center gauge pair. Fits – 1965-66 Corsa Dash
(The Corsa Dash will fit into 65-69 cars)
Parts are usable individually or in any combination. Upper pair and lower pair are replaced as a pair of gauges. Plates retain the gauges from behind, pressing them up against the back side of the dash. No cutting or modifications to the dash panel are needed. Uses the original mounting screws. Stock Speedo can be retained. Standard 3 3/8” Speedo/Tach and 2 1/16” aftermarket gauges work fine. Cost $44/set + $9.60 shipping. Optional Tachometer and Speedometer plates for 4" instruments are available.
MOTOR METER RACING W Pro GPS Speedometer Odometer Waterproof for Car Boat Motorcycle Black Dial White LED Included GPS Sensor
- Spec.: Standard 3-3/8" (85mm) dial for a 3-3/4" (95mm) opening required 12/24 volt negative ground systems.
- FEATURES: Indicator Odometer, Designed for 270 dial sweep in-dash; White LED illumination, convex lens stainless bezel comes with ABS housing.
- PACKAGED: Speedometer, GPS sensor, Wiring Harness, installation manual.
5.0 out of 5 stars — Incredible
Reviewed in the United States on July 5, 2021
Size: GPS Color: White Dial — Verified Purchase
I have tried to repair my speedometer cable a few times. Lasts for a while then self destructs.
Got tired of changing them and decided to go with something that dosen't go to the transmission.
Purchased this device, super incredibly easy to install. Seems very accurate and responsive.
The ONLY gripe i have as they ho not have in the instructions on how to set this new units odometer reading to duplicate the old one. After contacting customer support, they responded. Tap the button on the back 5 times. Pause for a second then tap it again. This lets you subtract miles from the odometer. Tap it the second time and it adds to the odometer. Now my new installation duplicates the old mileage exactly. Awesome, so far so good!
More info on aftermarket electronic GPS speedometers...
Note that most Navigation GPS units also include a very accurate digital clock and a continuous digital GPS speed display, and a record of accumulated total and current trip distance. A windshield-mounted GPS is a useful addition to any Corvair that you may want to consider.
The Corsa and Monza instrument panels can also develop problems with the electric instruments. The panels are plastic, so a metal conductive grounding strap links the electric gauges together and then ties them to chassis ground at a single point. If the single screw that attaches that grounding strap to the metal dashboard becomes loose or corroded, the electrical ground to the instrument panel components may be lost and this can disrupt the operation of the electric gauges and illumination lights.
What the Corsa ground strap spider looks like...
The first two attachments are from the 1965 Corvair Assembly Manual. These assembly manuals contain many detailed engineering drawings and diagrams that provide details not usually found in the Corvair Shop Manuals. The applicable assembly manual for your model year Corvair is often a good addition to the factory shop manual and shop manual supplement (if there is one). Clark's Corvair Parts sells these Assembly Manual reprints, and I highly recommend them as a useful addition to your personal technical library.
- Attachments
-
- 1965 Corvair Assembly Manual - INSTRUMENT PANEL.pdf
- 1965 Corvair Assembly Manual - INSTRUMENT PANEL
- (2.38 MiB) Downloaded 15 times
-
- 1965 Corvair Assembly Manual - ELECTRICAL COMPONENTS, HARNESSES & SCHEMATICS.pdf
- 1965 Corvair Assembly Manual - ELECTRICAL COMPONENTS, HARNESSES & SCHEMATICS
- (12.21 MiB) Downloaded 15 times
-
- Corsa Speedometer Repair - Communique - 2012 May - Vol 34 - No 4.pdf
- Corsa Speedometer Repair - Communique - 2012 May - Vol 34 - No 4
- (785.62 KiB) Downloaded 14 times
Brad Bodie
Lake Chatuge, North Carolina
 1966 Corvair Corsa Convertible
Lake Chatuge, North Carolina
1966 Corvair Corsa Convertible-
bbodie52
- Corvair of the Month
- Posts: 11971
- Joined: Mon Aug 06, 2012 12:33 pm
- Location: Lake Chatuge Hayesville, NC
- Contact:
Re: Instrument cluster repair
bbodie52 wrote:Here is some material I put together some time ago on the Corvair temperature monitoring system...
bbodie52 wrote:Remember, out of a total production of 1,786,243 Corvairs manufactured between 1960 and 1969 model years, only 78,924 (4.42%) were manufactured with cylinder head temperature gauges (Spyders and Corsas). All of the remainder survived primarily based on a fan belt warning light (GEN) and a TEMP warning light (I've yet to see that light come on because of an overheat condition). Basically, if the fan belt is driving the cooling fan, the engine does not overheat. Even when I've driven my 140 hp Corsa across the southern California desert in the middle of a very hot summer day at a constant 70-75 mph, fully loaded with four passengers and a lot of luggage, the temperature gauge never indicated excessive engine heat. Only the passengers were overheated!
If 12V DC is present on the wire coming from the gauge, when measured at the connector at the engine compartment area, where the wire passes through the left heater duct shroud and connects to the thermistor, this would tend to indicate good power to the gauge itself, and good electrical continuity all the way to the engine thermistor connector. On the other side, a cold engine should show approximately 5000 ohms resistance between the wire connector and ground (cylinder head, where the thermistor attaches to the head). This resistance reading should be roughly 300-500 ohms with the engine fully warmed up. If the thermistor is providing appropriate resistance readings to ground, and voltage is detected coming from the gauge on the other side of the connector, the gauge should indicate an appropriate reading when the harness is reconnected (unless the gauge itself is defective). If no voltage is present coming from the gauge, the wiring powering the gauge at the instrument panel must be checked, and if 12V DC is found going into the gauge and coming out of the gauge, the thermistor wire itself may have a broken lead. Of course, if the thermistor does not display appropriate resistance readings, it is likely faulty. In any case, a physical inspection and some testing with a multimeter should point to the cause of the malfunction.
It might be that the gauge to thermistor wire is shorted someplace to ground. Grounding that wire before it reaches the thermistor would cause maximum current to flow from the internal gauge coil to ground (with no thermistor resistance to limit the current flow). This would cause maximum electrical current to flow through the gauge coil, pulling the gauge needle all the way to the right. Inspect the wire along its path and look for damaged insulation where the wire may be coming into contact with metal and shorting to ground.
Perhaps the best thing to do is to assume that the gauge and thermistor are both OK, and check the wiring to verify power, ground, and electrical continuity all the way back to the thermistor. The thermistor is a variable resistor that changes resistance value with temperature change. Power from the ignition key circuit is routed to the gauge, where it passes through an electro-magnetic coil to deflect the instrument needle. The amount of the deflection depends on how much electrical current is flowing through the wire to the thermistor, and though the thermistor to GROUND (cylinder head).
The Corsa and Monza instrument panels can also develop problems with the electric instruments. The panels are plastic, so a metal conductive grounding strap links the electric gauges together and then ties them to chassis ground at a single point. If the single screw that attaches that grounding strap to the metal dashboard becomes loose or corroded, the electrical ground to the instrument panel components may be lost and this can disrupt the operation of the electric gauges and illumination lights.
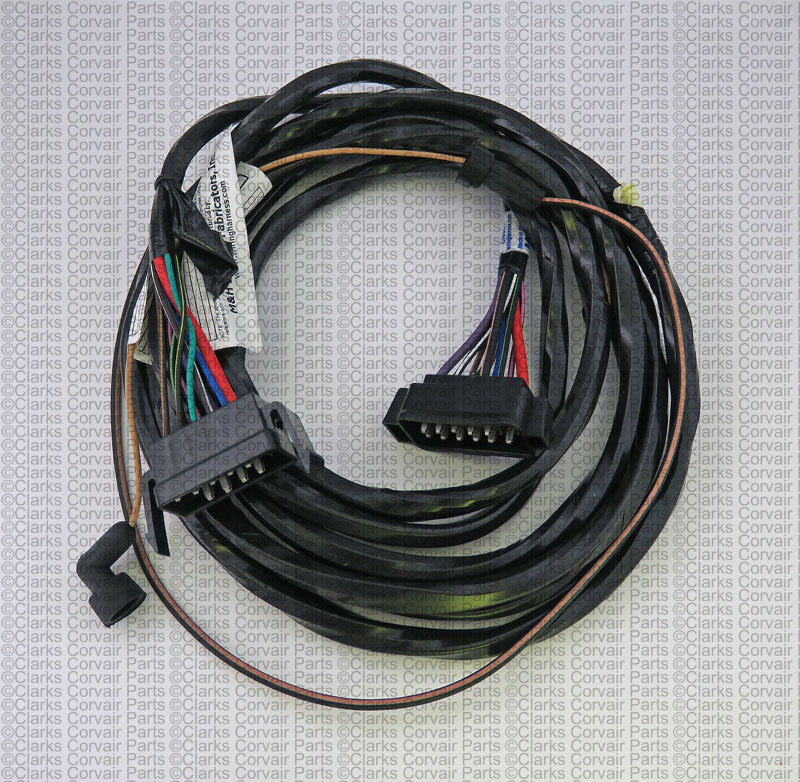
1962-66 Turbo CORSA head heat sensor mini harness, exact reproduction, you don't need to modify anything. This mini harness will work in your Turbo, or your 140 HP; one end goes to the thermistor, and the other one to the engine harness. Don't hesitate to call us at 918-413-1544 with any questions you might have about this item.
CORVAIR THERMISTOR TEMP WIRE 62-4 SPYDER 65-6 CORSA

Part number C1718: 65-66 TURBO & 140 CYL HEAD TEMP SENSOR *THERMO COUPLER - REPLACEMENT FOR THERMISTOR
Weight: 0 lbs 4 oz
Catalog Page(s): 51
Price: $ 151.40
Brad Bodie
Lake Chatuge, North Carolina
1966 Corvair Corsa Convertible
Lake Chatuge, North Carolina
1966 Corvair Corsa ConvertibleRe: Instrument cluster repair
I've never run into one place that can test all the instruments.
Do you want to keep the original instruments, or put in modern instruments?
You can test the instruments ----- 825RPM to speedometer input and it should read 60MPH and the odometer and trip odometer should turn. If not -- a few instrument shops can still fix them, but you'll have to find them online. Corsa model speedometers tend to have a worn out internal worm drive for the odometers.
You can test the Boost/Vacuum gauge with a simple vacuum test tool with a gauge. Mity-Vac is one, but HB has one that works better.
The clock is simple - power to it, and ground the case. Rarely do they work well now. Clark's sells a quartz kit. Looks stock, less power, accurate.
The temperature and fuel gauges are very durable. You can do a simple check. Apply ground and power, then leave the signal input open and then ground it to see if the gauge swings from side to side. Look for corrosion at the terminals.
The tachometer can be tested by grounding the case, power to 12VDC terminal, apply signal from coil "-" terminal to tachometer input terminal (marked on tachometer case). DO NOT PAINT THE TACHOMETER NEEDLE as that requires a rebalance of the armature. I did them years ago and the average was FIVE HOURS each!!! If the meter fails - no fix. Electronic parts can be replaced.
-
bbodie52
- Corvair of the Month
- Posts: 11971
- Joined: Mon Aug 06, 2012 12:33 pm
- Location: Lake Chatuge Hayesville, NC
- Contact:
Re: Instrument cluster repair
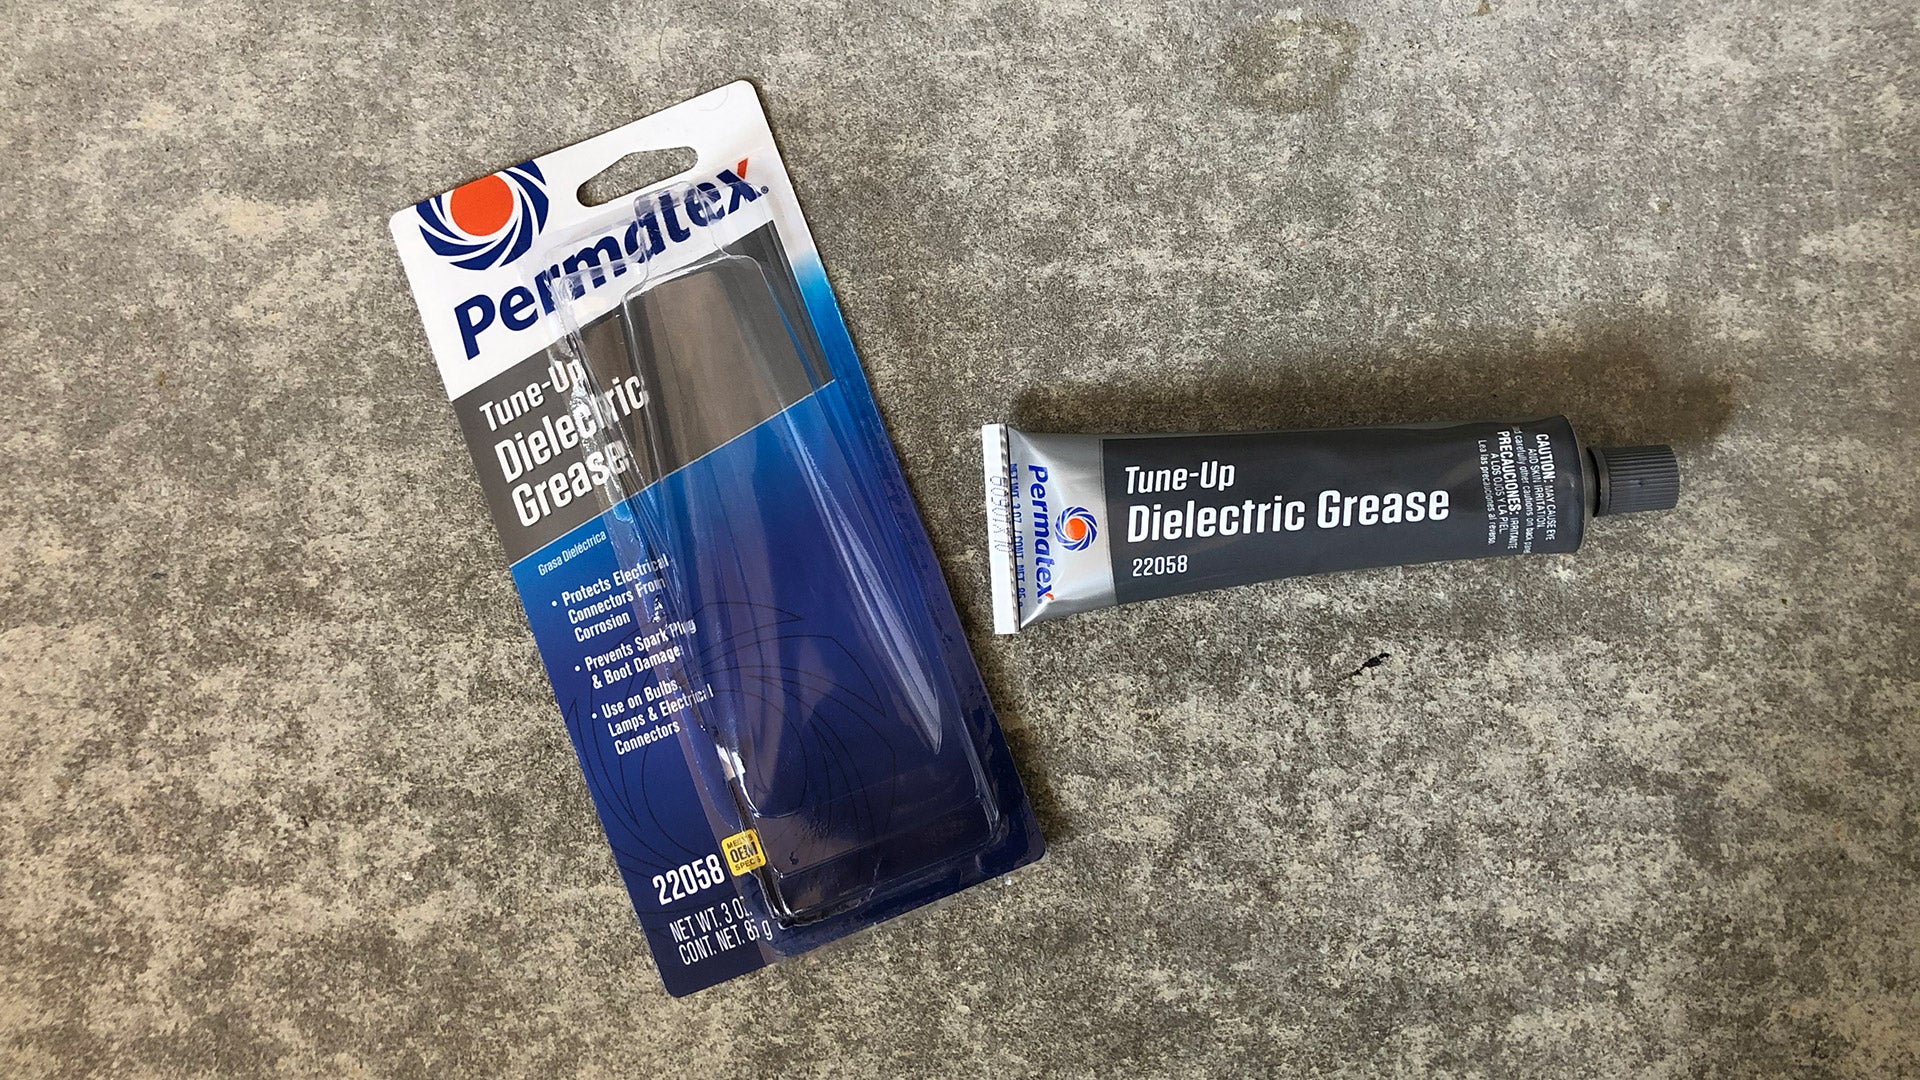
A careful inspection, cleaning and repair of the internal metal connector pins may help. Dielectric grease may also improve the reliability of the internal electrical connections.
Dielectric, sometimes referred to as tune-up grease, is a viscous non-conductive waterproof substance used to protect electrical connections from corrosion and dirt.
Permatex 22058 Dielectric Tune-Up Grease, 3 oz. Tube


What The Heck Is Dielectric Grease?
And is it necessary?
BY TONY MARKOVICH MARCH 2, 2021
CORVAIR COMBINED WIRING SCHEMATIC DIAGRAMS
BODY WIRING-65 CORSA

ENGINE WIRING-65 CORSA
Brad Bodie
Lake Chatuge, North Carolina
1966 Corvair Corsa Convertible
Lake Chatuge, North Carolina
1966 Corvair Corsa ConvertibleRe: Instrument cluster repair
Thank you both for the great input!! 
When I did my 65 Monza, I put Seth’s tack in the center hole….love it!!!
The only item that is not working in the cluster, is the trip odometer. I am just starting the body work (4-5 months ) so I have time to research your ideas. My car is not a turbo so I will replace the vacuum gauge with oil pressure. Again, Thanks
Ed ( my65 )
65 Monza Convertible
110 HP 4 Speed
63 Monza Coupe
140 HP 4 Speed
66 Corsa Coupe
140hp 4 speed
Porter, Texas
65 Monza Convertible
110 HP 4 Speed
63 Monza Coupe
140 HP 4 Speed
66 Corsa Coupe
140hp 4 speed
Porter, Texas
Re: Instrument cluster repair
Unlike the Monza speedometer, the Corsa model speedometer use a metal intermediate gear to run both odometers off the input shaft spiral gear. After a couple of decades the lubricant dries out and the gears fail and BOTH odometers quit.my65 wrote: ↑Sat Sep 03, 2022 7:47 am Thank you both for the great input!!
When I did my 65 Monza, I put Seth’s tack in the center hole….love it!!!
The only item that is not working in the cluster, is the trip odometer. I am just starting the body work (4-5 months ) so I have time to research your ideas. My car is not a turbo so I will replace the vacuum gauge with oil pressure. Again, Thanks
Since you said ONLY the trip odometer isn't working that implies the regular odometer is working. Note: the trip odometer was resettable via a cable that pushed an engagement gear to disengage the odometer and let you turn the input cable to reset the trip odometer. Check the odometer reset cable to see if it is stuck (they were never a great design) and are often missing as folks take off the cable when removing the cluster.
I've rebuilt four speedometers decades ago. Now parts are hard to find and it's like repairing a watch. I even dismantled the trip odometer shaft and the wheels with their sprag clutches (the wheel paint almost always falls off the trip odometer wheels - I used 1955 Chevy odometer wheel decals). I used a combination of graphite and DEXTRON PG oil (just a thin film) to lubricate the shaft, otherwise the dial to shaft drag puts a lot of stress on the drive gears. Keep in mind this odometer was never meant to function for over five decades. If lubricated before failure, they will go another couple decades without issue.
I'm retired you can do labor intensive projects. Note that dismantling the speedometer will cause the cup magnet on the input shaft to change. Once re-assembled you have to find a shop that CAN magnetically calibrate the magnet to read 60MPH at 825RPM (HINT: same as the old VW's). I doubt I'll ever do another speedometer rebuild as it took MANY hours and was just a "fun" project to get my cars done. Finding a good repair shop now is not easy. The 65-69 Corvair speedometer used 825 RPMs per mile since it used the front wheel to drive it so some parts are unique. Most GM cars used 1000 RPM's since they were transmission driven, as was the EM Corvairs with that LONG, and sometimes problematic, speedometer cable.