Page 5 of 7
Re: '65 Monza project in the dry central valley CA
Posted: Mon May 09, 2016 11:21 am
by viewmaster
UPDATE:
Got through the winter months, lots of other chores to do, and a trip out to see the daughter (back east).
Anyways...back at it!! Transfering some money to a PayPal credit card, so i can order the lower windshield sil piece from Clark's. As well as a few more odds and ends...for now... While waiting for that, got the gumption to take the best block out of the four i had, and pre-fit the crank and cam. Slowly torquing and spinning, and torquing and spinning, etc...with the occasional bop with a rubber mallet. Making sure we atill have free spin at full torque, then disassemble again, thorough cleaning and de-flashing of case, then if everything is good, ill do final assy. of the short block. #makingprogreas
Re: '65 Monza project in the dry central valley CA
Posted: Mon May 16, 2016 1:10 pm
by viewmaster
INTERRUPT:
As i was going about the plan of final torque check and spinning and all that...a friend suggested the added step of Plastigauge, just to make sure of my measurements. I got some green Plastigauge and set about measuring the crank (with STD bearings), and the cam.
Crank/bearing clearance measured .002 - .0025...so...the manual says i need .001 main bearings. Those...as some know, are like finding hensteeth. So, i asked around a little more, and alot of Corvair people, more experienced than I, said ".002 is perfect...RUN IT!!" The cam measured .002, the upper end of used tolerance, so i am VERY pleased to just clean, clean, clean...and assemble and run it!!!
Thanks to some great Corvair people with knowledgable responses, the project marches on.
Stay tuned...
Re: '65 Monza project in the dry central valley CA
Posted: Wed May 25, 2016 8:06 am
by viewmaster
Update:
Lookee what showed up on the doorstep yesterday after work!!! Looks like my weekend is laid out for me...good thing its a three day'r!!!
-m
Re: '65 Monza project in the dry central valley CA
Posted: Wed May 25, 2016 10:19 am
by SteveH
Woo Hoo!! Lots of fun. Good luck!
Re: '65 Monza project in the dry central valley CA
Posted: Sat Jul 09, 2016 11:32 pm
by viewmaster
Got a redneck rotissourie fabbed up. This will help get to the belly of the beast.
Re: '65 Monza project in the dry central valley CA
Posted: Sat Jul 09, 2016 11:34 pm
by viewmaster
Wife pitched in and helped me torque the short block. Always fun having help in the shop.
Re: '65 Monza project in the dry central valley CA
Posted: Sun Jul 17, 2016 5:15 pm
by viewmaster
Update:
Got some time in the shop this weekend. Performed a couple caveman body shop repairs. Welded up a couple holes here and there, and removed the PO's crappy welded rear sway bar brackets. Also, started rust encapsulation on the belley, since i have good access now. I think im gonna leave the rear sway bar off, since im not gonna be autoX'ing this thing. It would be pretty stiff for the street...or so i have heard.
Stay tuned...
Re: '65 Monza project in the dry central valley CA
Posted: Mon Jul 25, 2016 9:06 am
by viewmaster
Update:
Got belly seam sealed in places it was missing or loose, masked for epoxy primer yesterday, and primed this morning before it gets too terribly hot. Rust encapsulation on pedal mech and prepped for paint. Cleaned up and inspected bellhousing, installed crank seal and torqued to short block. #makingprogress
-m
(stay tuned)
Re: '65 Monza project in the dry central valley CA
Posted: Mon Jul 25, 2016 12:11 pm
by cad-kid
I like it

Re: '65 Monza project in the dry central valley CA
Posted: Tue Jul 26, 2016 5:54 am
by Wagon Master
Have you checked the fit of your new windshield lower filler piece yet. I've heard some say theirs need reshaped slightly.
LOVE the rotisserie.
Re: '65 Monza project in the dry central valley CA
Posted: Tue Jul 26, 2016 12:20 pm
by viewmaster
Wagon Master wrote:Have you checked the fit of your new windshield lower filler piece yet. I've heard some say theirs need reshaped slightly.
LOVE the rotisserie.
I have fit it against my windshield, and its actually a good fit the hard way, but will need some massaging the easy way. If you know what i mean...thats a term used in metal work.
If you have a piece of flat bar that is 1/4" x 2", and you want to roll it on a ring, the "easy way" would be to roll it in a band, looking like a belt. The "hard way" would be rolling it against the "I" factor, and looking like a rib. I hope that explains everything.
So...just a little working and it will be just fine.
-m
Re: '65 Monza project in the dry central valley CA
Posted: Sun Aug 07, 2016 5:46 pm
by viewmaster
UPDATE:
Finally got round to tackling the lower windshield frame replacement. I have had the Clark's repop piece for a while now, and finally got up the energy to do it. The Clark's piece, as most know, is far from perfect, and needed MUCH massaging, but it worked out in the end. Windshield fits real nice, and now need to make some plastic spacers for when i install the glass with urethane. WHEW...LONG DAY.
Stay tuned...
Re: '65 Monza project in the dry central valley CA
Posted: Mon Aug 08, 2016 8:02 am
by Wagon Master
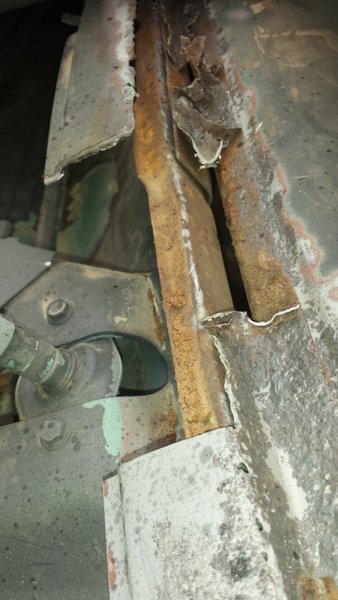
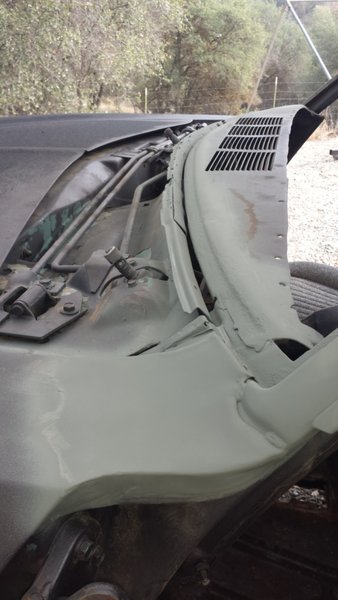
Do you have and can post any pictures of the area with the old panel cut out? With at least three different panels converging here I'd like to see what's underneath when it all "opened up".
Thanks,
Arden
Re: '65 Monza project in the dry central valley CA
Posted: Mon Aug 08, 2016 9:25 am
by viewmaster
Arden,
Here are a couple pics:

- In the midst of deconstruction...

- From driver side, after cancer removal.
You can see in the second pic (primer covered) two of the three in this area. Dash, and pan under front cowl. Add the windshield lower frame to make the three pieces you are talking about. These are the only pics i have. Hope this helps.
Oh...there are also a couple of additional brackets that protrude into this multi-layered weld area, that have to be tacked in, that go down and support lower dash crossmember.
Re: '65 Monza project in the dry central valley CA
Posted: Sat Aug 13, 2016 1:53 pm
by viewmaster
UPDATE:
This weekend, working on seat mounts for the Chrysler Sebring Vert conversions. I believe i came up with a strong solution, using the same mounts on the outside rail, which has three mounts, and the middle and rear ones taking the brunt of the stress in a frontal crash.
They will be strengthened also by being so close to the rockers. This is the drivers side, just need to mirror it for the passenger seat.
-m
(stay tuned)
Re: '65 Monza project in the dry central valley CA
Posted: Sat Sep 10, 2016 12:55 pm
by viewmaster
UPDATE:
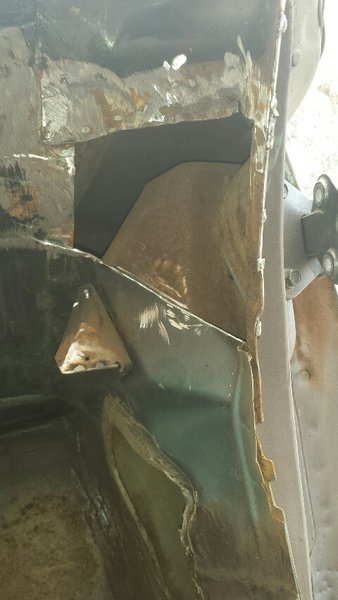
Been working on stuff here and there, and finally aquired a donor dash piece. But...before i can get that fitted and welded in, i have some winddgield drainage damage to attend to.

- Drainage under pass side windshield drain hole...
Here is the passenger side, under dash anf under windshield drain hole. It must have gotten more water on this side than the driver side, cuz the driver side is still solid. So i cut out the cancer, and will weld in some galvanized steek at a later time.
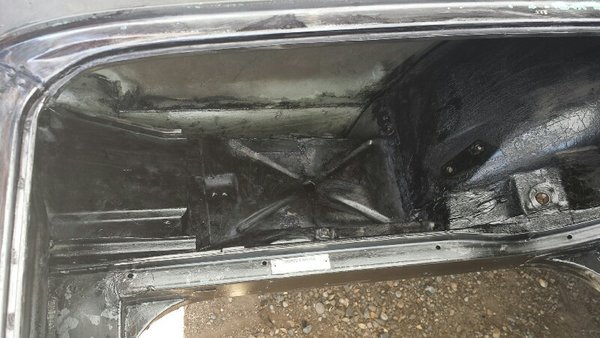
Also, cleaned out the rear engine compartment, and rust converted the whole area, as well as the seal area and around rear window channel.

- Battery tray area...

- Pass side...
Keeping busy...