A place to preserve the past, present and future of the Corvair. An ever evolving knowledge base made up of Corvair Enthusiasts from all over the world. (Note: no ads for logged in members). https://www.corvairforum.com/forum/
Very impressed with your dedication! Keep it up! Sorry to see about the back quarter but it sounds like you'll be able to mend it in time. When I finally get my next Vair I'm going to keep this car mind when issues arise and try to keep a positive attitude like you seem to have. Good luck!
Re: '66 Monza Coupe Project
Posted: Tue Jun 24, 2014 1:57 am
by BIGTWIN
Hang in there Blaze. You might want to dig a little deeper and get rid of that rust under the rear fender while you fix it. It might be best to replace the quarter panel instead of the fiberglass depending on the extent of the rust. The panels aren't that expensive but the welding and finishing can be tedious work. Good luck.
Re: '66 Monza Coupe Project
Posted: Tue Jun 24, 2014 12:47 pm
by 91blaze
Decided to take some more clear pictures of the damage. Looks like all cosmetic damage other than the battery tray and lid support. From what I can tell, the tire went under the rear 1/4 panel breaking the bond between the metal and fiberglass. The metal of the rear inner fender-well was pushed up into the battery tray, but as far as I can tell, nothing else was damaged. I'm considering using the parts car to replace the fiberglass 1/4 rather than attempting a repair. I don't really have the means to do bodywork right now, so it may be a while before I can fix this.
Battery tray, pushed up in the middle:
Damage:
Metal folded up:
Re: '66 Monza Coupe Project
Posted: Wed Jul 02, 2014 6:58 pm
by Bobby65
time to get the hammer out and start pulling things back into shape
Re: '66 Monza Coupe Project
Posted: Thu Jul 03, 2014 5:38 pm
by 91blaze
Bobby65 wrote:time to get the hammer out and start pulling things back into shape
Should be interesting, never done body work before.
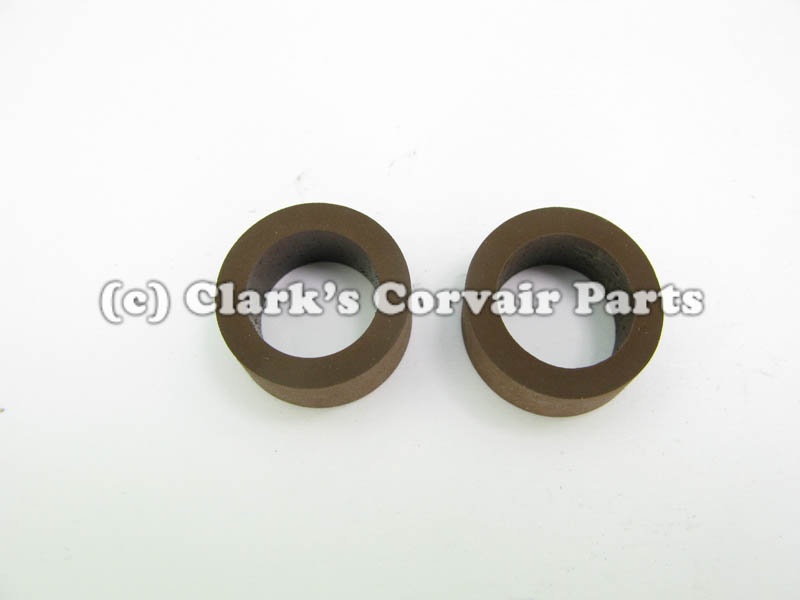
So, driving home Tuesday I lost my muffler, so I decided to go ahead and have the exhaust done. Went to the shop yesterday and would have had it done that day had they been able to find donut gaskets. They ended up only being able to get one, and put one of the old ones back on until next week they will put the new one in. I decided to go dual with mufflers similar to stock 140's. It's definitely a lot quieter than I expected, but it looks good and doesn't drone like it used to. My oil leak from the pushrod tubes has gotten worse, so I will hopefully be getting those replaced tomorrow if all goes well. Saturday I will be rebuilding the brakes with new shoes, wheel cylinders, and spring kits. Pics of new exhaust:
Rear shot:
Left:
Right:
Re: '66 Monza Coupe Project
Posted: Fri Jul 04, 2014 11:01 am
by cad-kid
Good looking custom exhaust. Where did you have the work done?
Re: '66 Monza Coupe Project
Posted: Fri Jul 04, 2014 4:52 pm
by 91blaze
cad-kid wrote:Good looking custom exhaust. Where did you have the work done?
Anderson Warehouse Mufflers
They were recommended by someone and I didn't want to use some big chain shop.
Re: '66 Monza Coupe Project
Posted: Sat Jul 05, 2014 10:02 am
by 91blaze
I got the two suspected pushrod tube o-rings replaced but I still have a leak. Looks like it's coming from the driver's side just a bit further back than the pushrods. My guess is oil cooler, is there a common leak somewhere in that area? I'm going to do the brakes today and maybe tomorrow if necessary. Due to this leak, I'm going to probably have to pull the engine after the car show next weekend. I was hoping to be able to drive it until winter, but it looks like I may have to tear apart sooner than I had hoped.
Re: '66 Monza Coupe Project
Posted: Sat Jul 05, 2014 2:02 pm
by bbodie52
From your description, it sounds like an oil cooler leak. It is fairly easy to fix. The oil cooler resides on the left side, below the alternator. It is held in place by one bolt, but there are also a few sheet metal screws above and below it. It is a common place for an oil leak. The VITON oil seals listed below usually hold up better under heat, so they should last longer than standard seals.
The instructions below were extracted from the 1965 Corvair Chassis Shop Manual, page 6-19. In the first picture, you can see the oil cooler to the left of the oil filter.
The torque specifications for the ⅜-16 bolt that holds the oil cooler to the oil cooler mounting adapter is 8-12 ft. lbs. Remember that most bolts on the Corvair engine are threaded into soft aluminum. Bolts should be threaded in by hand to prevent cross-threading. The use of anti-seize compound on the bolt threads is recommended. Always try to use a ½-inch Drive Foot-Pound or a ⅜-inch Drive Inch-Pound torque wrench when tightening, to avoid over-tightening and possibly stripping the aluminum threads.
This video goes a bit beyond the job you need to do on the oil cooler, but the portion of the video that covers the oil cooler seals will help you to visualize the work needed. Just fast forward to the 22.00 minute part to skip past the harmonic balancer and focus in on the oil cooler part (unless you just enjoy watching and learning from Dave Motohead!)
Thanks Brad, got the seals ordered, hopefully they solve the problem. I got the rear brakes finished, worst part was the little springs that hold the shoes on. Ended up reusing the old ones since the new springs were too stiff to get on. Found that the RR wheel cylinder was leaking very badly, but now the rears work great. I started to do the LF brake because it pulls to the right when I stop. Found that the wheel cylinder is completely frozen, there is fluid pressure there but no movement. I decided to hold off on replacing it until tomorrow.
Is there anything special about removing the front wheel cylinder or is it the same as the rears? Also, what is the little flat plate that goes behind spring holding stud above the wheel cylinder? It didn't seem to be holding anything on and is only on the front brakes.
Re: '66 Monza Coupe Project
Posted: Sat Jul 05, 2014 6:55 pm
by bbodie52
Brake Spring Tool How To...
Re: '66 Monza Coupe Project
Posted: Sat Jul 05, 2014 7:10 pm
by 91blaze
Yeah, I can do the main springs easy enough, it's getting the little ones to compress far enough to get the pin in the washer is a pain. I used vice grips like he did, but for some reason it seems like the new shoes are more difficult. I can get them off and back on the old shoes easy enough, but the new shoes seem to fit differently. I know I'm using the right ones, and all the other components fit back together correctly once I get the shoes on.
Oh, and an unrelated question about the engine. Since I'm not using the stock air cleaner, does the line going between the carbs need to connect to the pcv, or can that connection be capped off? I want to run the pcv directly to the right cleaner, and just block off the line going from the connecting carb line to the pcv line.
Re: '66 Monza Coupe Project
Posted: Sun Jul 06, 2014 2:12 am
by bbodie52
You're in luck... we just had a big discussion on this topic! Basically, you need BOTH — the vacuum connection to the balance tube AND the connection to the air cleaner.
So now I'm a little ticked off at my car. Seems the carburetor problems from before have come back and causing a different set of problems. When accelerating or under load, the car stumbles and acts like it's going to die. When idling and revving without load, it sounds the same as before and runs great. I have noticed that when I cover the left carb it nearly dies but when I cover the right it doesn't react. I pulled all the plugs to do a compression check but nothing jumped out as bad:
1- 120
2- 115
3- 100
4- 115
5- 120
6- 100
I did remove the right carb and clean out the idle circuits with compressed air, but no changes. After running, the right side is about 10 degrees cooler than the left, so it is running on both sides, maybe a partial blockage?
Tomorrow I plan on removing the valve covers and checking for loose valves or broken parts, hoping I can figure this out. In the meantime, any recommendations on what I should check? If nothing shows up, I'm thinking about talking to LeVair.
Re: '66 Monza Coupe Project
Posted: Tue Jul 15, 2014 5:03 pm
by 91blaze
So today I decided to do a little test to check if it's the carbs or something deeper causing problems. I switched the carbs left to right because the right carb was the one acting strange. When I switched them, the problem followed the right carb, but oddly enough, it runs better now. I'm thinking that something is not adjusted properly somewhere so I bought a Uni-Sync so I can get the carbs synchronized and readjust everything the way it should be. The right carb (previously left) makes a sucking sound when covered while the left does not. Both sides feel like they have the same vacuum, so any ideas on what this could be?
Re: '66 Monza Coupe Project
Posted: Tue Jul 15, 2014 5:38 pm
by bbodie52
Have you actually dismantled, chemically cleaned, and overhauled the carburetors? It seems like you are touching on and working around the symptoms, but not completely working to correct the fault(s). Using compressed air to blow out a few passages may be inadequate to fully overhaul the carburetors by clearing all obstructions, properly adjusting all carburetor settings, and replacing worn components. The fact that some symptoms travel from the left to the right side of the engine when you swap the carburetors does further point to a defective carburetor, but it does nothing to actually correct the problem. Overhauling both carburetors will help to balance performance on both sides.
If the compression test results for all cylinders is satisfactory, this would indicate a mechanically sound engine that should produce a balanced vacuum on both sides of the engine. The Uni-syn will help you to synchronize the idle and throttle linkage opening settings on both carburetors, but it will not measure internal carburetor settings or carburetor cleanliness to ensure a balanced functional condition in each carburetor.
I would suggest tearing down both carburetors, properly cleaning them by soaking the metal components in carburetor parts cleaner, flushing and drying all passages, and then properly putting them back together with carburetor rebuild kits. The base gaskets (2 per carburetor) and insulators (1 per carburetor) may need replacement and will help to ensure no vacuum leaks, and all vacuum hoses on the balance tube and other carburetor connections should be carefully inspected to ensure a proper seal at each connection point. Automatic transmission? Be sure to check all vacuum connections to the modulator, and check the vacuum hose at the modulator for signs of transmission fluid inside the hose, which can indicate a ruptured diaphragm inside the modulator. The fuel pump should also be checked for proper pressure and volume output, and all linkages should be properly adjusted and synchronized. This will address all possible fuel system issues and will ensure that the entire fuel system is a known quantity. Coupled with engine compression checks on all cylinders and a proper ignition system tune up, the end result should end the guessing games and will help to make the operating condition of the engine a known quantity.