Corvair fan bellmouth shop
Corvair fan bellmouth shop
I figured I better post the link here somewhere. This is a link to my Bellmouth Shop on Shapeways. These are 3D printed bellmouths for Corvair engines, all have been extensively tested by me. You can order these directly through this link, and they take 3 weeks or less to be delivered to you. https://www.shapeways.com/shops/nashfan-bellmouth-shop
Re: Corvair fan bellmouth shop
Thanks for sharing. It looks like the d compound already has the cutouts for the belt? If so, nice touch!
Re: Corvair fan bellmouth shop
Nashfan Guidevane bellmouth - shroud cutting tip
Here is an alternative method to modify (cut) the shroud in preparation for mounting the bellmouth. There are instructions provided with guidevane that show how to cut the top lip off the fan shroud. As I prepared to start cutting with the hacksaw... I decided to use some of the woodworking skills I learned from my grandpa. The setup is styled after a table saw with rip fence.
Tools required:
Woodworking clamp (or equivalent)
C-Clamp (or equivalent) - 2ea
2x4 (for rip fence)
Dremel & Dremel EZ406-02 cutting kit
Eye & Ear protection
Bench
Shroud prep: Tape around the circumference of the shroud with painters tape and mark the cutting line. You will be using the round face of the shroud as your reference for cutting.
Bench setup: Clamp the Dremel tool inside the woodworking clamp. The Dremel/wood clamp is then positioned with the cutting wheel extended out from the bench to match up with the cut line on the shroud. C-Clamp holds the wood clamp to bench in this position. Snug it down and check wheel position. Clamp the rip fence flush with the edge of the bench so you have a flat surface to guide the shroud.
.
.
Dremel cutting wheels: The metal wheels will wear down so you need at least 5ea. They can be replaced on the mandrel without disturbing the clamped position.
Cutting: As you move the shroud towards the cutting wheel, make sure to hold it square while contacting the rip fence for a nice even cut. Rotate the shroud as you cut and just go slowly. Be careful with the spark plug holders as you rotate past them so you don't cut them.
.
.
Finish up: After you have cut all the way around and take the "ring" off, you just need to file/deburr the edge and all done. proceed to follow remaining instructions provided by "that Nashfan" guy.
.
.
Here is an alternative method to modify (cut) the shroud in preparation for mounting the bellmouth. There are instructions provided with guidevane that show how to cut the top lip off the fan shroud. As I prepared to start cutting with the hacksaw... I decided to use some of the woodworking skills I learned from my grandpa. The setup is styled after a table saw with rip fence.
Tools required:
Woodworking clamp (or equivalent)
C-Clamp (or equivalent) - 2ea
2x4 (for rip fence)
Dremel & Dremel EZ406-02 cutting kit
Eye & Ear protection
Bench
Shroud prep: Tape around the circumference of the shroud with painters tape and mark the cutting line. You will be using the round face of the shroud as your reference for cutting.
Bench setup: Clamp the Dremel tool inside the woodworking clamp. The Dremel/wood clamp is then positioned with the cutting wheel extended out from the bench to match up with the cut line on the shroud. C-Clamp holds the wood clamp to bench in this position. Snug it down and check wheel position. Clamp the rip fence flush with the edge of the bench so you have a flat surface to guide the shroud.
.
- Shroud - cutting fixture.jpg (33.42 KiB) Viewed 179 times
Dremel cutting wheels: The metal wheels will wear down so you need at least 5ea. They can be replaced on the mandrel without disturbing the clamped position.
Cutting: As you move the shroud towards the cutting wheel, make sure to hold it square while contacting the rip fence for a nice even cut. Rotate the shroud as you cut and just go slowly. Be careful with the spark plug holders as you rotate past them so you don't cut them.
.
Finish up: After you have cut all the way around and take the "ring" off, you just need to file/deburr the edge and all done. proceed to follow remaining instructions provided by "that Nashfan" guy.
.
- Shroud - deburred edge.jpg (34.1 KiB) Viewed 179 times
- bellmouth installed.jpg (45.59 KiB) Viewed 179 times
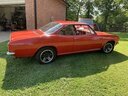
Ken
'62 Spyder. '63 Monza.
'62 Spyder. '63 Monza.
Re: Corvair fan bellmouth shop
Thanks Chris! Yes, Guidevane D compound does have the belt cutouts integrated into the model.
The other ones dont yet. I will, however, for anyone that wants a bell but isnt comfortable doing the work, to put the cutouts in and paint. I also have a large number of nice, 2 carb shrouds for adapting to bellmouths and Im more than happy to do up the whole thing. Bugger is that shipping a fan shroud is kind of pricey, due to size.