1962-1969 Corvairs all had automatic chokes. The first two years were still under development in the choke department. The Rochester carburetors and Corvair fuel systems began to settle down in 1962, with minor refinements, Positive Crankcase Ventilation (PCV) introduced in 1963, and Air Injection Reactors (SMOG Pumps) invading the Corvair engines in the last few years. A picture of your engine, the engine serial number, and perhaps the cylinder head casting numbers would help to clearly identify your engine. See page 10 of the attached
CORSA Corvair Technical Guide 1+2 - Corvair Code Numbers for info on Carburetor ID Tags.

 http://www.corvair.com/user-cgi/catalog ... nd_page=57
A few points about the Corvair fuel pump...
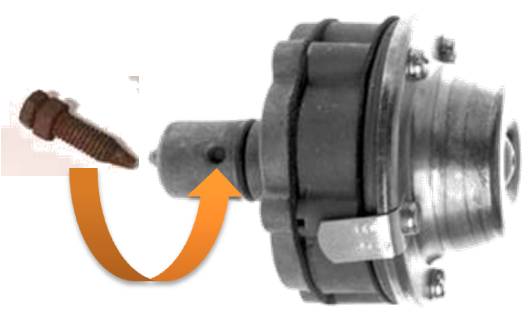
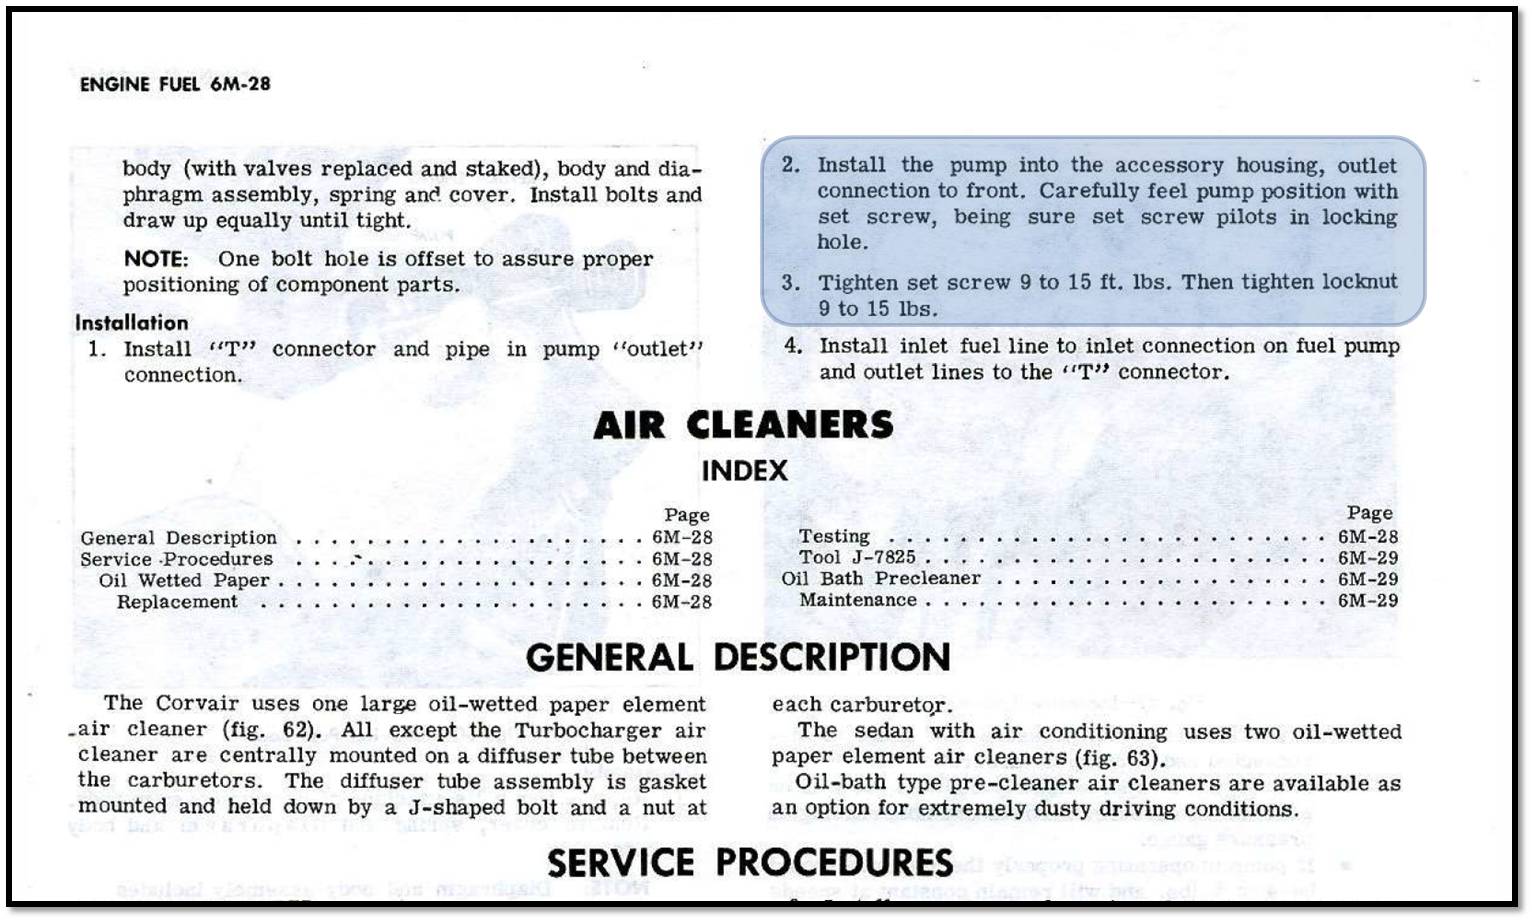
You may need to check the fuel pump and the pump feed lines from the tank. Also check to ensure that the pump is properly installed at the correct insertion depth by the tapered bolt.
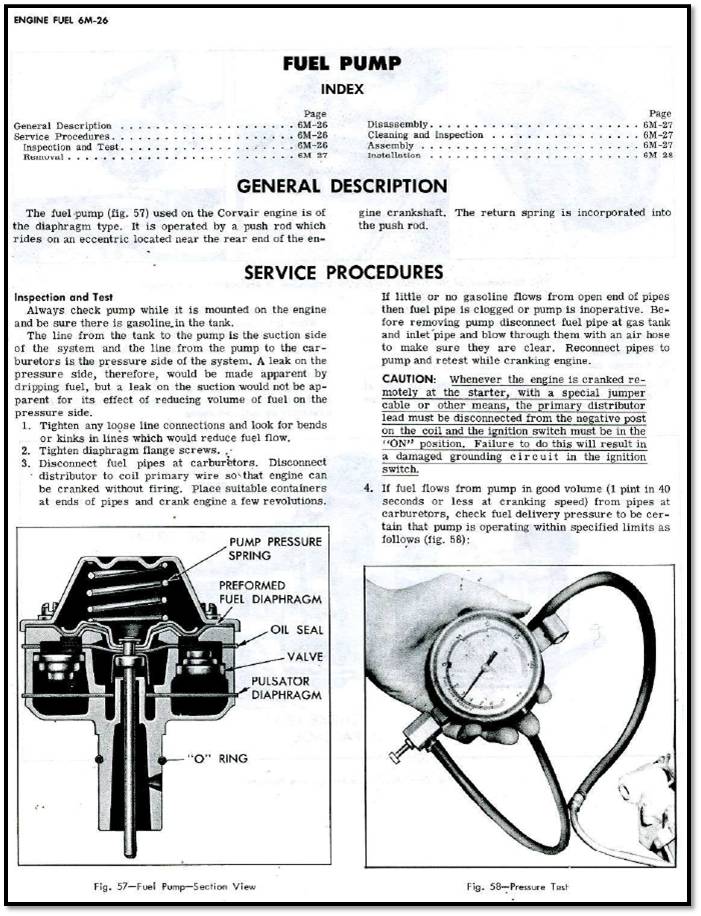
There are two relatively simple tests outlined in the Corvair shop manual. These tests measure output pressure and fuel delivery volume. The output pressure test utilizes a common vacuum/pressure gauge that is relatively inexpensive. The output pressure is regulated by an internal spring that is contained in the upper pump housing. Unless your pump springs a leak in one of the diaphragms or seals, it is likely that the output pressure will not change with age. However, new pumps may be fitted with a spring that produces an output pressure well in excess of the 4-5 psi standard. High-pressure can cause carburetor flooding, and is particularly a problem with the Carter YH carburetor found on turbocharged Corvairs, which is sensitive to excessive fuel pressure.
A new fuel pump should always be tested for output pressure. If the pressure is found to be excessive it may be possible to cut the spring or to exchange the spring from the old pump and fit it into the new pump. This may correct the output pressure.
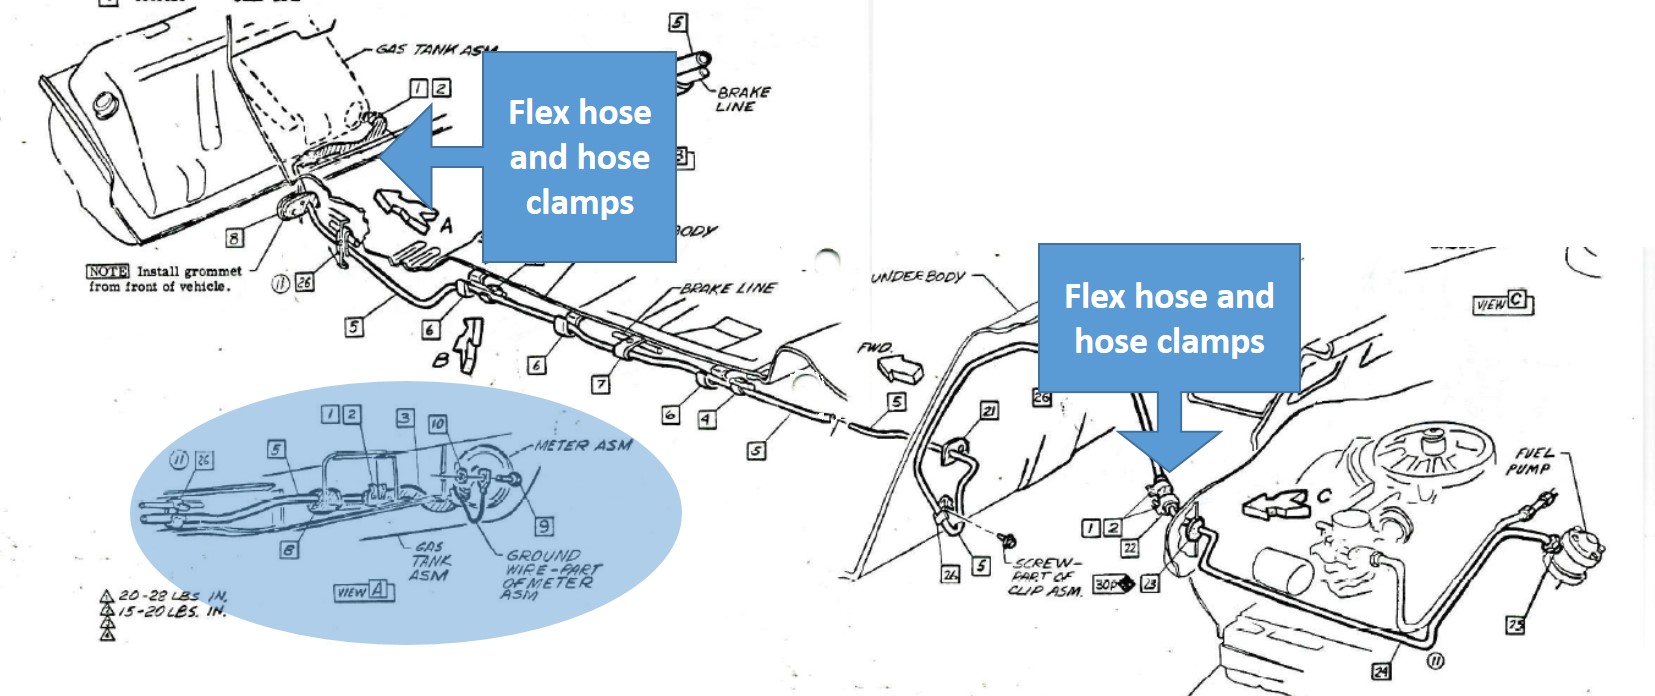
The second test measures fuel flow at the fuel pump outlet. The standard in the shop manual states that the pump should be able to deliver 1 pint of fuel over a period of 40 seconds or less at engine cranking speed. If your pump does not appear to have any leaks and can pass the output pressure test, but fails to deliver the needed fuel volume, the problem may not be with the pump itself. There is a long fuel line that runs the length of the car from the fuel tank to the fuel pump. In order to pressurize and deliver fuel to the carburetors, the pump must be able to create a continuous vacuum in that fuel line to draw the fuel from the tank to the pump. Most of the fuel line is made up of steel tubing and is unlikely to develop a leak. However, there are two short lengths of rubber fuel hose in the fuel path. One section of hose is found at the fuel tank outlet, while the other is found adjacent to the starter motor — just before the line enters the engine compartment. The purpose of the second hose is to absorb vibration from the engine and prevent it from reaching the rigid steel fuel line. If either one of these two hoses develops a leak, the leak itself may not be apparent because the line is not under pressure so fuel will not be forced out. Instead, the leak amounts to a vacuum leak, which can allow air to enter the fuel line. This can prevent fuel from being drawn from the tank to the fuel pump, much like you might experience with a drinking straw if the straw was to split and developed an air leak in the side of the straw. What appears to be a faulty pump that is causing fuel starvation problems in the carburetors often turns out to be a leak in the fuel line at some point between the gas tank and the fuel pump. So if fuel starvation becomes a problem with your carburetors, there is a tendency to question the condition of the needle and seat valve inside the carburetor, or to blame the fuel filter at the carburetor inlet (thinking it is clogged), or to blame the fuel pump itself. Before you blame the pump and toss it, or abandon it and replace it with electric fuel pump, be sure to check the condition of the rubber fuel hoses at each end of the long fuel line between the fuel tank and the fuel pump. You may find that a couple of hose clamps and a few inches of replacement fuel hose is all that necessary to get you back on the road!

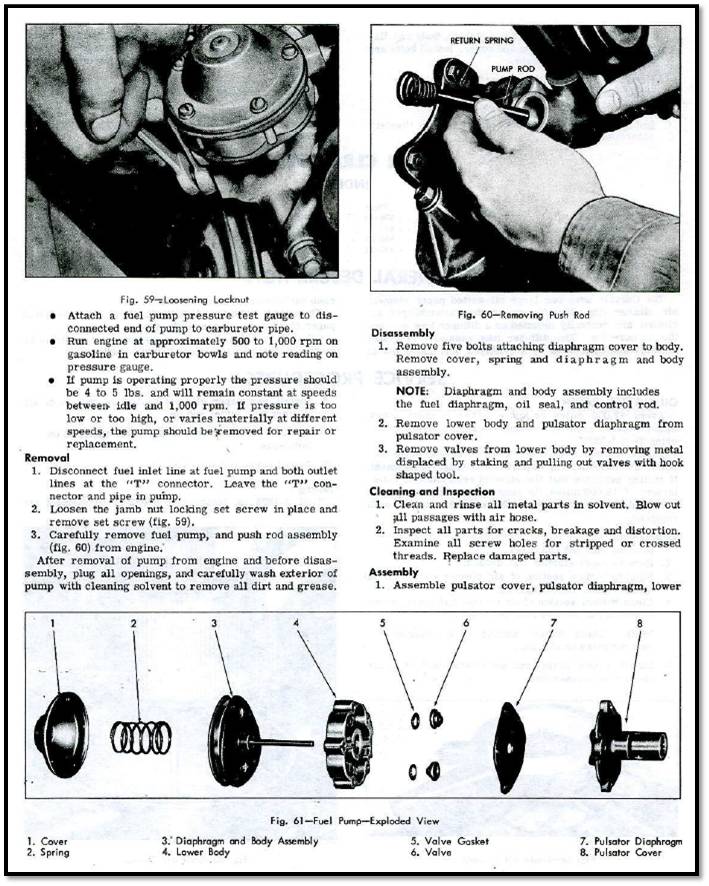
To remove and reinstall the fuel pump, be sure that you have installed it properly. It is important to ensure that the fuel pump is correctly seated and installed. There is a hole in the side of the pump shaft that the tapered bolt tip must seat into. If the pump is sitting too high and the bolt is simply pressing against the side of the pump housing, rather than seating inside the tapered hole, the pump push rod will not be doing its job. Fig. 57 in the shop manual page shows the tapered hole that the tip of the bolt fits into. This ensures proper installation and seating of the pump.