Page 1 of 2
Head nuts
Posted: Mon Aug 31, 2015 8:53 pm
by wqqdster
I have read that the upper head nuts are soft and should be replaced if removed. Any reason why I can't use Grade 8 nuts and washers to replace the originals?
Thanks in advance,
Gary O
Re: Head nuts
Posted: Mon Aug 31, 2015 10:01 pm
by bbodie52
I wrote these comments three years ago to try to address this topic. Most of my comments were to try to focus on getting the old head nuts off, without damaging them or rounding them off. Once removed, I would have to defer to Clark's recommendations and their years of experience, which recommends against using a conventional nut with a washer (although no explanation is given for this recommendation)...
bbodie52 wrote: 

 Removing Corvair cylinder heads can sometimes be a real pain! I wrote some comments about this on the CORSA Facebook Web site, in response to another Corvair fan who was about to tear down his first Corvair engine (dirty and well-worn) and was asking for some tips. I felt that what I wrote might be useful here too, so, for what it's worth, here it is...
One engine dis-assembly problem area I discovered in my first engine tear-down was with the upper cylinder head nuts (above the valve cover area and under the intake manifold). Years of exposure, heat and rust can make them hard to remove. The heat can also soften the metal, and the nut can easily "round off" if the socket slips. Once the flat surfaces round off the nut it is very hard to remove!

I recommend using a good-quality six-sided socket to remove these nuts, rather than a 12-point socket that has less surface-area to "grab" each flat surface on the head nuts. The latter 12-point sockets are more-likely to slip or damage the soft nuts and round them off.

If a nut does become damaged, I've found two methods to remove the damaged nut. Both methods will destroy the stud that protrudes from the engine case, so that stud will later have to be removed and replaced. Since access to most of these nuts is limited under the intake manifold, it is hard to split the nut and chisel it off with a hammer and chisel. However, you can try center-punching the center of the stud (to guide the drill bit and keep it centered when you start drilling), and then using a drill bit that is about the diameter of the stud to drill-out the center of the stud within the nut. (Sometimes it might work better if you start with a smaller drill bit to drill a "pilot hole", and then move up to a drill bit that is approximately the same diameter as the stud threads.) Once you have "hollowed-out" the material within the center of the nut (to the depth of the nut) a chisel can be used to knock off the nut from the end of the damaged stud. The other method of removal uses a hacksaw blade. (A hacksaw frame will not fit in the cutting area near the cylinder barrel). Tape one end of the blade to protect your hand, and perhaps wear a protective glove. Then cut the stud where you can get to it in the area between the cylinder head and the engine cases. A whole-lot of short strokes with the hacksaw blade will (eventually) cut through the stud to allow you to finish removing the head. Once the head and cylinder barrels have been removed, the damaged stud can be carefully extracted and unscrewed from the cases with a stud removal tool. Cutting the stud or drilling and chiseling the nut is no real fun, so try to carefully remove each nut with a six-point socket in the first place and hopefully you will be able to remove all of the head nuts without damaging them. Using new, high-quality head nuts for reassembly later might also be a good idea!
Another contributor wrote: "As for Brad's comments and suggestions on the head nuts- these were a complete PITA to get off on my car. I removed the head while it was still in the car, making the task all the more difficult. I ended up hammering them w/a 3lb. sledge and various chisels, splitting them. DO THIS RATHER THAN LETTING THE HEAD STUD TURN! They tell you that only if no other choice exists or your stud breaks, as mine did, do you remove these head studs. Let the nuts soak in PB blaster and Kroil for a few days, reapplying every few hours. As for all the parts,- 'tag'em and bag'em' -DO THIS, because you will for sure forget where stuff went. Good luck"
My final comment was as follows:

It's just a theory, but when removing the heads it might help to remove the lower row (under the rocker arms) before removing the upper row of nuts. This MIGHT have the effect of reducing tension on the upper row by eliminating the torque and tension on the lower part of the cylinder head FIRST. This might have the effect of reducing tension on the upper row of nuts by allowing the head to tilt just slightly -- forced by the already existing tension on the upper row. This might make it easier to remove the upper nuts, if less tension is being applied against the threads on top. Once the lower row has been removed, use a six-point socket to carefully remove the upper row of nuts. (The lower row is usually easier to remove because they are made of a hardened steel and are larger in size than the top row. Also, there will be no rust to deal with on the lower row.) You will need a deep, six-point socket for the bottom row.
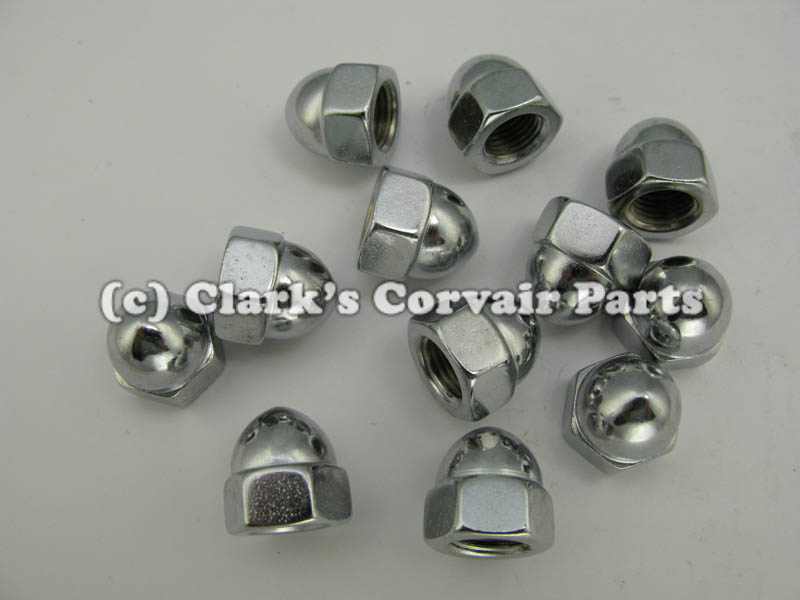
 NOTE: Heat-treated replacement nuts, acorn cap nuts, and anti-seize compound are all listed on the following Clark's Corvair Parts online catalog page (13).
http://www.corvair.com/user-cgi/catalog ... IN&page=13
NOTE: Heat-treated replacement nuts, acorn cap nuts, and anti-seize compound are all listed on the following Clark's Corvair Parts online catalog page (13).
http://www.corvair.com/user-cgi/catalog ... IN&page=13

Part number C1089: NUTS-HEAD-SET 12 PLATED CHROME ACORN NUTS TO COVER END OF STUD =C3413
Weight: 0 lbs 6 oz
Catalog Pages(s): 13(69),20,181,OT,40
Price:
1 - 1 $ 7.65
2+ $ 6.90
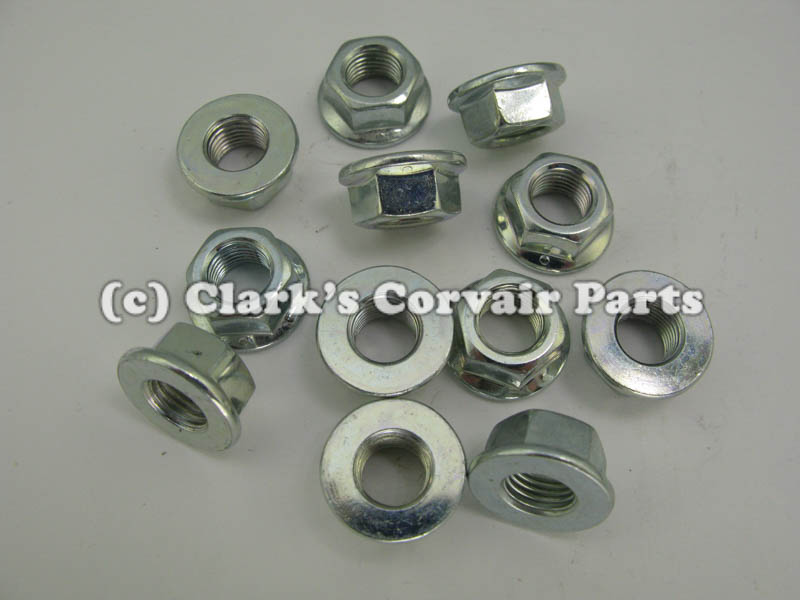 Part number C3413: NUTS-12 CHROME ACORN-UPPER HEAD STUDS
Weight: 0 lbs 6 oz
Catalog Pages(s): 13(69),20,181
Price: $ 14.35
Re: Head nuts
Posted: Mon Aug 31, 2015 10:32 pm
by wqqdster
Brad, thanks for your usual very complete reply. I searched and had come across your previous post but nothing on why standard nuts and washers can't be used. Most 3/8 washers are larger than the stock nut's contact surface so I can see why that would cause a problem getting the correct torque. The stock nuts have a more rounded edge whereas the grade 8 washers are smaller diameter and thicker but with a sharp edge , possibly changing the torque as they 'seat' in the head.
Not worth the risk......
Re: Head nuts
Posted: Tue Sep 01, 2015 5:37 am
by funvairs
I cannot tell you why you should not use different nuts
I will tell you that you do not want to loosen or remove a head stud. This is based on my very limited experience. The stud is supposed to be torqued into the block. Once loosened it may not re-torque. The studs come in three sizes, Std and oversize (.003 and .006) The oversize is not the OD, but, has to do with the thread pitch and there is no good way to identify the stud you loosened. At $17.50 a stud you really don't want to buy an assortment. Some people Loctite studs and some will tell you that the Loctited stud will seize before it reaches it's installed depth.
I changed a head last summer without removing the engine and I could not get vise grips on the base of all the studs to keep them from loosening. I used a Dremel tool to grind two sides of the nuts to relieve the pressure and then peeled them off with a small chisel.
Re: Head nuts
Posted: Tue Sep 01, 2015 8:36 am
by 66vairguy
First about the grade 8 nuts. When a bolt or nut is torqued it binds by actually stretching. On modern engines many bolts and nuts on studs are tightened using a stretch gauge. The issue with grade 8 hardware is it must be torqued to a higher value to "stretch" adequately to stay tight. This is not a good thing when you are anchoring hardware into aluminum.
About the head studs. Experienced engine builders indicate the lower head studs rarely come loose. The upper studs are exposed to more corrosive forces and of course the upper nuts are exposed more so the upper studs tend to unscrew from the block. Many will re-install them and torque and if they don't pull out - fine.
I'm an amateur at engine rebuilding, but last year I dismantled a nice corrosion free west coast engine and non of the studs came loose. During reassembly an upper head stud on the end pulled out very easily at a low torque (I torque in incremental steps) even though it did not turn loose during disassemble. It happens. Too much aluminum came out to use an over sized stud. So I installed a special Timesert into the block from Corvair specialist Ray Sedman (American PI). The Corvair stud "pitch" is the SAME as a standard thread (not an odd ball or pipe thread). It binds because a thread consists of an outer and inner (valley) diameter. After a few threads from the end the Corvair stud "valley" is less deep than standard and THAT is what binds the stud in the block by pushing the softer aluminum thread peak out of place. Of course the standard stud will not turn into a hard insert and Ray warned me that I had to get a high speed steel die to cut the original head stud threads to standard valley depth so it would turn into the Timesert. WOW those studs are TOUGH!! To keep the die from locking up on the stud I had to use a super slippery mix of oil and STP (it worked well). Then you make sure the stud turns into the Timesert in the block. So how to keep it from leaking oil or turning out? You install the stud and back it out about four turns then put permanent LocTite on the inner and out exposed threads and VERY QUICKLY turn the stud in to the correct depth. Within a second after I did that the stud DID NOT MOVE. So it's true you can't LocTite the entire stud as it will bind up BEFORE you can turn it in more than few threads.
BTW - the Engine is running fine now.
Re: Head nuts
Posted: Tue Sep 01, 2015 2:20 pm
by wqqdster
You guys are killing me!!!! I had one stud turn out (upper) and replaced it with blue loctite before reading these posts. Thanks for all the tips... I'm going to go through my Corvair manual and see if it has any direction. One thing I can do is torque it to the low side of the specs.
66vairguy, your analysis makes the most sense......
Re: Head nuts
Posted: Tue Sep 01, 2015 7:34 pm
by 66vairguy
wqqdster wrote:You guys are killing me!!!! I had one stud turn out (upper) and replaced it with blue loctite before reading these posts. Thanks for all the tips... I'm going to go through my Corvair manual and see if it has any direction. One thing I can do is torque it to the low side of the specs.
66vairguy, your analysis makes the most sense......
DON'T USE THE SHOP MANUAL FOR HEAD TORQUE VALUES!! Over the years Chevrolet revised the head torque values for reasons unknown. Now the Corvair guys torque to a lower value of 30 ft. lbs.
The factory assembly and most repair shops torque the heads ONCE and don't want the gaskets to leak. So a higher value was used for a one time torque, but these old aluminum blocks tend to strip threads at a higher torque value. The solution is to use a lower torque value of 30 ft lbs. and then re-torque after a few hours, or better yet the next day. Of course torque in incremental values in sequence listed in the shop manual until reaching the value of 30 ft. lbs.
The 30 ft. lbs. is for CLEAN THREADS with NEW PLATED nuts. If you use unlubricated, unplated nuts you can go to 32 ft. lbs. BTW - The Clark's head nuts are plated.
Re: Head nuts
Posted: Tue Sep 01, 2015 10:41 pm
by wqqdster
Thanks for the update..... 30 it is! Is that upper AND lower?
Re: Head nuts
Posted: Tue Sep 01, 2015 10:56 pm
by bbodie52

This information was extracted from the 1961 and 1965 Shop Manuals. The torque specifications were unchanged in the supplements, but increased in 1965.

 http://corvaircenter.com/phorum/read.ph ... 638,454818
Re: Finch head torque sequence...
Posted by: vairmech ()
Date: October 25, 2011 07:10PM
I don't know about the Fitch torque sequence but here is what I use.
I start in the top center, left or right, using 15 lbs. ft. of torque. Then go to the opposite lower corner and do the same thing, then the other bottom stud and the opposite top one in an X pattern. Then continue in a large X pattern and so on. Be sure and re-torque the center studs each pass.
On the second pass I use either 20 or 25 lbs. ft. of torque in the same pattern.
On the third pass I use 30 lbs. ft. of torque and I use a modified X pattern in that I will tighten the top center studs then the bottom center studs. The top left, top right, outboard of the center 4 studs then the same with the lower studs. Continue to finish torquing the remainder. I stop at 30 lbs and use no more, even on my race engines.
Once you are all done, make at least 2 more passes at the 30 lbs. in any order you want to. Check torque all the way through and the center ones will be loose as you start the recheck, I generally start there. The center 4 studs should be the last studs checked even if it is the fourth time for them.
Using this I have never burned a head gasket, not even the copper ones. Well, once I lost a copper head gasket but no steel ones.
Ken Hand
CORSA Central Division Director
CORSA President
Corvanatics VP
Re: Head nuts
Posted: Wed Sep 02, 2015 1:27 pm
by wqqdster
Y'all are beyond helpful!
Thanks!
Re: Head nuts
Posted: Thu Sep 03, 2015 9:25 am
by 66vairguy
wqqdster wrote:Thanks for the update..... 30 it is! Is that upper AND lower?
Yes.
BTW - I recall that someone wrote an article on the Yenko Corvairs were Yenko used a different torque for lowers vs. uppers, BUT THIS WAS ON NEW ENGINES! At this point in time I'm not aware of anyone who does it.
Ken's explanation for pattern and incremental torque increases per pass was good.
Per Brad the head nut torque was increased in 1965 to 32-38 ft. lbs, but also increased in 1966 to
40 FT. LBS!!
Re: Head nuts
Posted: Thu Sep 03, 2015 5:27 pm
by wqqdster
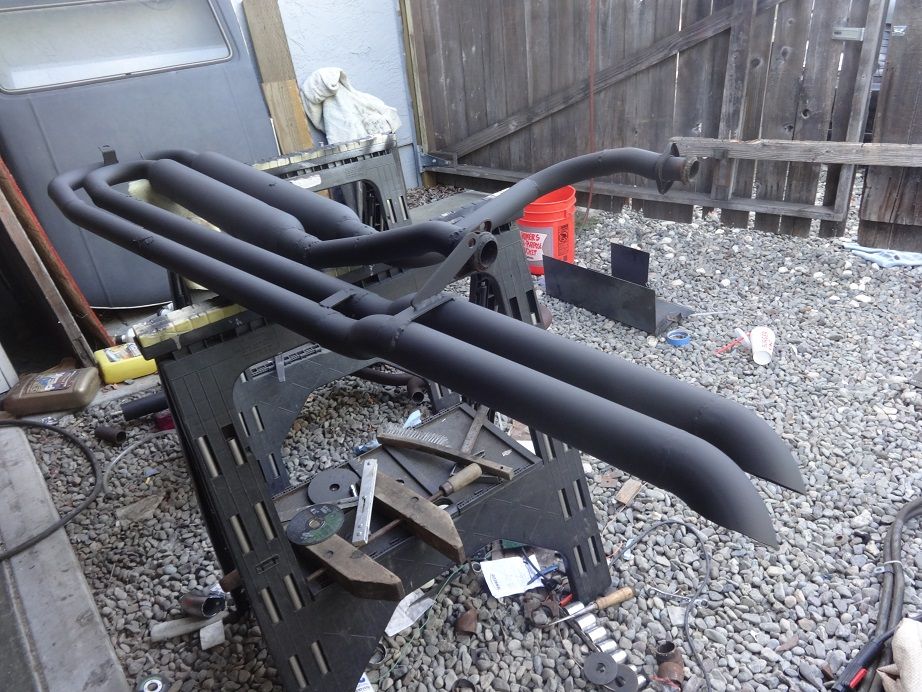
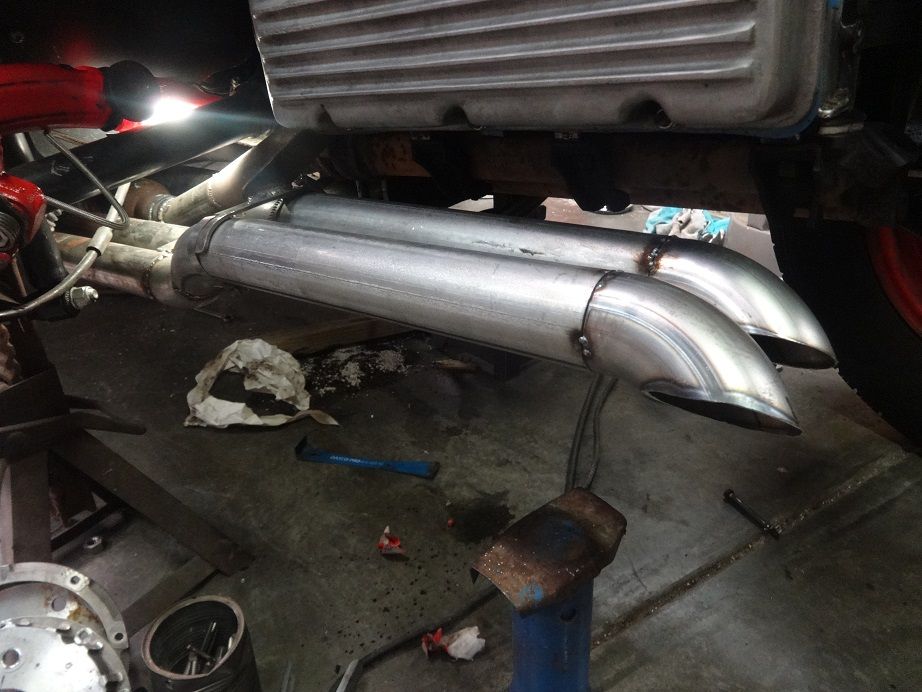
Heads are on and torqued down.... that is soooooooooooo scary thinking they're gonna pull out at any moment. You know the feeling, when instead of increasing resistance it suddenly becomes easier? None of that today. The new exhaust is on, carbs (two for now) will gocar back on and hopefully fire it up tomorrow.
I've missed driving my car... been broken since April
Here's the exhaust I built for it
Re: Head nuts
Posted: Thu Sep 03, 2015 7:27 pm
by cad-kid
Cool looking exhaust

Re: Head nuts
Posted: Thu Sep 03, 2015 8:58 pm
by wqqdster
cad-kid wrote:Cool looking exhaust
Thanks! I hope it sounds cool with those long pipes after the mufflers....
Re: Head nuts
Posted: Thu Sep 03, 2015 10:11 pm
by wbabst
Wicked sexy looking exhaust you have there..you will have to put a file on here so we can hear it.
Re: Head nuts
Posted: Thu Sep 03, 2015 10:49 pm
by wqqdster
Thanks.... I'll try and post it.