A place to preserve the past, present and future of the Corvair. An ever evolving knowledge base made up of Corvair Enthusiasts from all over the world. (Note: no ads for logged in members). https://www.corvairforum.com/forum/
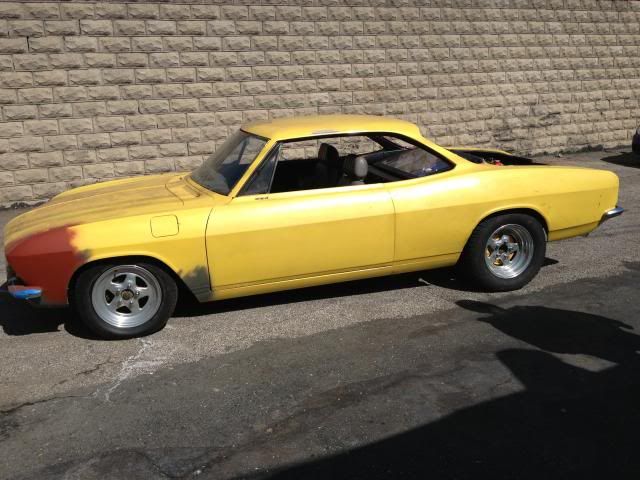
Sorry it is a little messy, this vette is a ground pounder, not a show queen. She runs 11s in the qtr!
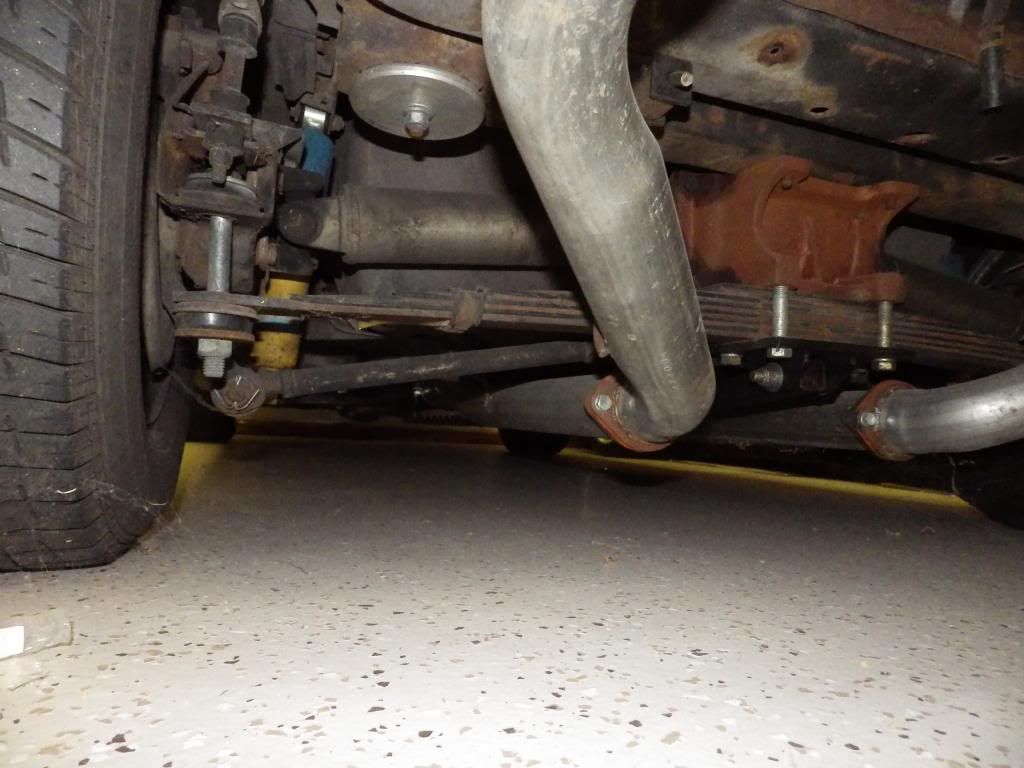
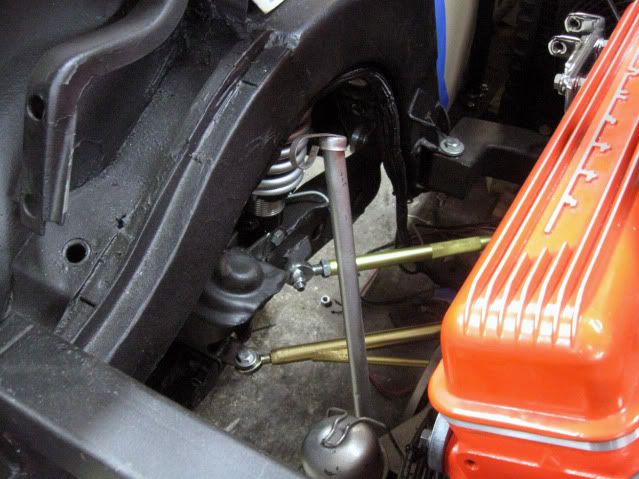
The original vette suspension had similar components. These are my beefed up versions of the components. The original strut rod had an eccentric bolt, that would move when a good dose of power was channeled through the rear. I made new camber rods with L and R hiems to set the camber and then a new bracket out of welded 1020. Been kicken like this for 6 years
Re: The Spousal Avoidance Unit build
Posted: Fri Feb 07, 2014 7:54 pm
by hrm2k
Thanks Dave..........We had tried to come up with something like the control rods like you Vett has. The only problem is the heavy offset of the pumpkin. It is to the driver's side pretty heavily. Al had posted some links to the crossmember and control rods that I will probably follow on a second go around. We are going to attach the two trailing arms with a simple cross arm. I know it is not the way to do it if you are doing a full travel rear suspension. Our total movement is less than 5 inches,3 up and 2 down on trailing arms that can only travel straight up and down. I hope to have it all back together tomorrow ( 2-8 ).............moveable under it's own power. I have to stop and pick up 2 more hiem joints on the way to the garage............................................film at 11 Saturday
Re: The Spousal Avoidance Unit build
Posted: Sat Feb 08, 2014 7:31 am
by DAVECS1
tying the bottom of the trailing arms together will just allow them to translate together. As one cambers in, the other will camber out, in a parallelogram style.
I think I would look at making a mount out of your outriggers for the front engine mount. Then I would make and oversized Z bar for the camber rod.
Re: The Spousal Avoidance Unit build
Posted: Sat Feb 08, 2014 7:44 am
by DAVECS1
I would tie the point the engine mount is on back to somewhere else on the car. Then using something in the order of a 2x2 cross section I would extend it straight down for a mount that is barely higher than the bottom of the trailing arm at ride height. Then using some 1.75X1.75 cross section I would make a Z bar with Heims on each end. THey would be large heims to. May want to see if you can work an eccentric cam bolt in there for adjusting camber as you will not have a spinable rod.
These are just suggestions. I hope I am not ruffling any feathers.
this is the overhead view of the suspension pieces.....I think it looks pretty damn cool...............just hope it works that way
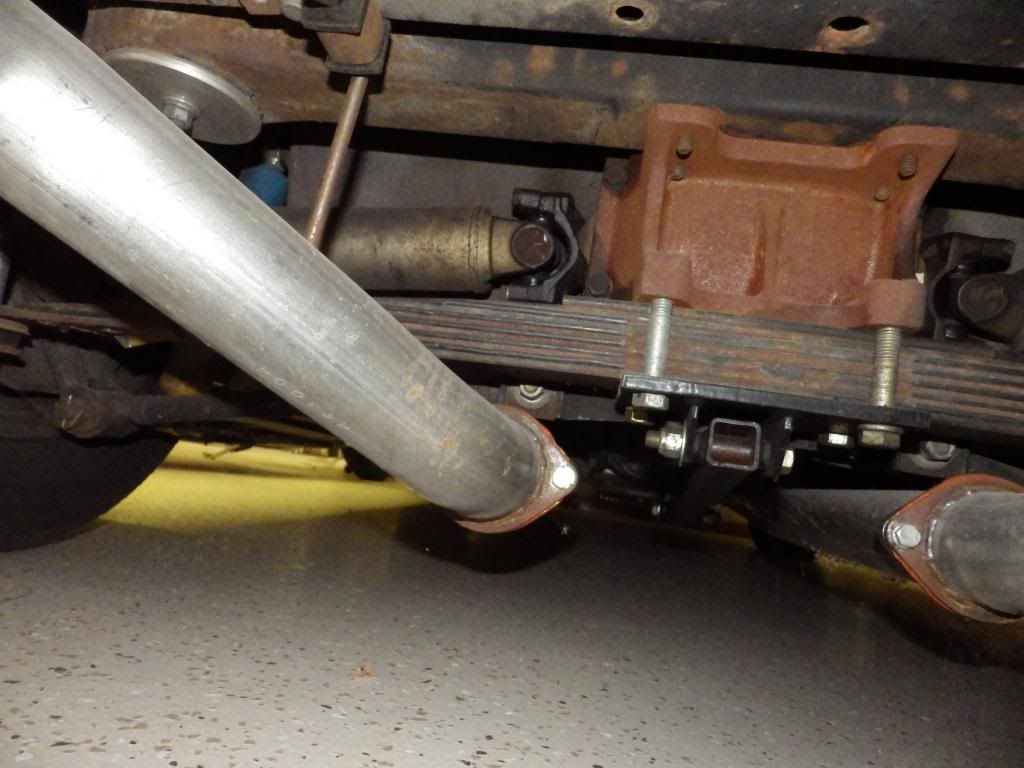
This is a view of the trailing arm connections...........is this getting old ?
Re: The Spousal Avoidance Unit build
Posted: Thu Feb 20, 2014 5:58 pm
by hrm2k
first off, thanks for all the suggestions on the suspension. Over the last week or so, I have spent several hours under the car trying to get everything to work as planned. Today, my friend Frank and I went to the garage and did the rest of the adjusting. We now have everything straight and level. Funny, the bars that run at a 45 degree to the trailing arms actually work to adjust the toe in/out............just like we planned. We now need to reinstall the coil overs and install the axles. We both feel a lot better with our design..........at least in the short term.
Film is still at 11 PM...............just not saying what day
Re: The Spousal Avoidance Unit build
Posted: Tue Feb 25, 2014 5:41 pm
by hrm2k
"BAM"
for some reason, the video isn't working...................trust me, I drove it
We put the balance of the suspension together today. We used some old wheels and tires as the tires I bought are simply too big. We didn't have the correct lug nuts so any driving was curtailed. We had set the camber at 0 degrees thinking that should be good enough. Turns out we should have set the camber at a +5 degree. When we moved the car, the wheels cambered in to 5 degrees. Last time we could change that by backing the car up. Not so this time, It stayed at 5 degrees. As for the toe in, that stayed exactly as set. I guess I am going to take the car to a front end shop and have them do the final alignment.
I noticed that we went over 10,000 views........DAMN !!!!!! I can't thank you enough for following this build. We are not going to stop but all the really cool stuff has been done. I will post some photos as we go along.
Thank you for all the help and suggestions along the way. I guess time will tell if we did it all correctly.
Re: The Spousal Avoidance Unit build
Posted: Tue Feb 25, 2014 6:48 pm
by azdave
Keep us updated!
Re: The Spousal Avoidance Unit build
Posted: Sun Mar 02, 2014 10:54 pm
by Vair-8
More, more
Re: The Spousal Avoidance Unit build
Posted: Thu Mar 06, 2014 7:49 pm
by hrm2k
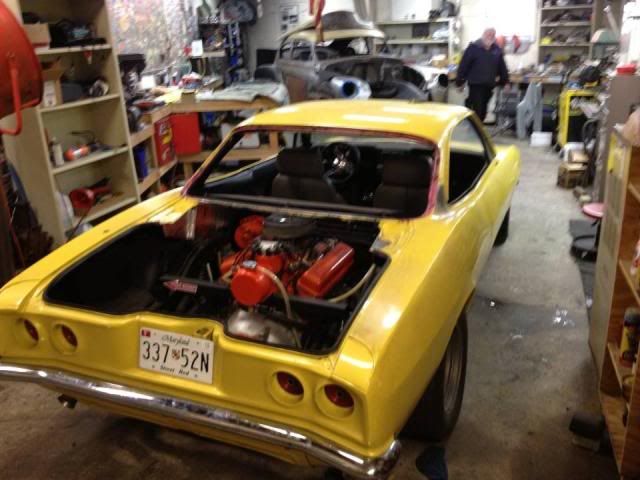
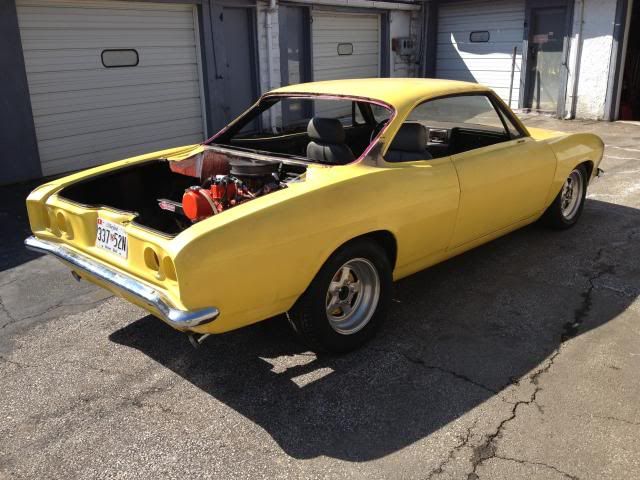
pulled it back in nose first after the drive............just a different point of view
Re: The Spousal Avoidance Unit build
Posted: Sun Mar 09, 2014 11:46 am
by hrm2k
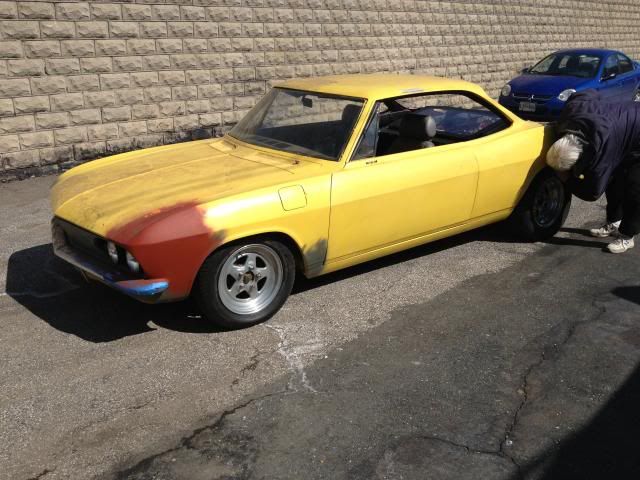
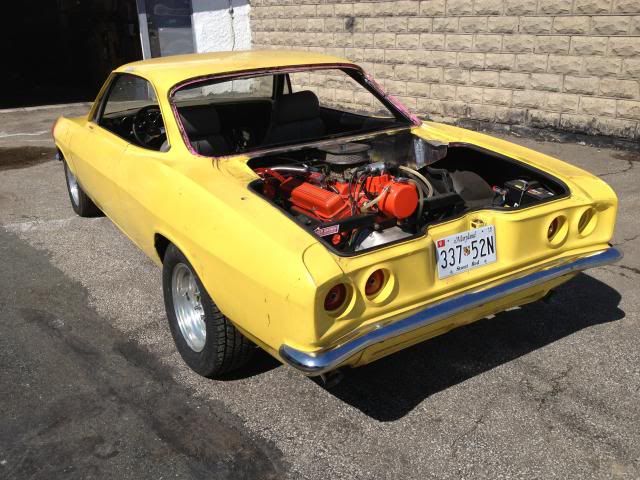
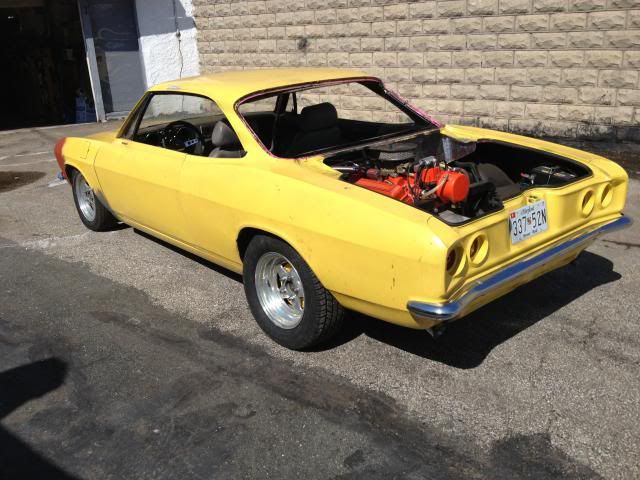
made some more adjustments..........a little better but still not what we want..................while it was outside.............more views
think I am liking that stance...............more to follow
Re: The Spousal Avoidance Unit build
Posted: Tue Mar 18, 2014 10:36 pm
by Corossa
hrm2k
This is a terrific build and a great looking car but I have 2 questions!
What are the seats out of? They are good looking seats and look very comfortable and well padded.
Since this hasn't been converted to dry sump yet how does oil in the pan get from one side to the other due to location of drive shaft tube. In addition how does one drain the entire pan?
Seems to me there will always be some amount of trapped oil?
Ross
Re: The Spousal Avoidance Unit build
Posted: Wed Mar 19, 2014 4:59 pm
by hrm2k
The seats are some units I bought in the late 90's. They are available through Jeg's and Summit......................................http://www.summitracing.com/parts/sca-8 ... /overview/" onclick="window.open(this.href);return false;" onclick="window.open(this.href);return false;. They are made by Procar..........about $370 each. They are very much like 944 Porsche seats........very comfy.
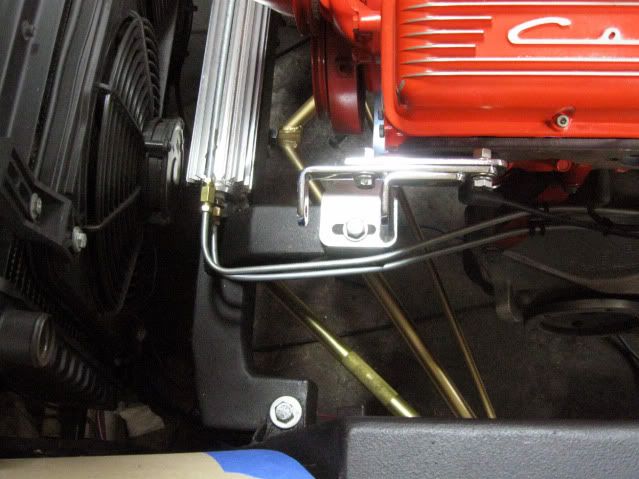
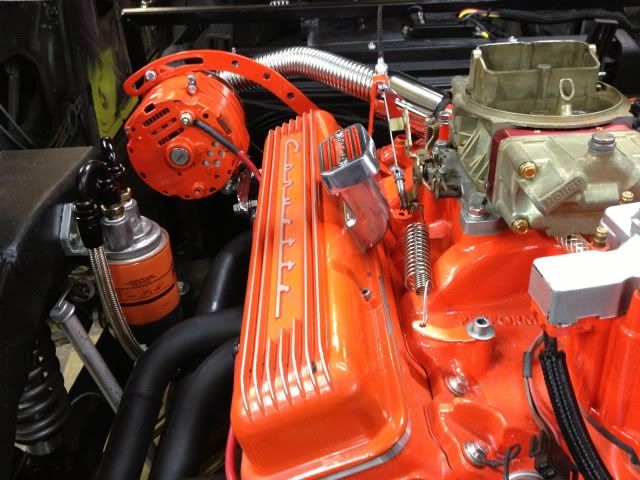
We used a remote oil filter with a remote adaptor. It was a close fit. We had to use some special AN fitting to make it fit. There is a normal drain plug in the oil pan. If you change the filter and drain via the plug, there may be a small amount of oil left in the line but it will be a small amount. This will show you where the filter is mounted
as for your question about in the pan.......Yes !!!! There will be a small amount of oil..........probably less than 1/2 inch deep. We talked about this in depth and finally decided to take our changes.
thank you very much for your nice comments
And to update my Car Chemistry Baffle test................
they look great in the metal recycling bin.................totally a waste of money
Re: The Spousal Avoidance Unit build
Posted: Sat Apr 19, 2014 7:41 pm
by cvair4life
Re: The Spousal Avoidance Unit build
Posted: Sun Apr 20, 2014 5:07 am
by Corossa
Five seconds out of the garage and they are chasing you already!
LOL
Re: The Spousal Avoidance Unit build
Posted: Thu Apr 24, 2014 5:18 am
by hrm2k
Thanks Zack, for the life of me, I couldn't figure out how to post videos.........this getting old sucks. The top video was the first move......you can see how canted the tires are. The second one was a little better, still needs some work..............................for those who have pointed out, the tail light is fixed
Corossa, it is a bad neighborhood.............I mean a really bad neighborhood. There is one of Baltimore's famous blue light cameras at the end of the driveway..................not so much for me, but for whoever shot and killed a guy in our driveway a few months ago...........................and YES !!!!!! we are looking for a new place to do this stuff.
more good things happening to the vair.................more film and pictures soon
Re: The Spousal Avoidance Unit build
Posted: Fri Apr 25, 2014 5:21 am
by DAVECS1
I would set it to zero toe in the back or a bit positive. You have positive camber gain when backing up and negative camber gain when moving forward. Nt an ideal situation, but so far it works, it will be easier on components at zero toe.