Page 10 of 27
Re: The Spousal Avoidance Unit build
Posted: Thu Jun 13, 2013 5:48 am
by bbodie52
Re: The Spousal Avoidance Unit build
Posted: Thu Jun 13, 2013 6:15 am
by azdave
Keep the updates coming!
I love the nuts and bolts sorter cabinet. Cool idea. I use the same blue Akro-Mills storage bins left over from my days as a service tech for Cox Cable but I use an old fiberglass serving tray to pour out and then sort my hardware. I have to pour them back into the storage bin from the tray and a few pieces always end up on the floor.
The rubber lip seal looks like it has plenty of room for compression when you put on the lid. Having the rear window out sure help access for the build. Many time I thought I should have pulled mine but I never did. If I ever finish my other ToroV8 I'll pull the glass because someone not so bright welded inside the car and the glass now has weld spatters imbedded in the glass.
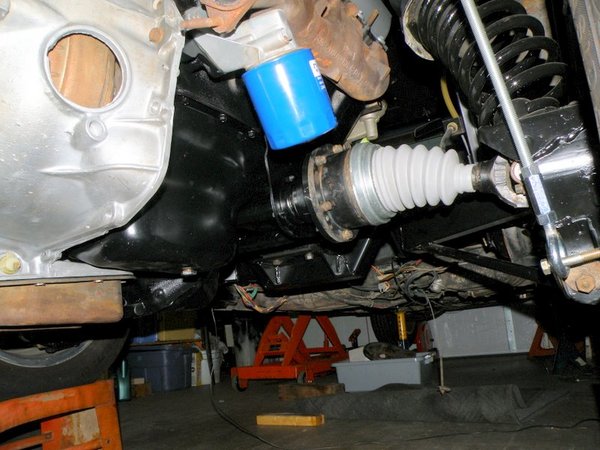
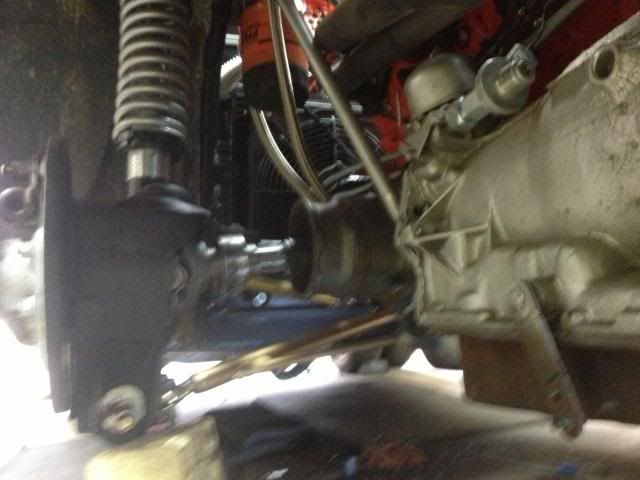
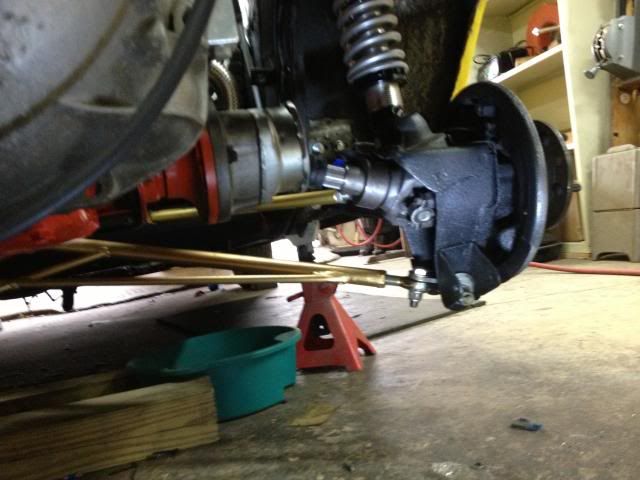
CV joint? I've had my fun with those. Your suspension looks like it has more down travel than mine. If mine drops too far my joints get in a bind. I was able to find a Dorman 614-004 slicone boot to fit the CV joint. I had to modify it but it works.
Even though the car is up on jack stands, in this pic my suspension is being held in the normal position by a threaded rod (where the shock is normally mounted). This allowed me to check various items while the car was simulated to be at normal ride height. Also note the Dorman 614-004 CV axle boot.
Re: The Spousal Avoidance Unit build
Posted: Thu Jun 13, 2013 6:32 am
by bbodie52
You should get a new custom license plate. If there is room in Maryland for one additional letter, how about
UNSAFER That way, when you win Corvair of the Month AND Corvair of the Year, we won't get you confused with that other UNSAFE guy in Juneau Alaska!

Re: The Spousal Avoidance Unit build
Posted: Thu Jun 13, 2013 10:05 am
by hrm2k
I was actually leaving in a few minutes to go order my new plates. Maryland has jacked the price of personnalized plates so high that I would not consider spending that kind of money...............except to put a big engine / transaxle in another Corvair.............that is money well spent
Re: The Spousal Avoidance Unit build
Posted: Thu Jun 13, 2013 3:01 pm
by bbodie52
Well... what would you expect from a state government that will be taxing rhe calculated rainfall on your property???
HERE’S WHAT’S INCLUDED IN MARYLAND’S CONTROVERSIAL ‘RAIN TAX’ (IT’S EXACTLY WHAT IT SOUNDS LIKE)
Apr. 11, 2013 7:30pm Becket Adams
On the heels of Maryland’s decision to enact tough new gun laws, the ironically nicknamed state (the “Free State”) will now impose a so-called “rain tax” on its residents.
The “storm management fee,” passed by the state legislature in 2012, will go into effect on July 1 following a decree from Democrat Gov. Martin O’Malley.
Re: The Spousal Avoidance Unit build
Posted: Fri Jun 14, 2013 7:51 pm
by hrm2k
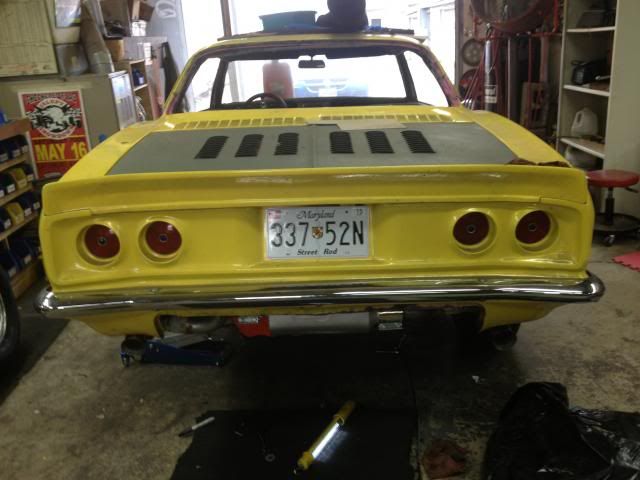
I went to a little place near my house that does tags and titles this morning. Standard street rod tags ( no safety or emmissions testing) is $91 for 2 years. I still held the ownership of vanity tag UNSAFE. I thought about getting it again.......It is $100 a year more................That would be $291 for that plate.............My actual number will be a surprise Saturday morning.
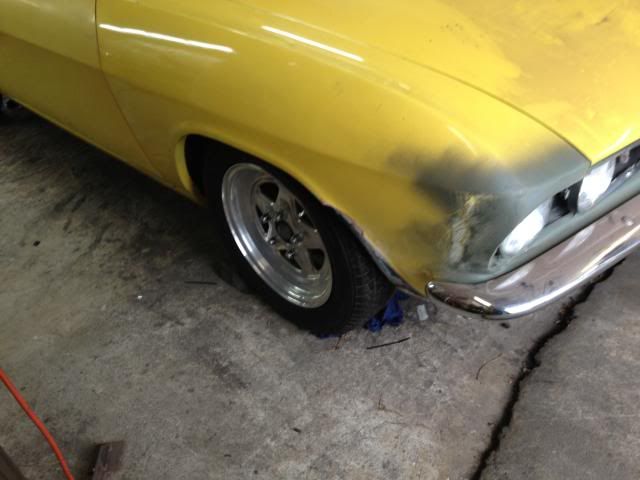
I also bought my 2 new back tires and had them mounted on my Weld Prostar rims........I got 235-75-15 tires for the back. I just added body modifications to the list of things to do........they are some big tires
Re: The Spousal Avoidance Unit build
Posted: Fri Jun 14, 2013 9:40 pm
by bbodie52
In North Carolina...$58 per year.
Plate Fee, Private Passenger Vehicles.....$28.00
Personalized Plate.....$30.00 (In North Carolina, you can get a personalized license plate for an extra $30)
Safety Inspection.....$13.60
(Vehicles 35 years old, or older, are exempt from the North Carolina vehicle safety inspection)
I think the further north you go, the higher the taxes and the worse the bureaucracy! Or perhaps it has to to with being too close to Washington DC

I used to live in Pennsylvania. The fee for a vanity plate in Pennsylvania is only $20! I think you are getting ripped off in Maryland!
Personalized (Vanity and Vintage) License Plate Availability
Step 1: Review the Requirements
DEFINITION OF PERSONALIZED REGISTRATION PLATE
A personalized registration plate may contain a combination of up to seven letters and numbers. One hyphen or one space is permitted, but not both. Special characters are not available. A personalized motorcycle registration plate may contain up to five letters and numbers in combination. NOTE: A hyphen or space is not recognized as part of the plate configuration and does not count as one of the letters or numbers.
HOW TO APPLY
To apply for a personalized registration plate, Form MV-904, "Application for Special Registration Plate," must be completed. PennDOT reserves the right to limit or reject certain requests. Personalized registration plate applicants must have a valid registration plate and valid sticker first, which the applicant shall retain pending receipt of the requested personalized plate.
Requests for personalized registration plates are restricted to passenger vehicles, motorcycles, or truck/motor home vehicles with a registered gross weight of not more than 10,000 pounds. Trailers do not qualify for personalized registration plates.
A separate application must be submitted for each personalized registration plate. The fee is $20. Make check or money order payable to the Commonwealth of Pennsylvania. PLEASE DO NOT SEND CASH.
 Viewed 3306 times")
Re: The Spousal Avoidance Unit build
Posted: Sat Jun 15, 2013 1:04 pm
by hrm2k
MILLER TIME
Just got back from the garage and couldn't wait to show you guys what I saw today !!!
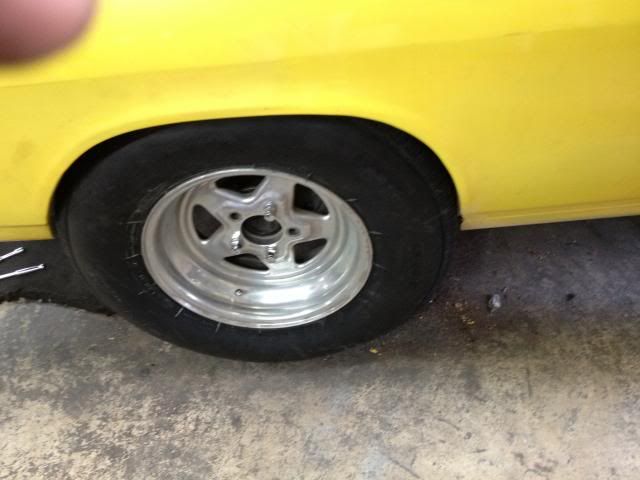
First would be the stance.....My initial thought had been 235 -60-15 for the rear tires. Old guy syndrone kicks in and I buy 235-75-15, had them mounted and balanced on the Weld Pro Stars..............29 inches of tire has some body clearance issues..........I couldn't return them..........so we get a stance and a bunch of trimming
I'm sure I am going to address this again sometime soon but it does look good in the wheel well
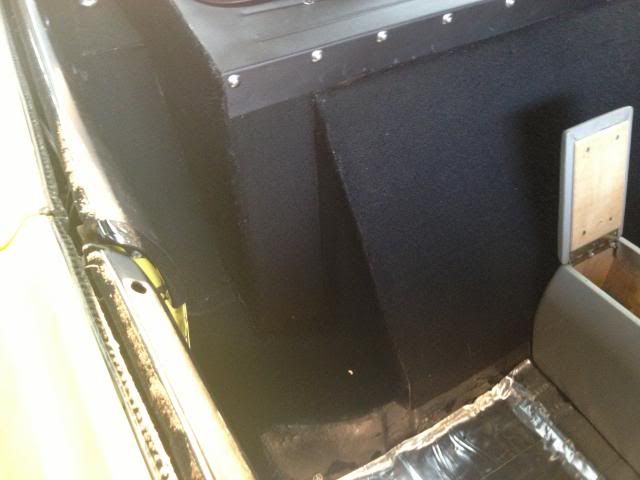
I started with some of the carpet and ended up looking like this
I still need to finalize screwing down the cap panel....another reason to go to home depot.....our's has good hardware.
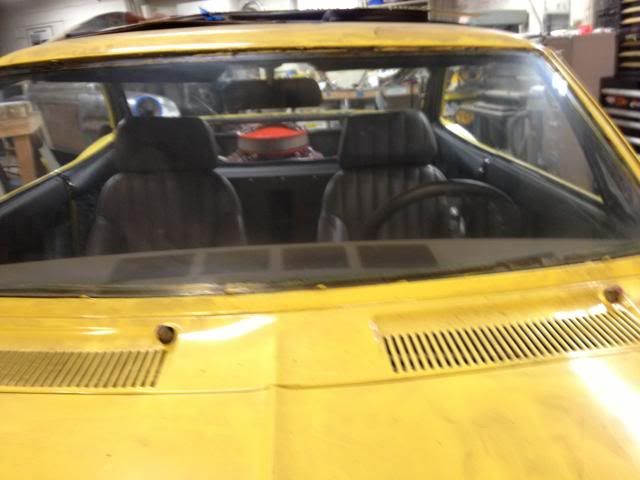
Which leaves us with the view through the back window. Cutting and mounting the lexan is this coming week..........stay tuned for those pictures....in the mean time, this is about what a 7 foot man might see if he looked at my car
Re: The Spousal Avoidance Unit build
Posted: Thu Jun 20, 2013 6:02 am
by hrm2k
Almost 7,000 views..........damn..........

At a point where small changes mean so much. Here are some changes from the last couple of days
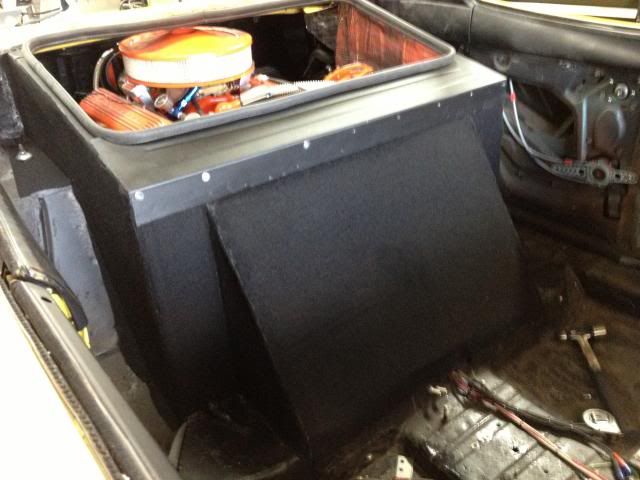
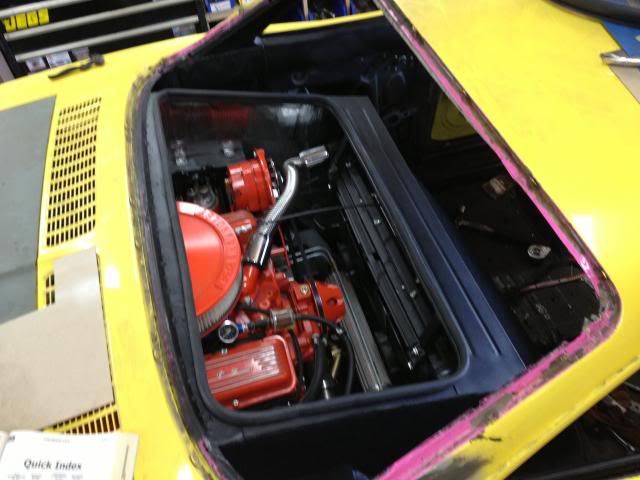
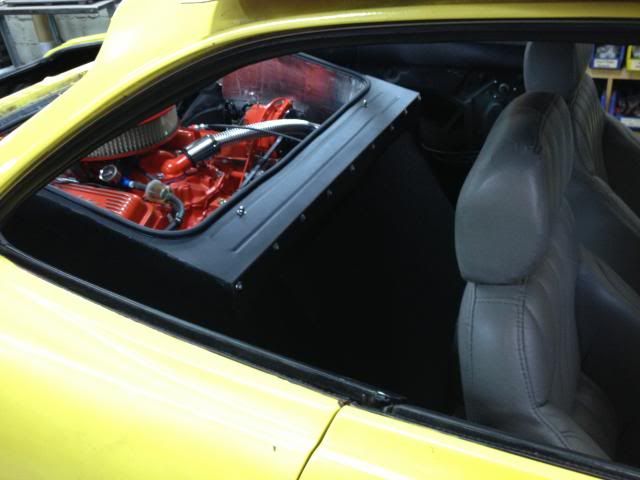
The engine cover is complete less the Lexan.
I found some mirror rosettes at home depot to use as a decorative washer for the heads of the screws holding the cover panel in place. The 2 acorn nuts that you can see on the top attach the cover to 2 mounts that are attached to the radiator support.............the panel turned out to be rock solid. We may change the acorn nuts over to posts for the lexan mounts...............more to follow on that.................
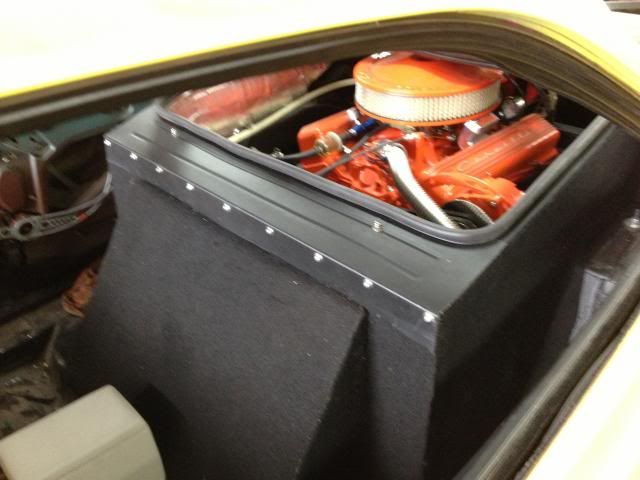
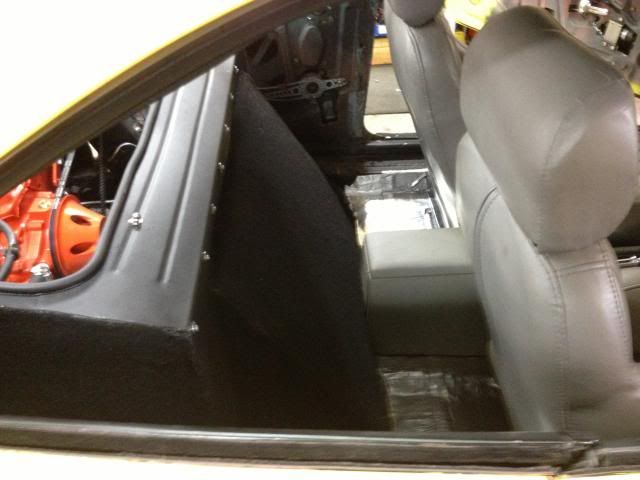
I used some felt trunk liner to cover everything..............not great but very do-able in my mind's eye
I started in on the rear floor with the sound deadening. I got the console bolted in for the last time and started on the cables and such that must reside there. Visible in the photo are the 2 cables that are for the emergency brake. Also visible is the shifter cable. I ordered a couple of mounts for the ends of the shifter cable. They should get here Friday of this week
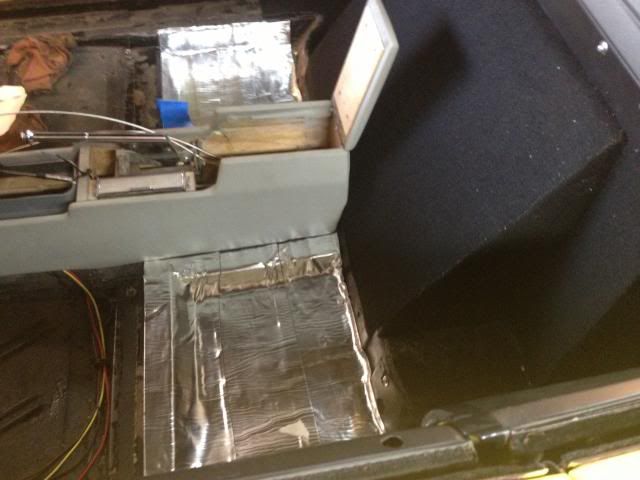
I bought some grade 9 bolts with 12 point heads to mount the axle trunions to the flanges. These damn things are heavy...........Everything is now bolted in. The last thing to do will be to tighten the collars when the car is sitting at ride height. I think they look pretty bad ass................maybe heavy duty is the right phrase.
last but not least.............you can not have a car without the government getting involved..........can you say tags ?
Re: The Spousal Avoidance Unit build
Posted: Thu Jun 20, 2013 8:55 pm
by Scott H
Man you are getting close! The details make it! Keep it up

Re: The Spousal Avoidance Unit build
Posted: Thu Jul 04, 2013 6:48 am
by hrm2k
I thought I might do a quick update here on July 4th. THe current tasks are mostly mundane type of things. We got ready to re-install the brakes only to find the wheel cylinders, which were working fine wnem we started, were now frozen solid. My buddy Frank and I took a ride up to Corvair Ranch and picked up 2 new ones. It sure is nice having a great guy like Jeff around to help out with parts.
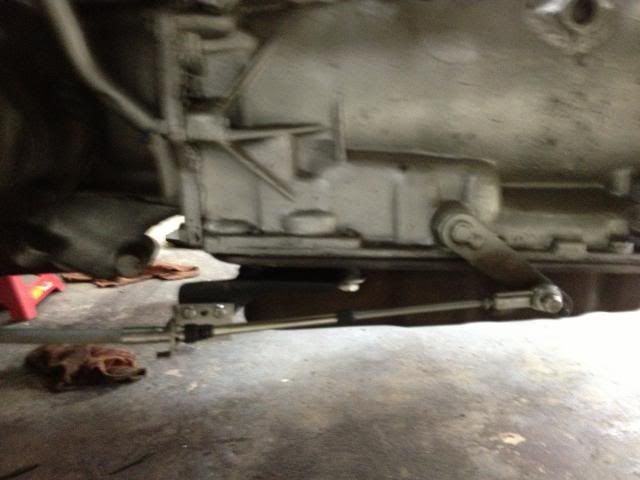
I got the new wheel cylinders bolted on. Today we will make the new brake lines and that will bring the brakes to a finish on the list. My task today is the bracket for the shifter cable at the trans..........................................................
LAST PIECE ON THE LIST.
We are still puttzing around with the Lexan but that may end today as well. This puppy is getting driven either this afternoon or Friday for sure.
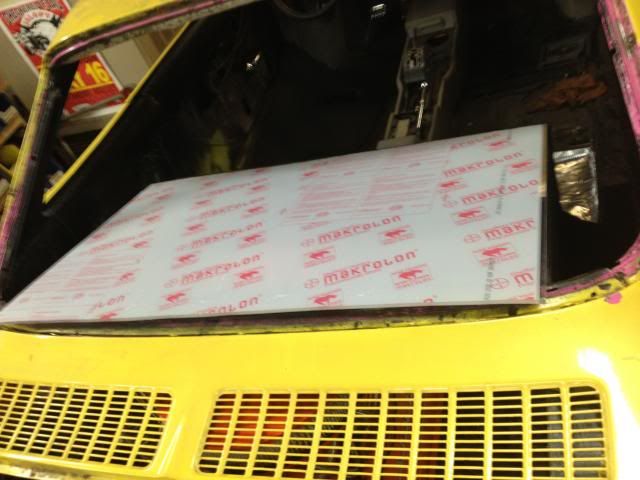
Here is what we have been doing with the lexan. We have about 100 lbs stiing in the middle of the 24" x 39" panel. We have been using heat guns to bring the Lexan temp up to about 180 degrees before letting it cool for a couple of minutes. Here is what that looks like
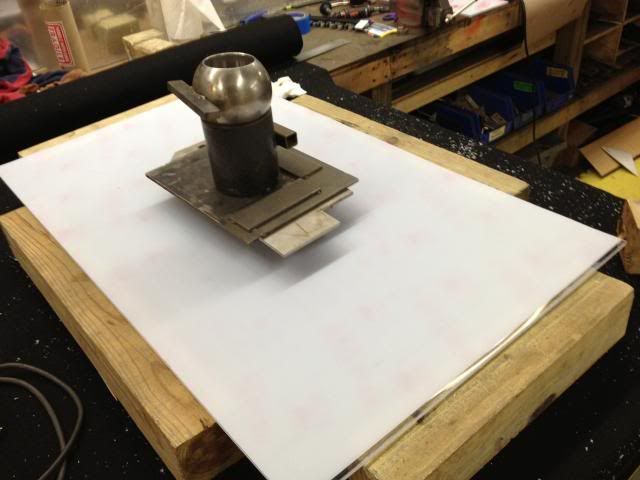
We are trying to get a bulge of about 2 inches in the middle............yeah...........I know..........do you really need a bubble top cover for your engine............................DING DING DING.....................of course.
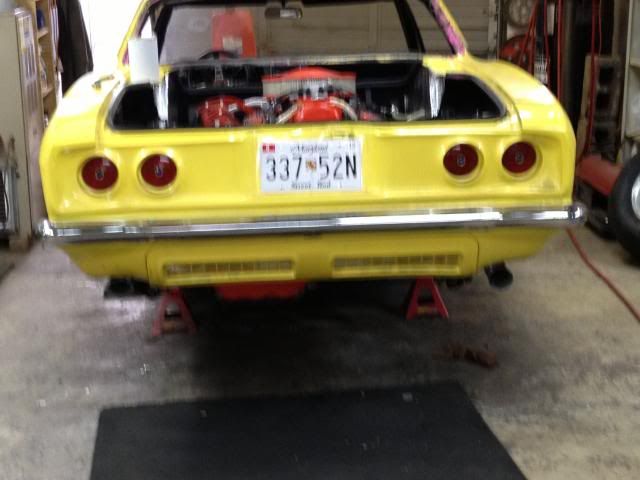
A couple of friends have made comments about all the ugly mufflers and stuff hanging out the back of the car..........So I bolted the cover in place ( sorry for the shakey picture............I was getting excited ) and this is how the back of the car worked out
So I am hoping the next update will include a short movie shot from inside the car as it drives out of the garage
Thanks for all the nice comments on this build. It has been fun.
Happy Birthday America.................I hope you have a couple a hundred more
Re: The Spousal Avoidance Unit build
Posted: Fri Jul 05, 2013 10:58 am
by azdave
Good luck with the test drive!
Re: The Spousal Avoidance Unit build
Posted: Sun Jul 28, 2013 7:37 am
by 65corvaircopnj
Brad unfortunately in PA you have to have a 'regular' registration first, then apply $20 for your vanity tag... Or you apply for antique tags once and never have to renew again Hahahaha!
Hrm2k, looks fantastic keep up the great work!
Re: The Spousal Avoidance Unit build
Posted: Sat Aug 03, 2013 5:52 pm
by hrm2k
Hello, my name is John and I have a Corvair problem
I felt I was taking up too much band width so I slowed down for a while. We had a couple of weeks of 435 degree weather and with me being an old guy with all the old guy ailments, I chose to sit in the living room and watch TV.............for awhile. It was a little bit of a struggle to get motivated again but I think I am back..................
so where are we ? Well..................we are not driving yet. When we put the brakes back on the car, both rear wheel cylinders were frozen up. We drove up to Corvair Ranch for 2 new ones. We come back, put them on and go to bleed the brakes.................the f*@%^#*^ Master cyclinder will not push any fluid to the back...............or the front. So I order up a new one and put that on. Maybe we will get the brakes bled this week. The only other needed component will be gasoline...............It is bound to happen that the damn thing will get driven soon.
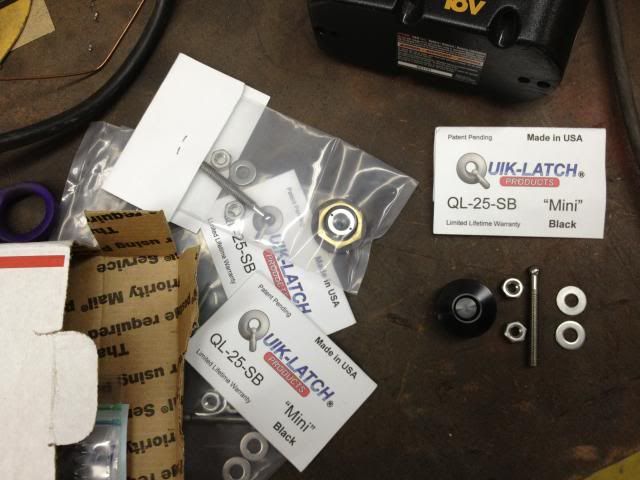
I have done a couple of new product things in this build thread. Some have worked and some have just been major disappointments. I have a couple more for you. One is a line clamp that ended up in my garage from my buddy's employer.The clamp shows a 3/8 inch marking on the inside so I guess they make them in other sizes. Here are a couple of pics of the clamps and how I used them.

If you drill down through the base, you can fold the top over, use one bolt or screw to hold it down. It will never collpase like an adel clamp and this is how it looked when it was bolted in place
I have a manufacturers name .
http://www.stauffusa.com/customer/stcor ... andard.htm#" onclick="window.open(this.href);return false;
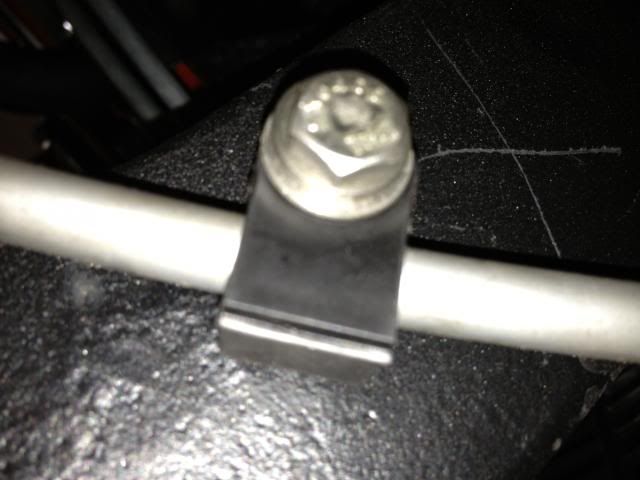
The second thing I found is small latches amde by a company in Texas called Quik Latch. I ordered up 4 od their mini latchs ( in black ) to use to hold my Lexan in place. These are made in America. They are custom machined. They come with all the needed hardware. The latch fits over a machined ball . It will latch even on a 45 degree angle. I haven't put them on the Lexan yet but there is no concern about them not working. They even have an air cleaner latch. To open, you simply push the little button in the middle and the latch will eject the ball and allow the ( in my case ) Lexan come loose. The manufacturer says that the mini latch will hold to close to 200 lbs of pressure. Here is what they look like
If you use hood pins or Dzuse fasteners, you might want to take a look at this web site
http://www.quik-latch.com" onclick="window.open(this.href);return false;
I actually finished my last bracket for the car. Big deal......................last bracket
I have mentioned that I am going to make my engine cover out of Lexan......1/4 inch Lexan. We had the rough cut piece under weight and under lots of heat for the last few weeks. When we could not find the sand weights, we jumped into our stainless bucket. I am almost embarassed by this stack of crap but it worked.................
we ended up with a couple of concrete blocks and what ended up as about 160 lbs of stainless................we ended up with a 5/8 tall bulge in the middle of the lexan..............................and this is how it looked this afternoon
All this will come to an end soon, I promise
Re: The Spousal Avoidance Unit build
Posted: Tue Aug 06, 2013 6:29 pm
by hrm2k
Getting Closer each day !!!!!!!
Made a few more changes today....................some will require no comment..........others will
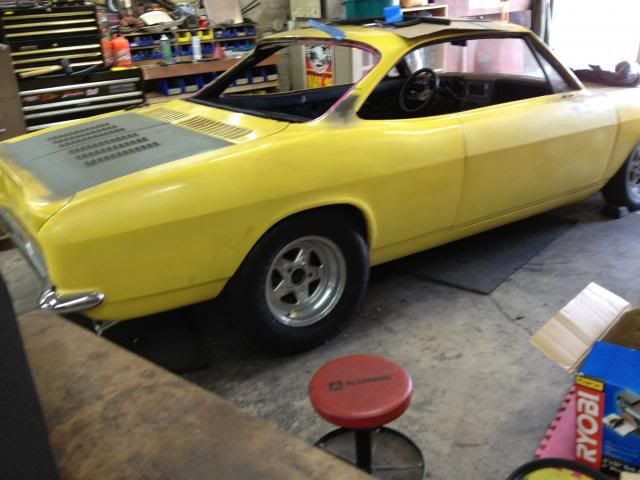
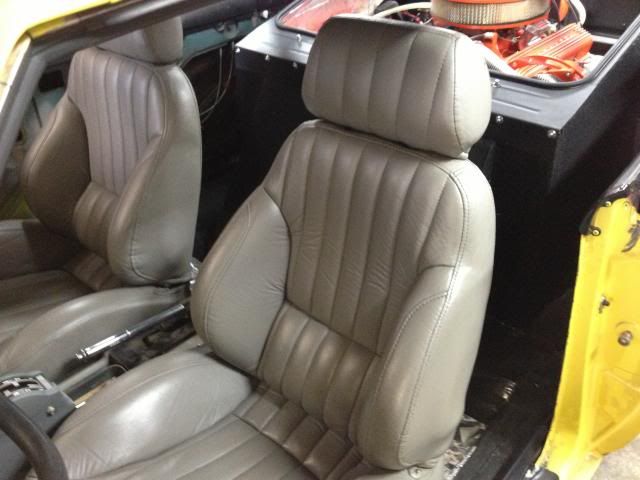
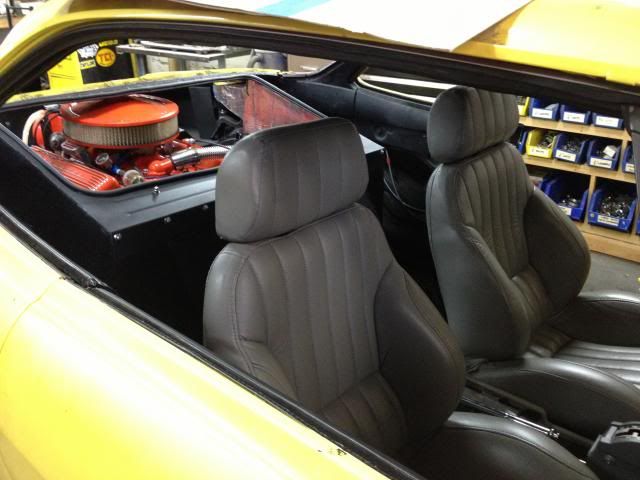
First, I have made several comments over the months about my preference for the TH425 conversion verus the Crown Conversion. I took the oppertunity today to mount the front seats for the last time. When I was done, I took a look inside for a first time view of the clearance. The seats are all the way back on the sliders. The back of the seat is in driving position. You can see for yourself how much clearance there is
I am pretty happy the way that worked out.
So here are a few of the interior as it is going together

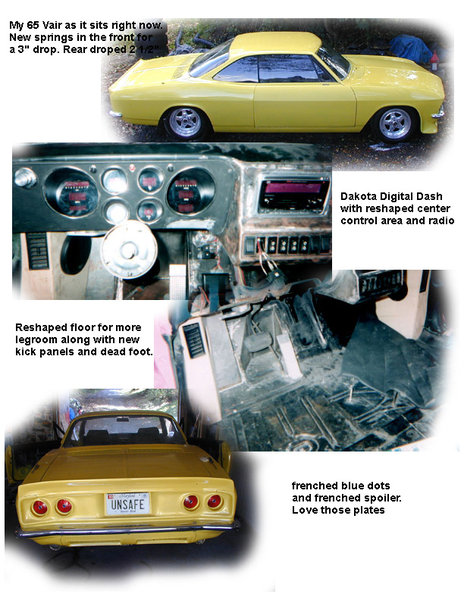
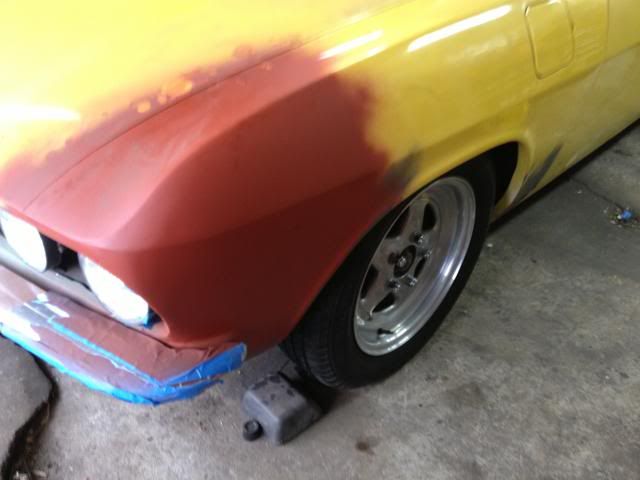
I had almost forgotten how nice the front stance of the car is. The front springs are custom wound units with a 3 inch drop.................body work is still required
Brakes are completed, bled and adjusted.......no leaks. The tunnel is all closed. Everything under the car is secure. Should drive it out of the garage Wednesday.............but I have been disappointed before................Film Wednesday night at 11
Re: The Spousal Avoidance Unit build
Posted: Tue Aug 06, 2013 6:34 pm
by hrm2k

 Much-more impressive than a pile of washers!