Cad-kid's 65 Monza - my first Corvair
Re: Cad-kid's 65 Monza - my first Corvair
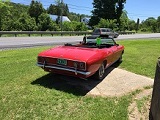
Onto the back seat back
Here's what I started with - not too bad apart from the rip in the top. The vinyl was really dried out and the sun had taken it's toll. Here is how the fabric is retained before the metal brackets are put on (staples!)
I like the hog rings much better- Thick metal under the hardboard piece. This is one heavy duty rear seat back! Here's with the cover removed Here's what the back of the cotton looks like. It was really built well Here's a cross section of all the cotton. I was surprised at how much they used. Even though it was in good looking and feeling condition it really stunk like mold! Time to go! Since I don't sit in the back seat layered it with 1/4 inch felt and 1 layer of heavy duty foam. I thought it was about time to show how great the Clarks upholstery is, side by side with the original To get the cover onto the frame I laid the cover on the floor and set the seat frame on top of it. Then I stapled the bottom and sides on. Finally I finished with the top. It was a bit nerve-wracking because as I was stapling I couldn't see how it was looking. I could feel the corners and made sure the foam was filling in the area, but that's it. When I turned it around I was pleasantly surprised
I finished up by setting the trim panel in place and fastening the metal strips back in place.
*And you know what? With 1 layer of foam the seat is plenty comfortable*
Jeremy (cad-kid)
Kronenwetter, WI (Central Wisconsin)
SOLD 9-2016 65 Monza 4spd/140
My 65 Monza thread
My YouTube page
Kronenwetter, WI (Central Wisconsin)
SOLD 9-2016 65 Monza 4spd/140
My 65 Monza thread
My YouTube page
-
- Posts: 1604
- Joined: Tue Mar 25, 2014 9:18 pm
- Location: Kalamazoo Mi..
Re: Cad-kid's 65 Monza - my first Corvair
You can cut that foam with an electric carving knife, it gives a nice clean cut. You won't need one now but anyone doing seats like this it's a real handy tool!! Boy now I want to get my seats going but it might be some time. Talking to a lady at the Cancer Center where my wife has been going since last April & she said the bill is just over $453,000 as of last Friday. Maybe next year i'll get new seat covers.
64Powerglide, Jeff Phillips
Kalamazoo, Mi..
Kalamazoo, Mi..
Re: Cad-kid's 65 Monza - my first Corvair
And now what you have been waiting for - photos of the seats installed!
Ignore the squiggly shadow on the back seat - hmm didn't notice that when I was taking the photo And since it was a nice sunny spring afternoon, I had to take this photo *final thoughts*
Comfort - For the front seats, the new seat foam with my extra synthetic cotton has moved the pressure point more toward the shoulder area. Not the best, but it will most likely settle down (or I will just get used to it). To change that would require getting creative with removing part of the synthetic cotton. The seat bottom is great! Much more comfortable. Although now that I am sitting higher in the seat it's harder to stay in position while cornering
I'm really happy to have taken the plunge and done all the seats. It started out as, well I could do the drivers seat during the winter then do the others later (next season, what ever). But then I thought that it would look really bad if the vinyl didn't match up as there is no color guarantee if you order 1 cover then next year order another cover. So I made a jump decision and bought the kit, I have close to a grand in covers and supplies (I did replace all the soft materials). Used seats from another make of car would have been a much cheaper choice but this way I got to learn a good skill. I rather would have spent the money on the front suspension but I couldn't take those uncomfortable seats any more I'm very happy with the end result
The longer they sit, the better they look as the vinyl relaxesIgnore the squiggly shadow on the back seat - hmm didn't notice that when I was taking the photo And since it was a nice sunny spring afternoon, I had to take this photo *final thoughts*
Comfort - For the front seats, the new seat foam with my extra synthetic cotton has moved the pressure point more toward the shoulder area. Not the best, but it will most likely settle down (or I will just get used to it). To change that would require getting creative with removing part of the synthetic cotton. The seat bottom is great! Much more comfortable. Although now that I am sitting higher in the seat it's harder to stay in position while cornering
I'm really happy to have taken the plunge and done all the seats. It started out as, well I could do the drivers seat during the winter then do the others later (next season, what ever). But then I thought that it would look really bad if the vinyl didn't match up as there is no color guarantee if you order 1 cover then next year order another cover. So I made a jump decision and bought the kit, I have close to a grand in covers and supplies (I did replace all the soft materials). Used seats from another make of car would have been a much cheaper choice but this way I got to learn a good skill. I rather would have spent the money on the front suspension but I couldn't take those uncomfortable seats any more I'm very happy with the end result
Jeremy (cad-kid)
Kronenwetter, WI (Central Wisconsin)
SOLD 9-2016 65 Monza 4spd/140
My 65 Monza thread
My YouTube page
Kronenwetter, WI (Central Wisconsin)
SOLD 9-2016 65 Monza 4spd/140
My 65 Monza thread
My YouTube page
Re: Cad-kid's 65 Monza - my first Corvair
Thanks for the tip. If I was doing a front bench I would have taken more time shaping things. As it turned out, the foam was soft enough to erase any jagged edges when the cover went on.64powerglide wrote:You can cut that foam with an electric carving knife, it gives a nice clean cut. You won't need one now but anyone doing seats like this it's a real handy tool!! Boy now I want to get my seats going but it might be some time. Talking to a lady at the Cancer Center where my wife has been going since last April & she said the bill is just over $453,000 as of last Friday. Maybe next year i'll get new seat covers.
Good luck and best wishes on the Cancer treatment for your wife
Jeremy (cad-kid)
Kronenwetter, WI (Central Wisconsin)
SOLD 9-2016 65 Monza 4spd/140
My 65 Monza thread
My YouTube page
Kronenwetter, WI (Central Wisconsin)
SOLD 9-2016 65 Monza 4spd/140
My 65 Monza thread
My YouTube page
-
- Posts: 1604
- Joined: Tue Mar 25, 2014 9:18 pm
- Location: Kalamazoo Mi..
Re: Cad-kid's 65 Monza - my first Corvair
Foam & dacron are easy to work with & do a great job. You should mold right into that driver seat. Guess I better play Power Ball!!!!!
64Powerglide, Jeff Phillips
Kalamazoo, Mi..
Kalamazoo, Mi..
- CorvairCon65
- Posts: 89
- Joined: Thu Jul 02, 2015 11:52 am
Re: Cad-kid's 65 Monza - my first Corvair
Good job Jeremy! My seats need sorting out especially now that I have discovered that mine would have had red seats when new. I'm presuming that red seats means the door cards and carpet would have been red too, which is a bummer as that's all black in mine so will have to be changed too. Rome wasn't built in a day though. Thanks for the inspiration to get mine sorted!
Re: Cad-kid's 65 Monza - my first Corvair
Thank you for the kind wordsCorvairCon65 wrote:Good job Jeremy! My seats need sorting out especially now that I have discovered that mine would have had red seats when new. I'm presuming that red seats means the door cards and carpet would have been red too, which is a bummer as that's all black in mine so will have to be changed too. Rome wasn't built in a day though. Thanks for the inspiration to get mine sorted!
You don't have to put it back to stock, red and black are a nice combo. Clarks will do custom work also.
Most likely the seats, door inserts, door paint, dash, windshield trim, headliner & carpet would be red. I could be wrong as I'm no expert on original color combos
Jeremy (cad-kid)
Kronenwetter, WI (Central Wisconsin)
SOLD 9-2016 65 Monza 4spd/140
My 65 Monza thread
My YouTube page
Kronenwetter, WI (Central Wisconsin)
SOLD 9-2016 65 Monza 4spd/140
My 65 Monza thread
My YouTube page
Re: Cad-kid's 65 Monza - my first Corvair
fantastic job!! Thanks for the details take apart pics! These will help with the re-assembly of mine!
CORSA Member #034095
65 Corvair Corsa "Field Find" 140-4, 4 speed, Hardtop, Telescoping wheel. Rear Speaker
65 Corvair Corsa Automatic 140-4, Coupe
65 Corvair Corsa "Field Find" 140-4, 4 speed, Hardtop, Telescoping wheel. Rear Speaker
65 Corvair Corsa Automatic 140-4, Coupe
Re: Cad-kid's 65 Monza - my first Corvair
Thank you, I'm happy the photos will help.SteveH wrote:fantastic job!! Thanks for the details take apart pics! These will help with the re-assembly of mine!
Jeremy (cad-kid)
Kronenwetter, WI (Central Wisconsin)
SOLD 9-2016 65 Monza 4spd/140
My 65 Monza thread
My YouTube page
Kronenwetter, WI (Central Wisconsin)
SOLD 9-2016 65 Monza 4spd/140
My 65 Monza thread
My YouTube page
Re: Cad-kid's 65 Monza - my first Corvair
the rodents had eaten most of the soft parts of mine.... i have the original wired fabric panel still... the rest is being made from scratch. seeing yours Really does help. I took lots of notes and split the seams on all of mine to make new patterns. if they turn out to actually work, I'll post them as PDF's on my thread.
Thanks again
Thanks again
CORSA Member #034095
65 Corvair Corsa "Field Find" 140-4, 4 speed, Hardtop, Telescoping wheel. Rear Speaker
65 Corvair Corsa Automatic 140-4, Coupe
65 Corvair Corsa "Field Find" 140-4, 4 speed, Hardtop, Telescoping wheel. Rear Speaker
65 Corvair Corsa Automatic 140-4, Coupe
Re: Cad-kid's 65 Monza - my first Corvair
You're welcome. I have learned in my research that the wired panel is to stiffen up the springs (helps them act together). You can use a stiffer material and have the same effect. With my rear bench seat the wires were rusty and the fabric and plastic film that held them really stunk! The 1/4 inch felt seems to have worked out well enough.
Jeremy (cad-kid)
Kronenwetter, WI (Central Wisconsin)
SOLD 9-2016 65 Monza 4spd/140
My 65 Monza thread
My YouTube page
Kronenwetter, WI (Central Wisconsin)
SOLD 9-2016 65 Monza 4spd/140
My 65 Monza thread
My YouTube page
Re: Cad-kid's 65 Monza - my first Corvair
After having the car run better and better each year as I tweak and fix things - here's a tiny update.
The car is running great - after I got the car out of storage I changed the main jets in the primary carbs to one size larger (140 motor). The engine seems to run cooler and happier with the change. It never overheated before but I could just tell when it gets hot. Last year I hooked back up the secondary carbs. With the primary jets changed the secondary carbs seem to work better. I'm getting the "oh yea!" feeling when merging onto the highway winding out 2nd & 3rd gear
Date line - last weekend (May 21st). First big trip of the season (2 hours each way). The car ran great on the way there.
On the return leg of this longer trip while puttering around town I could tell the engine was getting warm. I still need to install the oil cooler side deflectors I purchased to stop the hot air dumping out the side of it and getting pulled back into the engine fan. Heading back onto the main highway I opened up all the carbs & the engine was cutting out - all cylinders. I figured it was the coil getting hot - it's still mounted to the cylinder head. The car ran fine all the way home doing 65 mph without issue - just the full throttle cutout. When I got home the coil was cooking at about 180 deg.
Driving it the next day - normal full throttle operation. So tonight I relocated the coil - it was on the to do list for some time. Checked out a few old threads on Corvair Center and followed one. Turned out simple and easy to do. No drilling required. The after photo is misleading - there's plenty of room around the coil for the distributor and belt.
BEFORE- AFTER-
Jeremy (cad-kid)
Kronenwetter, WI (Central Wisconsin)
SOLD 9-2016 65 Monza 4spd/140
My 65 Monza thread
My YouTube page
Kronenwetter, WI (Central Wisconsin)
SOLD 9-2016 65 Monza 4spd/140
My 65 Monza thread
My YouTube page
Re: Cad-kid's 65 Monza - my first Corvair
Oil temp of 180 degrees is fine. And unrelated to full throttle cut-out. Which sounds fuel delivery related based on your observations. Did you get any gunk in the tank over the winter? have you changed the fuel filter?
Jim Thomas
Bethel, VT
63 Monza Coupe
Bethel, VT
63 Monza Coupe
Re: Cad-kid's 65 Monza - my first Corvair
Coil, not oil. BTW, good idea on the location Jeremy, I've been meaning to try that and now you reminded me lol.b74eqcm wrote:Oil temp of 180 degrees is fine. And unrelated to full throttle cut-out. Which sounds fuel delivery related based on your observations. Did you get any gunk in the tank over the winter? have you changed the fuel filter?
'66 Monza Coupe Project: viewtopic.php?f=52&t=7188" onclick="window.open(this.href);return false;
Re: Cad-kid's 65 Monza - my first Corvair
Oops. I shouldn't post so close to bedtime.b74eqcm wrote:Oil temp of 180 degrees is fine. And unrelated to full throttle cut-out. Which sounds fuel delivery related based on your observations. Did you get any gunk in the tank over the winter? have you changed the fuel filter?
Jim Thomas
Bethel, VT
63 Monza Coupe
Bethel, VT
63 Monza Coupe
Re: Cad-kid's 65 Monza - my first Corvair
Thanks for the replies guys. I have a similar drive coming up next month. But there won't be much slow speed puttering involved. I will keep the thread updated with any changes in engine behavior.
Jeremy (cad-kid)
Kronenwetter, WI (Central Wisconsin)
SOLD 9-2016 65 Monza 4spd/140
My 65 Monza thread
My YouTube page
Kronenwetter, WI (Central Wisconsin)
SOLD 9-2016 65 Monza 4spd/140
My 65 Monza thread
My YouTube page