Right now, I'm just trying to get the sheetmetal back in correctly. I think I know where most everything goes, but I'm struggling with the orientation of a couple of pieces, mainly around the rear of the engine around the oil cooler. I've been looking through the assembly book and its a bit vague on some of the pieces.
It looks like I need to fab up a shroud to cover the edges of the cooler as well.
Corvair project
-
34nineteen
- Posts: 158
- Joined: Tue Aug 09, 2022 4:27 pm
- Location: Phoenix, AZ
Re: Corvair project
1965 Corvair Monza 2 door 4 speed 110hp motor

Re: Corvair project
What cooler are you using? Dennis
-
34nineteen
- Posts: 158
- Joined: Tue Aug 09, 2022 4:27 pm
- Location: Phoenix, AZ
Re: Corvair project
12 plate cooler. It was on the motor when I got the car, and all the tin seemed to fit properly.
I'll try to get pics of the parts in question tonight or tomorrow.
I'll try to get pics of the parts in question tonight or tomorrow.
1965 Corvair Monza 2 door 4 speed 110hp motor
-
34nineteen
- Posts: 158
- Joined: Tue Aug 09, 2022 4:27 pm
- Location: Phoenix, AZ
Re: Corvair project
As I was thumbing through the assembly guide for another thing (LH muffler shield), I stumbled on these two pics
On this pic, the cover #5, should obviously fit there, but mine really doesn't unless I bend it up. I dont remember it fitting so poorly before, but I think it was also covered by the alternator, so maybe I just never noticed.
On this pic, it shows an oil cooler mount "support" screw. The longer bolt to connect the cooler to the engine was easy. But this one is fitting weird. When I snug up the long bolt, the slot on the other end lines up with the hole in the motor but the bolt going into that hole is too big for the slot in the cooler. I can just file the slot to fit the bolt better, but I dont remember that being an issue when it was removed? On the piece of tin behind the cooler, there is a "mystery" threaded boss for a screw (10-24?) which seems to be the right size hole to fit the slot, but its about 1/4" off of where it should be.
On this pic, the cover #5, should obviously fit there, but mine really doesn't unless I bend it up. I dont remember it fitting so poorly before, but I think it was also covered by the alternator, so maybe I just never noticed.
- c1.png (203.09 KiB) Viewed 577 times
On this pic, it shows an oil cooler mount "support" screw. The longer bolt to connect the cooler to the engine was easy. But this one is fitting weird. When I snug up the long bolt, the slot on the other end lines up with the hole in the motor but the bolt going into that hole is too big for the slot in the cooler. I can just file the slot to fit the bolt better, but I dont remember that being an issue when it was removed? On the piece of tin behind the cooler, there is a "mystery" threaded boss for a screw (10-24?) which seems to be the right size hole to fit the slot, but its about 1/4" off of where it should be.
1965 Corvair Monza 2 door 4 speed 110hp motor
Re: Corvair project
Here's what I remember from a LONG time ago. I once bought a whole 65 or 66 sedan for 10.00 just to get the 12 plate cooler and extra pulley (it was an automatic / air conditioned car. The 12 plate took a different cover (your part #5) and this cover had corners on it. it seems like it may have had an entirely different top shroud. The normal shroud has the corners and just a straight cover (5) with "ears". The 12 plate shroud was cut off at the end, and the stamped corners over the cooler were on the little cover. I believe Clarks lists them, but none in stock last I saw. I recently picked up a 12 plate with a basket case engine I purchased, but undecided if I plan to use it, or my stock folded fin cooler. Dennis
-
34nineteen
- Posts: 158
- Joined: Tue Aug 09, 2022 4:27 pm
- Location: Phoenix, AZ
Re: Corvair project
Aha! I think you nailed it. My cover looks a lot like the one in the illustration.

I found a pic of a 140 shroud (which I would assume is set up for a 12 plate cooler), and like you mentioned, that part with the two screw holes in the lower left is chopped off.

And considering the shape the of the cover that fits over it, it now makes sense.
I'm sure some PO picked up a 12 plate cooler and just crammed that cover on over the stock one. It looks like I have some trimming in my future.
Thank you for the insight!
I found a pic of a 140 shroud (which I would assume is set up for a 12 plate cooler), and like you mentioned, that part with the two screw holes in the lower left is chopped off.
And considering the shape the of the cover that fits over it, it now makes sense.
I'm sure some PO picked up a 12 plate cooler and just crammed that cover on over the stock one. It looks like I have some trimming in my future.
Thank you for the insight!
1965 Corvair Monza 2 door 4 speed 110hp motor
Re: Corvair project
I found a picture of a 12 late and cover by googling Corvair 12 plate cooler and cover I tried saving it, but it must be protected as I cant get it to upload. It was something that was originally for sale on a Corvair website. Dennis
-
34nineteen
- Posts: 158
- Joined: Tue Aug 09, 2022 4:27 pm
- Location: Phoenix, AZ
Re: Corvair project
It was recommended to replace the gasket between the block and the part that holds the oil filler and fuel pump. I pulled the old part off last night and am letting it soak its worries away. I should have that reinstalled this weekend.
Does anyone use Gasgascinch anymore? I remember using quite a bit of it back in my aircooled VW days back in the 80's-90's, but I havent even seen it in a decade or so.

Does anyone use Gasgascinch anymore? I remember using quite a bit of it back in my aircooled VW days back in the 80's-90's, but I havent even seen it in a decade or so.
1965 Corvair Monza 2 door 4 speed 110hp motor
Re: Corvair project
Sure folks still use Gasga Cinch. Much better than RTV (silicone) sealers on an engine. It will dissolve in oil, so use it sparingly on the gasket only. I use Permatex Spray Tac as it's almost the same stuff and it sprays on (evenly) and is red so you can tell how much is on the gasket. I've had great luck using it on the top engine cover "sandwich" with the steel baffle between the aluminum engine and top cover (different expansion rates). I hang the gasket outside and spray both sides, then after a few minutes I spray it again. Usually 2-3 coats does it. This sealer DOES NOT harden so if the surfaces move a little, the seal holds.34nineteen wrote: ↑Wed Jan 18, 2023 8:58 am It was recommended to replace the gasket between the block and the part that holds the oil filler and fuel pump. I pulled the old part off last night and am letting it soak its worries away. I should have that reinstalled this weekend.
Does anyone use Gasgascinch anymore? I remember using quite a bit of it back in my aircooled VW days back in the 80's-90's, but I havent even seen it in a decade or so.
-
34nineteen
- Posts: 158
- Joined: Tue Aug 09, 2022 4:27 pm
- Location: Phoenix, AZ
Re: Corvair project
So, I wound up getting a little sidetracked with other projects and toys (primarily my new track bike), however I finally installed a new speedo cable in my car. I figured out most of it, aside from the seal in the firewall that the cable passes through.
The cable is now routed into the passenger compartment, but not to the speedo yet. I was able to massage the seal off the cable and am getting ready to reuse it (or see how much a replacement is from Clarks), but which orientation does it go it. I get it that the metal fingers need to engage the hole, but does it go on the inside of the passenger compartment, or the outside of the firewall?
Logic would say to put it on the outside, but how do you get access to that? Unless you need to remove the fuel tank?
I may just install it from the inside and just use some silicone on the seal to help the rubber keep the gunk out. Granted, this car will likely never get driven in the ran (or ever again at my current pace), so I doubt it may be an issue.
1965 Corvair Monza 2 door 4 speed 110hp motor
Re: Corvair project
You have it figured out -- the outside of the bulkhead is were the air pressure is an were the dirt and water will hit. So put the bigger side toward the outside. The metal tabs need to be inside as they are cheap steel and will rust if exposed to water.
Back in the day they used body strip caulk (3M still makes it) to fill in the gaps around the seal. It like art clay, but is sticky and stays soft for decades.
Silicone RTV should work also.
Back in the day they used body strip caulk (3M still makes it) to fill in the gaps around the seal. It like art clay, but is sticky and stays soft for decades.
Silicone RTV should work also.
-
34nineteen
- Posts: 158
- Joined: Tue Aug 09, 2022 4:27 pm
- Location: Phoenix, AZ
Re: Corvair project
I cant seem to find a "path" to get my hand up to the portion of the "firewall" where that snaps in from the outside. Do I need to lower/remove the fuel tank for this?
Clarks appears to sell a regular style grommet for this. Maybe this is the better way to go?
Clarks appears to sell a regular style grommet for this. Maybe this is the better way to go?
1965 Corvair Monza 2 door 4 speed 110hp motor
-
34nineteen
- Posts: 158
- Joined: Tue Aug 09, 2022 4:27 pm
- Location: Phoenix, AZ
Re: Corvair project
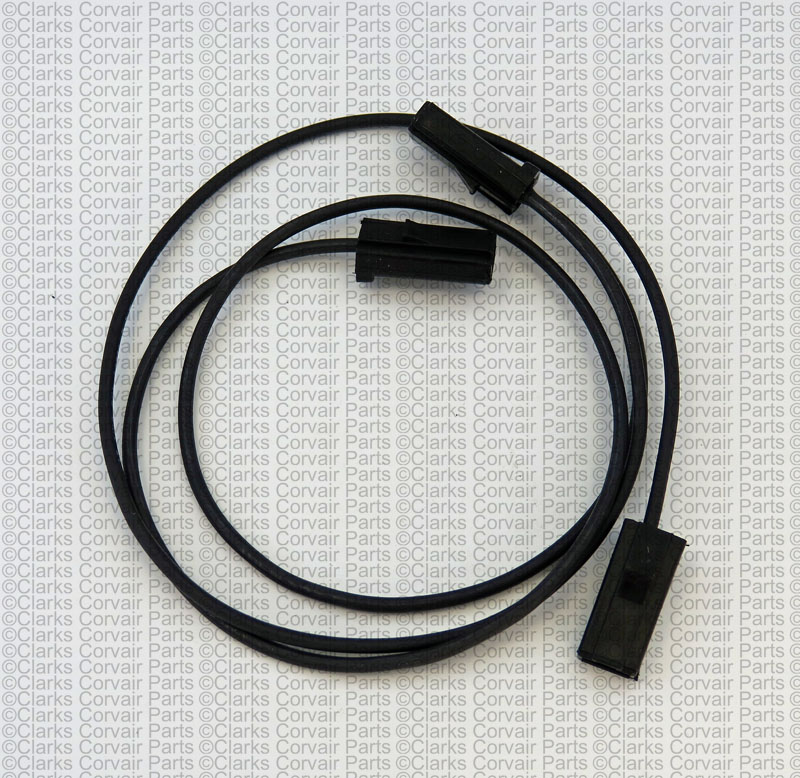
Well, the motor is finally going back together. I picked up a new temp/oil pressure wire since mine was shot. However, I can't tell which orientation to put the wire on in. It appears the middle connector goes to the oil pressure switch, the longer end goes to the main harness, and the shorter end goes to the temp sensor. I looked in the service book, and the wiring diagram tends to show this configuration also. Does anyone know for certain before I button it all up?
1965 Corvair Monza 2 door 4 speed 110hp motor
-
34nineteen
- Posts: 158
- Joined: Tue Aug 09, 2022 4:27 pm
- Location: Phoenix, AZ
Re: Corvair project
On the harness for the oil pressure switch and temp switch, I can't remember the orientation it fit in. Looking through my documentation, I found these two diagrams and can't figure out which one works correctly. I did purchase a new wire assembly from Clarks so I can't rely on the "memory" from the old one.
Does the "double wire" portion attach to the main harness or is it one of the single wire connectors? It appears the long one goes to the oil pressure switch regardless.
Does the "double wire" portion attach to the main harness or is it one of the single wire connectors? It appears the long one goes to the oil pressure switch regardless.
- Attachments
-
-
1965 Corvair Monza 2 door 4 speed 110hp motor
Re: Corvair project
There are two different TEMP and OIL PRESSURE harnesses, Corsa vs Monza and 500.34nineteen wrote: ↑Tue May 23, 2023 12:35 pm On the harness for the oil pressure switch and temp switch, I can't remember the orientation it fit in. Looking through my documentation, I found these two diagrams and can't figure out which one works correctly. I did purchase a new wire assembly from Clarks so I can't rely on the "memory" from the old one.
Does the "double wire" portion attach to the main harness or is it one of the single wire connectors? It appears the long one goes to the oil pressure switch regardless.
The Monza/500 models uses a single connector and one wire to the engine harness and one wire all the way to the Corsa instrument cluster. So the PRESSURE wires goes to the TEMP switch and then out to the engine harness - (your upper diagram).
The Corsa model uses the two wire "L" shaped connector to the engine harness with TWO wires all the way up to the instrument cluster - (your lower diagram).
-
34nineteen
- Posts: 158
- Joined: Tue Aug 09, 2022 4:27 pm
- Location: Phoenix, AZ
Re: Corvair project
I believe I mine configured like the bottom pic. Since mine is a Monza, I will re-orient the wire to match the upper picture.
Double wire connector -> head temp switch
Long wire with single connector -> oil pressure switch
Short wire with single connector -> engine harness
Does this sound right?
Double wire connector -> head temp switch
Long wire with single connector -> oil pressure switch
Short wire with single connector -> engine harness
Does this sound right?
1965 Corvair Monza 2 door 4 speed 110hp motor