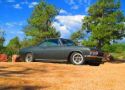
Here are some photos and preservation items going on with this 63.
- Acquired car in spring 2013,
- Forum Pic.jpg (5.73 KiB) Viewed 3464 times
Acquired car in Spring of 2013. Purchased car off ebay from dealer in Florida. Represented as good daily driver. When I received the car, overall I was very pleased with a solid body, nice interior and nice top. Several weeks of mechanical tinkering and it drove o.k. but the engine was smoking and fouling plugs every 100 miles or so. Drove the car appox 300 miles before I decided to start a preservation.
I'm calling it a preservation vs restoration since it is only my intention to replace parts if its worn out, repair what can be rebuilt and clean and service all other parts.
First Item Up Front Floor Boards
Pulled the interior out. Rear floor boards solid and in great shape. Both driver and passenger sides each had make shift patches put on somewhere in its past. Not a bad job, but it could be better. There were also a few rust holes that were not covered in patches. I decided to cut out the previous patches, cut out any additional bad metal, treat all other areas with POR 15 and weld in new floor boards from Clarks.
 Viewed 3464 times")
- Passenger Side Cut Out
I elected to leave any solid metal. Wire brush it, clean it and treat it with POR 15. Took out more floor on passenger side than driver side. Used 4" cut off wheel, took my time being carful not to cut too much of anything out. Remember there's a fuel line down there!
 Viewed 3464 times")
- Floor Boards Cut and Treated With POR
Received new floor boards from Clarks. Very nice quality. They do require some moderate trimming. It's not hard, just take your time, I used a reciprocating saw with metal blade and the 4" grinding cut off wheel. After a Saturday worth of fitting and cutting, I was happy with the way the new pans laid down.
 Viewed 3464 times")
- Trial Fit
Time to weld. Used a Mig welder with gas. I'm a slow welder. Took about 5 hours to lay all the beads down.
 Viewed 3464 times")
- Welding Floors
 Viewed 3464 times")
- Floors Welded In
Here are the floors welded in. Welds will need a little grinding and clean up prior to painting the floors boards. Note that in order to get the new floor boards to lay secure and flush on underbody supports, I used #10 2" metal self tapping screws, drill and screw every couple of inches to get a good fit and hold. When welding, I took a screw out one at a time, drilled it out to 1/4" and filled the hole with a weld. Repeat process.
Once painted, it will be good for the next 50+ years.
Total hours worked on my floor boards was about 40. Cost about $300 in materials.
More to come.....


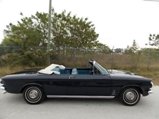
 1966 Corvair Corsa Convertible