John’s 65 sedan
Re: John’s 65 sedan
Another good day of progress on the nose section yesterday. I was able to at least get the main weld seams completed down each side on the outer fenders. This welding was very time consuming. I wasn’t exactly watching the clock or trying to get it done as fast as possible, because I was trying to control the amount of heat to the areas. In doing this, it will minimize warping. But I would say I spent about 3 hours on each side. Very minimal warping is present and I figure a very minimal of body filler will make it all straight and smooth before final painting. I’m anxious to grind down the weld and smooth out the seams to really see how it turned out.
I laid in the front cowl grill and the donor hood as a mock-up just to see how things would look before I welded up the seams. It fits up well.
(I still need to weld up the inner seams at the fenders and across the rear trunk frame.)
Here’s a couple of photos.
I laid in the front cowl grill and the donor hood as a mock-up just to see how things would look before I welded up the seams. It fits up well.
(I still need to weld up the inner seams at the fenders and across the rear trunk frame.)
Here’s a couple of photos.
John
1965 Monza Sedan “The Phoenix”. Rebuild in Progress.
Re: John’s 65 sedan
Man, that looks like a lot of work, lol. How to you keep everything level? Is the body that rigid?
Re: John’s 65 sedan
It is a lot of work, but I had to go this route as my fender tops were so badly corroded, pitted, and thinning, as was the trunk rim. Additionally, the front was dented from a previous wreck and the headlight openings were severely rusted away. I’ll show a few before photos below.
The body is rigid, and surprisingly light. I bet as it sits on the blocks, I could lift it up off of the blocks by hand. As far as alignment to keep it all straight, across the nose behind the front bumper is where the nose of the body is spot welded to the trunk and subframe rails. When it’s lined up, the 2 bumper bolts holes on each side line up. The holes pass through the front of the subframe ends and the nose piece. So when I set the nose on, a bolt on either side held things close. After a bit of shoving, pulling and finish trimming to get things really close, I lined up the holes in the front and snugged them down to help hold it in place. See photo below.
After removing the hood, I started some welding and surface finishing on the inboard area. The area in the corner by the hood hinge didn’t line up as well on the driver’s side, so it took a bit of filling and fabrication. I’m trying to make it look somewhat decent even though it’s hidden with the hood down. Across the rear of the trunk rim, the fit is tight and straight with a few tack welds.
- Attachments
John
1965 Monza Sedan “The Phoenix”. Rebuild in Progress.
Re: John’s 65 sedan
I’ve been able to get the rest of the front welded on by completing the back rim of the trunk frame. My donor did have a minor dent in the top of the passenger fender back towards where the corner of the hood is. I’m hoping the body shop has someone who can correct it.
I’m pushing to get the front end back on the ground and the next step is getting the gas tank installed. I’ve inserted the front brake lines in advance. I had to clean up my original filler neck. On the outside there was a lot of old undercoating. The inside has a buildup of scale. First cleaned the inside like I would a gun barrel. I got myself a coat hanger and a small scotch pad. Then ran it through aggressively for several minutes followed by a scrap of rag to swab out the dust. The vent tube needed a small hole welded shut. The outside I cleaned up out in the driveway with the grinder with a wire wheel. Then applied a heavy coat of rust oleum primer and allowing it to dry.
Also did some fab repair on the passenger headlight opening on the bottom. A tough area with contours to clean up with a grinder. Filling in pin holes and 2 new pieces to reconstruct the bottom. Most will be covered, but sanding the edges by hand will really smooth it out.
- Attachments
John
1965 Monza Sedan “The Phoenix”. Rebuild in Progress.
Re: John’s 65 sedan
Major milestone today! 
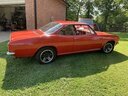
After 4 months of cutting, fabrication, fitting, welding and repairing rusted out areas, the front end is off of the concrete blocks and back on rubber! This required Installing the gas tank and filler neck, and then the front crossmember.
I’ll say that I was disappointed with the whole Clark’s gasoline tank install experience. Firstly, the anti-squeak material with the “self-adhesive” backing didn’t stick at all. I had a tube of JB weld quick set epoxy and had to use it to glue the padding to the car. Then I felt the tank was just a bit too big and didn’t fully go up in as it should, or else the padding didn’t allow it to fit right. I read the assembly manual and applied the anti squeak where it showed that it is supposed to be. Also the tank came with the lower corner flanges bent upwards. This prevents the tank from fitting in where it should because the bent corners hit the floor. I had to bend the flanges down flat to make it fit, hoping that it didn’t damage the edge weld seam of the tank and create an area where it would leak. Then once installed, there wasn’t enough clearance for the ground wire and sheet metal screw, so I had to use a hammer and a rod to make some clearance for the ground screw and bend the tank flange out of the way…because again I think the tank wouldn’t quite go up all the way as it maybe should. It was close, but just not there. (This deserves a double bang head!)
I had the crossmember and steering linkage rebuilt/repaired at the Corvair Ranch a few months ago. It’s been at the ready to install. That pretty much went in easily.
My steering column and wheel is not installed. I installed a steering box from one of my donors temporarily just to hang the pitman arm and keep the the wheels straight.
This week I’m pulling the drivetrain and starting on the back half of the car.
- Attachments
John
1965 Monza Sedan “The Phoenix”. Rebuild in Progress.
Re: John’s 65 sedan
So as I previously indicated, pulling the drivetrain was next. That was today’s adventure. I followed the Davemotorhead video with all of the prep (except mine’s an automatic). I didn’t have any help, so I had to take it slow with extra caution. Getting that darned back lower grille off was a pain!
It’s out and on a harbor freight moving skate. So the next chore is to strip it down, because next weekend it’s going to the Corvair ranch for a total overhaul…engine, diff, and transmission.
I finally was able to clean the stamp area on the differential and the code is “AH”, which is for a late model 3.55 posi with a powerglide.
While the drivetrain is getting the overhaul, I’ll be back to bodywork on the rear-half and the rear suspension.
Say, does anyone know how to remove the camber cam adjustment bolts on the rear trailing arms? Mine are likely just rusted, but they wouldn’t turn or drive out. I tried turning with a breaker bar, and persuading to drive them out with the 1lb ball peen hammer, but they didn’t want to budge. I did knock the rear cam loose with a chisel. I’ll try the fire wrench next. Help!!!
John
1965 Monza Sedan “The Phoenix”. Rebuild in Progress.
- Cfinley2001
- Posts: 95
- Joined: Wed Apr 07, 2021 3:55 pm
- Location: Texas
Re: John’s 65 sedan
Hey John, glad to see you got the motor out safely, I'm going to have a tough time with my gold car, because the engine and transmission are disconnected. Hope you were safe getting the motor out!
1967 Corvair Monza 110 "Patches"
1965 Corvair Monza 110 "Fishbone"
1961 Corvair Greenbriar "Bremmer"
1962 Corvair 95 Panel "Electrovan"
1961 Corvair Monza Sedan "Joseph's"
Texan my whole life.
1965 Corvair Monza 110 "Fishbone"
1961 Corvair Greenbriar "Bremmer"
1962 Corvair 95 Panel "Electrovan"
1961 Corvair Monza Sedan "Joseph's"
Texan my whole life.
Re: John’s 65 sedan
So tonight I thought I’d take it easy and simply vacuum out more nuts and nest from the engine areas and heater duct, then spray some screws with blaster.
How many out there though their corvair was running like two squirrels chasing a nut on a treadmill? Well I found one of the two in my engine! Yep, in the heater duct at the engine.
I kind of like how Connor has been naming his cars, so I’m going to give mine a name. Since it’s been an ice age since this car has been on the road, I’m going to name the car Scrat in honor of the prehistoric Saber Toothed Squirrel 🐿. So Scrat it is!
- Attachments
John
1965 Monza Sedan “The Phoenix”. Rebuild in Progress.
Re: John’s 65 sedan
65 Monza
Cincinnati, OH
Cincinnati, OH
Re: John’s 65 sedan
Yesterday was the journey back to the Corvair Ranch with the engine and drivetrain. It’s a 5 hour drive for me, but it seems to go fairly quickly. Upon arrival and first glance, Jeff (who owns the place) recognized the engine as a ‘64. How might you ask? By the fan. I thought that it was a ‘64 as I previously wrote judging by the engine code. So what I have is a’64 110hp with a 3.55 posi and a power glide. The plan after discussing with Jeff is a complete rebuild of the entire drivetrain. After he saw the video of it running and the amount of blow by, he agreed that it’s a good choice. The plan is an upgrade to dual exhaust and a 270 cam. He was confident that would be a great fit with the power glide.
Today I visited a member from the WPCC who has a potential parts car. I wanted to take a look at it and evaluate what it might have. He also gave me another potential source for parts so I’m pursuing that also.
Once I got back home, I proceeded with more preparation by removing the rear doors, engine cover, and spraying more Blaster on nuts and bolts.
Tomorrow it’s back to work on the rear floor and rusted out lower areas from the rear window and forward.
John
1965 Monza Sedan “The Phoenix”. Rebuild in Progress.
Re: John’s 65 sedan
Today, I dove into gaining a better assessment of the condition of the rear floor. This led to removing the back seat hinged panel, wire brushing the whole area, and poking hard for rusted out areas.
In order to gain good access to the rear floor, I also decided it was time to remove all of the rear suspension, rear crossmember, brake lines, wiring harness, heater blower, everything. All of the rear suspension components need overhauled or replaced, so it all was pulled.
Next will be laying out the floor repair underneath the rear seat. My donor was from a ‘66 convertible, and it has an additional support rail on the outer edges. I need to figure out how this will go.
(Don’t know why the pics uploaded this way.)
John
1965 Monza Sedan “The Phoenix”. Rebuild in Progress.
-
- Posts: 2062
- Joined: Wed Oct 13, 2010 12:51 pm
- Location: Northlake, TX
Re: John’s 65 sedan
I'm surprised you had that much trouble with the Clark's tank. I've installed a bunch of them with no issues.
Maybe they got a bad batch.
157 Corvairs, 5 Ultravans and counting
Northlake, TX
Northlake, TX
Re: John’s 65 sedan
Regarding the tank, yeah the fit just seemed really tight with the anti-rattle strips in there. Oh well…
On another note, I’d like to ask all of the readers out there their opinion. I’ve been wrestling with the thought of what color to paint the car when it’s that time. I’m only considering two choices here.
The first choice is to go back with the existing paint color which is red. That’s the color it was when my dad brought the car home. It was red when I drove it in High School. And is still red. I’ve seen several red Monza sedans in photos and one recently in person at a corvair club show. I think they look sharp!
The second choice I’m considering is to take the car back to it’s original color as it rolled off the assembly line which was Madeira Maroon. That’s the paint code on the body tag. I honestly have said for probably 20 to 30 years, that the one car color (car or truck) that I was least in favor of was maroon/burgundy. Now, I’ve looked on line at other cars with variations like “black cherry metallic ” and they do look sharp. I’ve only seen a couple of photos of maroon sedans,( never one in person), lots of photos coupes and convertibles, and recently at the one show, two maroon 2-doors. So the only reason why I’m considering maroon is because I’ll love this car when it’s done regardless of the color, and it’s sort of something special to bring it back to an original color (at least a close variation). I also think it would be a bit unusual today as I’m thinking there’s not that many maroon sedans out there.
So there it is. Let me hear your opinion and Thanks in advance.
I’m also wondering if anyone has any production numbers by body type and by color? (How many maroon sedans were built?).
John
1965 Monza Sedan “The Phoenix”. Rebuild in Progress.
-
- Posts: 2062
- Joined: Wed Oct 13, 2010 12:51 pm
- Location: Northlake, TX
Re: John’s 65 sedan
Go with the original color. I really like the original maroon and I think the original color is always best. I would bet red is the most common color for a Corvair. It's called "resale red" for a reason.
157 Corvairs, 5 Ultravans and counting
Northlake, TX
Northlake, TX
Re: John’s 65 sedan
Without re-reading everything, I like the 'Black Cherry Metallic' or a Candy Apple/Pearl type Red. But out of those two... Black Cherry Met.
If you are staying original, then I'd stick with the original paint the car was made with.
65 Monza
Cincinnati, OH
Cincinnati, OH
Re: John’s 65 sedan
Thanks for the suggestions on the color. I’m leaning towards the original color or the black cherry metallic when the time comes which hopefully will be in a couple of months.
This week has been a continued focus on the repairs on the floor under the rear seat. I was able to get the old one cut out. It was really rusted out. Then spent a few nights fitting and trimming for fit. Today I able to get the replacement floor welded in on the sides and across the back. I like the way it turned out.
Next will be the replacement of the rear floors. I have a set of new Clark’s floor pans for the job.
John
1965 Monza Sedan “The Phoenix”. Rebuild in Progress.