Lucy: 64 Convertable build thread

Show of your ride, keep track of your project, watch as others progress on their projects
User avatar
GriffinGuru
Posts: 121
Joined: Mon Aug 24, 2015 7:07 pm
Location: Mount Joy, PA

Lucy: 64 Convertable build thread

Post by GriffinGuru »

Hi everyone, so it is time that I start a build thread for my car. I bought this car back in August '15 and I had posted two previous threads in this topic page. At the time and being new to car forums, I was creating my posts in chapter-like linear format. Most things in life are not linear, and certainly undertaking a resto-repair does not proceed in simple linear fashion. My first post was shortly after I bought the car which was in relatively functional shape, and I was working on sorting out the running and driveability issues. That was called "64 convertible- getting it to run right" or something like that. Long story short it was the usual set of circumstances with carb rebuilds, point setting, timing, and issues with my valve rocker arms adjustment.

After I had it running and driving, I created a second post in this board called "chapter 2 repairing the convertible top". Not much in that post since my original plan to patch and jerry rig the top did not go anywhere, and I am just going to have to replace the top once the body work in done. So I realize these things do not go in simple 1, 2, 3 step processes since there are always things that come up, and short attention spans have one doing many little things all over the car at various times.

So here it is my build page! :tu: It's the usual stuff I guess, but I think it is kind of cool to document the progress of this for myself and future generations... Perhaps a little too epic, I got carried away. So below are a few pictures so all can see what I have ahead of me. Lots of work, but if it was easy someone else would have done the body on this car years ago. Now it's my turn to have a swing at it! :rafman:
Attachments
A shot of the back half of the car in my garage.  I need better lighting in the garage for sure.
A shot of the back half of the car in my garage. I need better lighting in the garage for sure.
The back of the car needs the most work, so that's where I'm starting.  The P.O. cut out the lower half of the back panel and I don't have it.  I just got a replacement fiberglass lower portion from the Corvair Ranch.  (I must give some free advertising to this place, they are really great and they can do nearly anything there!!)
The back of the car needs the most work, so that's where I'm starting. The P.O. cut out the lower half of the back panel and I don't have it. I just got a replacement fiberglass lower portion from the Corvair Ranch. (I must give some free advertising to this place, they are really great and they can do nearly anything there!!)
Rear inner panel missing a section as well- cut out by P.O.  I plan to section a patch in there for structure, but need to figure out how everything will go together with the fiberglass lower section.
Rear inner panel missing a section as well- cut out by P.O. I plan to section a patch in there for structure, but need to figure out how everything will go together with the fiberglass lower section.
Found a rust hole in top of rt. rear fender well.  Removing the undercoating is NOT a fun job.
Found a rust hole in top of rt. rear fender well. Removing the undercoating is NOT a fun job.
Another shot of rust hole in rt. rear fender well.  The asphalt-like undercoating seems to have protected everything else pretty good.  I am thinking this rust is from moisture that got in from above, but I don't know where that would be from.
Another shot of rust hole in rt. rear fender well. The asphalt-like undercoating seems to have protected everything else pretty good. I am thinking this rust is from moisture that got in from above, but I don't know where that would be from.
Left rear fender well.  The P.O. repaired the battery box area and started repairs in the top of fender well by cutting out a rusty area.  I plan on cleaning up the battery box repair a little by welding patches to seal in the large gaps around where the replacement battery box was installed.
Left rear fender well. The P.O. repaired the battery box area and started repairs in the top of fender well by cutting out a rusty area. I plan on cleaning up the battery box repair a little by welding patches to seal in the large gaps around where the replacement battery box was installed.
Left side is missing the engine cover gutter rail, and more of the repaired area around the battery box can be seen.
It keeps me humble:
64 Corvair Monza convertible called Lucy (work in progress)
User avatar
cad-kid
Posts: 2569
Joined: Thu Sep 09, 2010 4:29 pm
Location: Kronenwetter, WI
Contact:

Re: Lucy: 64 Convertable build thread

Post by cad-kid »

Lucy will sure be a great looker when you are done :tu:

I look forward to seeing your updates.
Jeremy (cad-kid)
Kronenwetter, WI (Central Wisconsin)
SOLD 9-2016 65 Monza 4spd/140
My 65 Monza thread
:soapbox: My YouTube page
User avatar
GriffinGuru
Posts: 121
Joined: Mon Aug 24, 2015 7:07 pm
Location: Mount Joy, PA

Re: Lucy: 64 Convertable build thread

Post by GriffinGuru »

It is about time for an update I think. I have been busy due to holidays, some projects around the house, and helping my brother fix his car, but
I have been making some progress however slow on the body work.

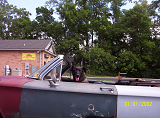
I have been trying to strip the paint on the rear half of the car. The stripping is done inside the passenger wheel well, and about half done inside the driver wheel well. I have also been working on the outside body paint stripping as well as seen in the picture. The engine lid is off and in the basement for now and I'll get to that after the back half is in primer. The stripping is slow for me. I keep getting asked if I am using "aircraft stripper", and I doubt that what I am using is actually "aircraft stripper". I am using paint stripper I bought at Tractor Supply and I am suspecting it is a safer low VOC (50%VOC) formula.

It is requiring 3-4 applications in a given area to get down to the fender metal. The first coat just bites into the paint and takes the gloss off (I don't think a car this old is 2 stage). With the second and third application I can usually use a putty knife to scrape all the color down to the primer. The primer however doesn't seem to remove so easily by scraping. Last night I put in my stripper on the remaining primer and ran a wire wheel across that while the stripper was still wet and that took it down to metal, but was very messy and I could only do about a square foot area at a time since the grinder would create wind that would dry the surrounding stripper off pretty quickly. Also stripping around the tight curves of the taillight area is difficult at best, and that I might try with the same wet-wire wheel process I used on the primer layer.

Is this how tedious the stripping process normally is, or do I need to find real "aircraft stripper" to ease and speed the process up? One good thing about what I am using is that it does not create a lot of nasty fumes in my not-so-well ventilated garage. We are coming into winter the need to open the garage door to vent the fumes in cold weather does not sound enjoyable. :td:

Once the stripping and bodywork-fabbing is done I plan to prime with epoxy primer as from what I have researched is the better way to go since I can prime onto filler and also add filler overtop the primer again if I see other areas that aren't straight after priming. I can't wait to be finished with the stripping process and can start playing with metal and fire again. I am not looking forward to doing the front and sides of the car if the process will be this painful across the whole car.
Attachments
You can see the various layers of paint and primer that are slowly being removed here.
It keeps me humble:
64 Corvair Monza convertible called Lucy (work in progress)
User avatar
GriffinGuru
Posts: 121
Joined: Mon Aug 24, 2015 7:07 pm
Location: Mount Joy, PA

Re: Lucy: 64 Convertable build thread

Post by GriffinGuru »

Hello again, I was getting bored with paint removal and also running into areas that needed repaired anyway, which made said paint removal in those spots impossible. So the other week I started in on the fabbing and patching work needed on the rear of this car. I still have a long way to go, but at least I am starting to get the hang of "stitching" in metal sheetwork without burning through when welding. I have completed the under panel in the rear and have cut out what needs replaced inside the upper right rear fender. I have a strategy for how I'll repair that somewhat complicated area and will need three pieces made, assembled from inside first, working toward the outside as I go. Earlier I was wondering what caused this rust, but now I think the rust in this area was caused by water getting between the fenderwell seam that runs the inner perimeter and attacking the pinchwelds, rather than water coming from somewhere above (also on the left side in the same location). I don't even remember why I started to remove the inner wheel well chip guard coating, but I'm glad I did since I have found multiple areas where the seam sealer was failing and rust was starting to form in some other locations.

Also I have started pulling and hammering around the left back-up light bezel. The car must have backed up into something because this lamp circle area was pushed inwards and was creased and dented at the lower edge of the rim. I still have a little way to go here, but it is almost back to where it needs to be. :woo: This area is certainly a tricky spot to work the metal and there are some complicated shapes to try to re-bend!

I still have a long way to go, and I did not know how time consuming all this patching and fab work is to do. The welding is necessarily slow :banghead: , so progress is slow, but once the back end is done, the rest of the car is not nearly in as bad shape!
Attachments
Right side rear panel had a large area previously cut out and more rust along the bottom edge further inboard- patched and primed!
Left side rear cut out area patched and some holes around the bumper support patched and repaired.  The backup light area is almost to the correct shape.
Left side rear cut out area patched and some holes around the bumper support patched and repaired. The backup light area is almost to the correct shape.
inner right rear fender well.  Areas further inside have rust protective coating on them.
inner right rear fender well. Areas further inside have rust protective coating on them.
View of cut out in engine compartment
Another view of fender area to show size and shape of what needs patched here.
It keeps me humble:
64 Corvair Monza convertible called Lucy (work in progress)
1949chevy
Posts: 277
Joined: Sat Sep 13, 2014 7:34 pm

Re: Lucy: 64 Convertable build thread

Post by 1949chevy »

Dscn0220 copy shoebox site.jpg
Dscn0220 copy shoebox site.jpg (43.27 KiB) Viewed 2085 times
55 before b and w.jpg
55 before b and w.jpg (45.73 KiB) Viewed 2085 times
Body work is sometimes a nice break when you have spent a lot of time doing the mechanical's with all its problems with any car but especially on a corvair. ...so look at it as once you start the mechanicals you will be very happy for a while anyway, then the body work seems like it was so nice and easy....but none of it is easy. The first car I built was a 55 ford f100, I paid $75.00 for it and it was a mess as you will see the photos. I even braved taking the frame off and starting it all from scratch...had very little money so I had to do all the work myself....suspension was first...I put in a crappy no good Mopar torsion bar system at first...eventually removed it and I welded in a 70 Monte carlo subframe ( 30,000 miles without alignment even), etc. Long story short, I have built 2 basically frame up since then and then this terrible corvair I have now...the longer you work...the more you feel comfortable and pleased in the garage.

Here is what I started with and what it finished like...so, hang in there and you will be a very pleased corvair owner.
User avatar
cad-kid
Posts: 2569
Joined: Thu Sep 09, 2010 4:29 pm
Location: Kronenwetter, WI
Contact:

Re: Lucy: 64 Convertable build thread

Post by cad-kid »

Good update :tu:
Jeremy (cad-kid)
Kronenwetter, WI (Central Wisconsin)
SOLD 9-2016 65 Monza 4spd/140
My 65 Monza thread
:soapbox: My YouTube page
User avatar
GriffinGuru
Posts: 121
Joined: Mon Aug 24, 2015 7:07 pm
Location: Mount Joy, PA

Re: Lucy: 64 Convertable build thread

Post by GriffinGuru »

It is time for an update: Over the cold weeks of winter it was difficult to find time to work on the car. Mainly, it takes a while for my heater to warm up the garage, and also the welding (flux wire), and paint stripping work generates many fumes which require me to open doors to vent. Not the best thing in January, who knew? :dontknow:

Anyway I did manage to finish repair in the pass rear wheel well, and just yesterday as the temps warmed up a little I started on the drivers side. I removed the previous battery box repair and have so far patched the lower side "rail" area. I plan to use heavier gauge metal for the battery tray bottom than was previously used in the repair. I am getting better at the patch/repair welds as there was very little that needed ground and re-welded in this first piece. One big reason for this is that I am cleaning up the metal better of paint and rust where I am welding and that REALLY makes all the difference. I know, it seems pretty self obvious, but after cutting and shaping the metal patches, I was overly ambitious and just wanted to start welding and fill those holes!! I am learning that a better weld to start with saves ALOT of time in re-work. Also. the auto-darkening helmet is a world of difference.!! :tu:
Attachments
Rear pass wheel well looking up from fender.  I had to bridge across a seam that was originally internally pinch welded, I will be using seam sealer on all the gaps that couldn't be welded, and also re-doing all the other gaps and construction seams in there.
Rear pass wheel well looking up from fender. I had to bridge across a seam that was originally internally pinch welded, I will be using seam sealer on all the gaps that couldn't be welded, and also re-doing all the other gaps and construction seams in there.
Top side.  I had a real hell hole of weld burn through (from rust and my lack of metal prep and weld skill) in the back corner where the engine compartment tapers back to a point.  It was not pretty, but I did finally get that filled.  There will be more seam sealer needed all through the engine compartment.
Top side. I had a real hell hole of weld burn through (from rust and my lack of metal prep and weld skill) in the back corner where the engine compartment tapers back to a point. It was not pretty, but I did finally get that filled. There will be more seam sealer needed all through the engine compartment.
The start of the driver side area under the battery tray along the frame rail.
It keeps me humble:
64 Corvair Monza convertible called Lucy (work in progress)
User avatar
GriffinGuru
Posts: 121
Joined: Mon Aug 24, 2015 7:07 pm
Location: Mount Joy, PA

Re: Lucy: 64 Convertable build thread

Post by GriffinGuru »

As with many things, the current process of finishing the back of the car is a bit all over the place. I want to get primer on the car, but in order to do one thing, I have to do something first, and to do that something else needs first prepped etc. The process is slow and a bit all over the place right now, but at least in a month or two, I think I'll actually be priming the rear. :woo: For now I am pushing myself to finish the battery tray area so that I can start the car and get those fluids moving again. The gas at least was drained back in the winter when I realized it won't be driving so soon.

I have welded in the drip rail that was missing above the battery tray with a repair patch and patched the hole cut out between the tray area and the hood prop mount. Halfway through this process I wished it had just removed the repaired area that the previous owner started as the metal was a bit too thin gauge and the patch was not square with the rest of the tray. :think: By that time, I was halfway into finishing the section and it is an unseen area in the engine bay anyway, so I will just work with what I am given.

I made the tray base with proper heavier gauge steel and have it mocked up into place. I will spot weld it into the box and then on the outside I will sandwich in the original cut places with L shaped sheet metal around the corners of the box. There are still a few other areas in the driver's side wheel well that also need patched at the top like on the pass. side I did earlier. This will all be sealed up with seam sealer then before I eventually spray underbody coat in the wheel wells. There are all sorts of seams that I will re-seal before painting.
Attachments
drip rail installed-I'm getting better at welding sheet steel I think with each section I repair.
Tray mocked up from above
Underneath shot of tray location showing position of tray relative to original metal.
It keeps me humble:
64 Corvair Monza convertible called Lucy (work in progress)
User avatar
cad-kid
Posts: 2569
Joined: Thu Sep 09, 2010 4:29 pm
Location: Kronenwetter, WI
Contact:

Re: Lucy: 64 Convertable build thread

Post by cad-kid »

Nice update! As my welding knowledge is pitiful at best - please explain the holes you drilled in the battery tray patch
Jeremy (cad-kid)
Kronenwetter, WI (Central Wisconsin)
SOLD 9-2016 65 Monza 4spd/140
My 65 Monza thread
:soapbox: My YouTube page
User avatar
GriffinGuru
Posts: 121
Joined: Mon Aug 24, 2015 7:07 pm
Location: Mount Joy, PA

Re: Lucy: 64 Convertable build thread

Post by GriffinGuru »

That battery tray is not actually welded yet. The holes are where I'll weld into and fill to make my "spot welds". I think in the welding/auto body world they are actually called button welds.

As far as patching goes I'm still not sure in some places whether it is better for me to spot weld or run continuous beads. In some repairs I have seen it seems that they spot weld patches in regular spacing and just fill un welded the gaps in with bondo? That seems half assed though and would cause the filler to crack over time I would think. ...Or in those pictorials they only just show the initial tacking up, but gloss over the process of finishing the welding. :dontknow:

My flux welder doesn't make the cleanest welds, and in certain places the rusty condition of the metal tends to cause some difficulty making clean beads. Spot welding is easier, quicker, and less likely to cause burn through for me. In the case of whenever I get to replacing a section of fender between the B pillar and the rear wheel well though, I think I want to do a continuous bead since the car is unibody and that is part of the structure there.
It keeps me humble:
64 Corvair Monza convertible called Lucy (work in progress)
User avatar
cad-kid
Posts: 2569
Joined: Thu Sep 09, 2010 4:29 pm
Location: Kronenwetter, WI
Contact:

Re: Lucy: 64 Convertable build thread

Post by cad-kid »

Thanks, good explanation.
Jeremy (cad-kid)
Kronenwetter, WI (Central Wisconsin)
SOLD 9-2016 65 Monza 4spd/140
My 65 Monza thread
:soapbox: My YouTube page
User avatar
GriffinGuru
Posts: 121
Joined: Mon Aug 24, 2015 7:07 pm
Location: Mount Joy, PA

Re: Lucy: 64 Convertable build thread

Post by GriffinGuru »

Overdue Update:

Much progress has been made. Although I am not as proficient in body work and turning around projects as quick as some others, I have been quietly making progress over the last few months and today I just got over a huge hurdle. I have attached my replacement fiberglass panel for the lower rear valence. This piece was holding me up from getting moving far ahead on my bodywork. Actually, I noticed a few weeks back that the areas I sanded were starting to surface rust, so I used naval jelly rust dissolver and then sprayed the car with etch prime for the time being so my hard work doesn't rust away. It also showed all the imperfections so I started doing the bondo on the rear quarters a while.

Attaching the fiberglass panel had many components that needed to come together at the same time, including trimming and sanding the panel (this took forever mostly because I was having trouble figuring out how it was going to mount at the body seam below the inner panel where there was nothing to attach to...)

Anyway, I borrowed a dual tube caulking gun from a friend, glued the panel and then riveted it around the edges and bolted through the bumper holes to hold it in place. The epoxy panel bond luckily has a 90minute working time which was nice since there was so much area to cover. It will need to cure for at least 24 hours and then I can finally do the bondo work on the rear panel. And there will be a lot of filler needed for this area with many tricky curves to sand- most likely by hand as I can't get a tool in around the taillight bezels very well :doh: My goal is to hopefully have the back section sprayed in urethane epoxy primer and driving for 4th of July weekend... That may or may not happen depending on if they fail my truck for inspection and I have to focus energy on that to be legal. :td:
Attachments
Underside of the fiber panel.  There were uneven spots and it required MUCH sanding and trimming.  I don't know how panels from Clarks are, this one was hand laid from a mold by the good folks at Corvair Ranch.  The outside shape was great, but the inside required evening out imperfections and thick areas.
Underside of the fiber panel. There were uneven spots and it required MUCH sanding and trimming. I don't know how panels from Clarks are, this one was hand laid from a mold by the good folks at Corvair Ranch. The outside shape was great, but the inside required evening out imperfections and thick areas.
Scuff pad over the areas to take the primer off where the epoxy will mate.  I then caulked the epoxy on and spread it over all bare metal areas.  Then I had another thick bead of epoxy on the panel itself since there are areas that needed to cover large-ish gaps.
Scuff pad over the areas to take the primer off where the epoxy will mate. I then caulked the epoxy on and spread it over all bare metal areas. Then I had another thick bead of epoxy on the panel itself since there are areas that needed to cover large-ish gaps.
This area had me stumped for a while.  The fiber panel had edges that turned in where the metal is seamed together.  I originally was going to leave those sides sticking in and attach at the seam sideways.  Unfortunately, with the side edges left on the panel, it was too wide to fit between the rear quarter seams at the bottom.  I welded these tabs and trimmed the fiber panel edges the rest of the way off.  The panel epoxy will go on the tabs along with 2 rivets each to hold the bottom in place.
This area had me stumped for a while. The fiber panel had edges that turned in where the metal is seamed together. I originally was going to leave those sides sticking in and attach at the seam sideways. Unfortunately, with the side edges left on the panel, it was too wide to fit between the rear quarter seams at the bottom. I welded these tabs and trimmed the fiber panel edges the rest of the way off. The panel epoxy will go on the tabs along with 2 rivets each to hold the bottom in place.
Glued panel with rivets.  I also pumped or caulked the gaps full of the epoxy where the panel did not smoothly mate like in the upper corners.  I also had to cut off and add a different bend to the tail pipe as the original one did not clear the panel.  The original pipe exited about 1" into the bottom of the panel.  The exhaust was obviously added after the rusted metal panel was removed from the car.  I like the angled 45* exit of the tailpipe I have now.  It is pretty good for now... Duals may eventually be the way I go here, but that's way down the list...
Glued panel with rivets. I also pumped or caulked the gaps full of the epoxy where the panel did not smoothly mate like in the upper corners. I also had to cut off and add a different bend to the tail pipe as the original one did not clear the panel. The original pipe exited about 1" into the bottom of the panel. The exhaust was obviously added after the rusted metal panel was removed from the car. I like the angled 45* exit of the tailpipe I have now. It is pretty good for now... Duals may eventually be the way I go here, but that's way down the list...
This is actually the panel mocked up before glueing, but it shows the new tailpipe bend and where it will exit.
It keeps me humble:
64 Corvair Monza convertible called Lucy (work in progress)
User avatar
GriffinGuru
Posts: 121
Joined: Mon Aug 24, 2015 7:07 pm
Location: Mount Joy, PA

Re: Lucy: 64 Convertable build thread

Post by GriffinGuru »

Well I almost made a HUGE mistake. About 3 hours into the curing time I remembered that I got a little epoxy onto the threads of the middle bumper bolt holding the panel in place and I thought it might be a good idea to back that bolt out before the epoxy cures... Man am I glad I did that. That bolt was really starting to tighten up, and had that fully cured, there would have probably been nothing I would have been able to do to remove that. I would have been totally screwed and had no choice but to grind flat and not have the bumper bolted in the middle. That would have been a total disaster. I checked the other 2 bolts but they are through bolts anyway and were not trying to glue themselves in place.

So remember kids: don't go glueing things you don't want to your car!!
It keeps me humble:
64 Corvair Monza convertible called Lucy (work in progress)
User avatar
cad-kid
Posts: 2569
Joined: Thu Sep 09, 2010 4:29 pm
Location: Kronenwetter, WI
Contact:

Re: Lucy: 64 Convertable build thread

Post by cad-kid »

Thanks for the good update :tu:
Jeremy (cad-kid)
Kronenwetter, WI (Central Wisconsin)
SOLD 9-2016 65 Monza 4spd/140
My 65 Monza thread
:soapbox: My YouTube page
Corventure Dave
Posts: 446
Joined: Tue Sep 06, 2011 8:35 am

Re: Lucy: 64 Convertable build thread

Post by Corventure Dave »

Keep us posted. Remember.... even a little progress, is still progress. Just keep at it. Eventually you will really
enjoy the accomplishment. Especially all that you have done yourself. Looking real good. Great work!

Corventure Dave
User avatar
GriffinGuru
Posts: 121
Joined: Mon Aug 24, 2015 7:07 pm
Location: Mount Joy, PA

Re: Lucy: 64 Convertable build thread

Post by GriffinGuru »

Update on the project:
I have really been itching to drive this again and I needed a break from the body work. So, I sprayed the rear with a urethane epoxy primer and put the taillights and associated bumper and trim back into place. Tried to sort a few other things like my fuel guage not working. I only have 6volts at the brown wire on the sender instead of 12v. The input at the dash guage black wire is at 12v, but even measuring voltage right at the brown wire on the guage itself I have only 6v. It looks like my guage is at fault with a poor internal connection or something along those lines...for another day I may try to source another guage.

In spraying the rear, I apparently had the wrong size paint gun needle (I have a 1.4, but I am told I should be using a 2.0 for primer). Also the gun had too much pressure and my primer came out a little like truck bedliner. I had a regulator and dessicator at the gun, but my error was that I had the regulator at the compressor turned down to about 60psi. At this low pressure, the regulator on the gun was giving me all sorts of weird readings, and as such it was turned all the way open...60psi at the gun? Also I did not have the engine bay masked as well as I thought I did and I have paint overspray all over the engine. :banghead: That part annoys me the most.

At least it is not like I am trying to bring this car to a concourse level of repair. I am just trying to get it to a presentable driver level and I know my bodywork will likely not be perfect, but hopefully should present good at a 10 foot distance.

Anyway I have the car together and drove it around town a little, and I now I can drive it for the holidays and nice summer days. The rest of the bodywork will resume at some alter point in the fall.
Attachments
Looks nice now that it is not missing half the rear bodywork.  Also, the color of the primer is not too bad, some sort of grey with a hint of light blue.  Interesting...
Looks nice now that it is not missing half the rear bodywork. Also, the color of the primer is not too bad, some sort of grey with a hint of light blue. Interesting...
I haven't done anything with the engine lid, so it gives the car a little of a ratty appearance, but hey that's popular now...
I'm very annoyed about the engine bay...not much I can do at this point.  The motor still works good and there is a whole lot more car to work on before the engine bay appearance takes precedent
I'm very annoyed about the engine bay...not much I can do at this point. The motor still works good and there is a whole lot more car to work on before the engine bay appearance takes precedent
It keeps me humble:
64 Corvair Monza convertible called Lucy (work in progress)
Post Reply

Return to “Member's Rides, Projects, and Builds”