Hello everyone,
So I now have my car running OK and finally took her for a maiden voyage into town to get some gas and cruised back home by some back roads. I now am looking to fix the next biggest issue which is trying to repair the top. I have not been able to find any threads addressing convertible top repair when I did some searches, so if anyone has had experience with this, your help would be very appreciated. Below you'll see what I am dealing with.
My plan of action is to detach the trim strips from the body and work on re-adjusting the frame assembly first. Once that is done, and I have it so it does not interfere with the windows I will zip the plastic window into place without tension on it. I will even stitch that zipper together if it does not want to stay in place. My plan is to try and then re-position the trim stick lower so that it will reach its mounting points with the top adjusted again. This will be the tricky part and will probably require some material to patch in another 2-4" at the lower end of the curtain area so that it will reach where it needs to go. I do eventually want to put a new top onto this car, but since I also still need to do paint and body work I just want to repair and patch this top for now. The good news is that there are no other holes in the top portion of the top so once this back is closed I am in pretty good shape.
The 64 convertable, chapter 2: top repair
-
GriffinGuru
- Posts: 121
- Joined: Mon Aug 24, 2015 7:07 pm
- Location: Mount Joy, PA
The 64 convertable, chapter 2: top repair
- Attachments
-
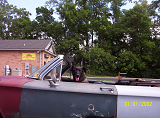
- The back curtain area is pulled away. The plastic window is intact, but due to the stretching, it cannot be zipped. The trim sticks which hold the top to the back wall, are loose and missing bolts in a few places as well
-
- Inside view showing the side curtain flap hanging
-
- This is not as bad as it looks. All the top bracketry was loose, and I had tightened it into place. I ran the hydraulic motor completely to stop and it goes past a level position and continues to pull the back side rails downward and re-fold the top section back again when going to full stop. If I stop it before this it will be "level," but I cannot close the doors with the windows rolled up or they will hit the roof rails even when level.
-
- This %!$# unit has now leaked on me a few times. Each time spilling brake fluid everywhere. I am an inch away from eliminating it completely and finding some manual spring counterweights for the top instead of this hydraulic disaster. As you may be able to tell, there is already a lot of lacquer paint dissolved off this back shelf from the multiple times this POS has leaked or spilled on me.
It keeps me humble:
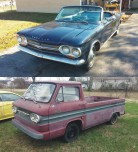
64 Corvair Monza convertible called Lucy (work in progress)
64 Corvair Monza convertible called Lucy (work in progress)
Re: The 64 convertable, chapter 2: top repair
In case you didn't know, One trim stick bolt on each side is shorter than the others.
There is one place on each side (I can't remember which one) that the full length bolt will go all the way through and make contact with the outer body panel, causing damage.
You should be able to check the depth to find the one for the short bolt.
Good luck with the top! I did my first (and probably only) one last December.
There is one place on each side (I can't remember which one) that the full length bolt will go all the way through and make contact with the outer body panel, causing damage.
You should be able to check the depth to find the one for the short bolt.
Good luck with the top!
'64 Spyder Convertible
'63 Rampside (to be Rotisseried)
Toney, Alabama (just outside Huntsville)
'63 Rampside (to be Rotisseried)
Toney, Alabama (just outside Huntsville)
-
GriffinGuru
- Posts: 121
- Joined: Mon Aug 24, 2015 7:07 pm
- Location: Mount Joy, PA
Re: The 64 convertable, chapter 2: top repair
Hi Danny,
The back section is still a big question mark for me at this point. Is yours a power top or a manual top? I removed the trim sticks today and the side pieces do use the shorter bolts. The back trim stick did not have bolts in the side radius areas-just three in the straight section, but those I could imagine should be of the shorter variety as well. the trim stick also did not have rubber spacers that the manual said should be between the trim stick and the body. I don't think the extra 3/8" difference without the rubber spacers will make up my distance that the back section needs to bridge, however.
-Tyler
It keeps me humble:
64 Corvair Monza convertible called Lucy (work in progress)
64 Corvair Monza convertible called Lucy (work in progress)
Re: The 64 convertable, chapter 2: top repair
If my car didn't have a power top from the factory included on the body tag I would get rid of it. Even when it works it doesn't work well and if you read the original convertible top manual even though you have a power top you are still supposed to get out and manually fold the rear window when putting it down, so what's the point? I guess it goes up easy. Mine had leaked too before my restoration. There's a company out there who sells GM power top parts called Hydroe, going all new is probably a good idea.
http://www.hydroe.com/" onclick="window.open(this.href);return false;
http://www.hydroe.com/" onclick="window.open(this.href);return false;
Nick
1964 Monza Spyder Convertible #435 - Rotisserie restored - SOLD ON BRING A TRAILER 4/30/2019 - Check out my restoration thread here: [corvaircenter.com]
Thanks to all the awesome CCF, CF, COG, and CORSA members who helped me with the restoration!
1964 Monza Spyder Convertible #435 - Rotisserie restored - SOLD ON BRING A TRAILER 4/30/2019 - Check out my restoration thread here: [corvaircenter.com]
Thanks to all the awesome CCF, CF, COG, and CORSA members who helped me with the restoration!
Re: The 64 convertable, chapter 2: top repair
Hi Tyler,
My top is a manual, so I can't be any help there.
Nick has a good point about either going manual or rebuilding the hydraulics completely.
You should be able to find the manual parts easily enough, your local Corvair club or asking on the forums would be the first places to try!
My top is a manual, so I can't be any help there.
Nick has a good point about either going manual or rebuilding the hydraulics completely.
You should be able to find the manual parts easily enough, your local Corvair club or asking on the forums would be the first places to try!
'64 Spyder Convertible
'63 Rampside (to be Rotisseried)
Toney, Alabama (just outside Huntsville)
'63 Rampside (to be Rotisseried)
Toney, Alabama (just outside Huntsville)
-
bbodie52

- Corvair of the Month

- Posts: 11909
- Joined: Mon Aug 06, 2012 12:33 pm
- Location: Lake Chatuge Hayesville, NC
- Contact:
Re: The 64 convertable, chapter 2: top repair
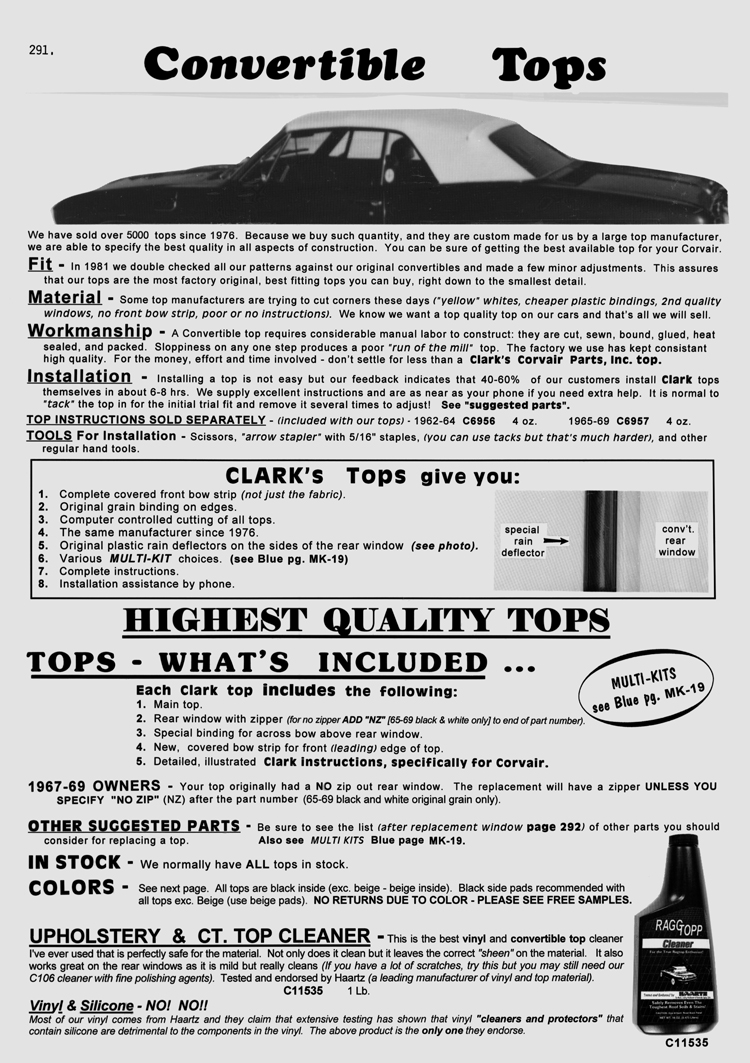
In case you need it, here is some material I gathered in 2014 on convertible top replacement...
I have also attached some material from the 1966 Fisher Body Service Manual that pertains to convertible tops. Perhaps you will find some useful material there.The consensus seems that a kit from a source like Clark's Corvair Parts can be pretty good, but it is a lot of DIY work and professionals probably do it better, because of the unique learning curve and they have the experience and know the "tricks of the trade". I had one done professionally in 1980 but that was my only experience in this arena. Since I still own a Corsa convertible I suppose my time is coming, but it is one area where I think I will defer to the professionals.
Clark's Corvair Parts has an excellent reputation for good interior and upholstery items. There are a number of videos on this site that will take you on a tour of their facilities, and you might enjoy watching them to learn something about what it takes to reproduce so many critical items that help us to keep our Corvairs alive.
viewtopic.php?f=81&t=6004
I've watched them a couple of times and have found them to be very informative. If you are planning a DIY effort to restore your car's interior you might want to watch the video that covers interior reproduction parts — the upholstery tour.
I have not done this work myself, but some time ago I did a little research to find out what is involved. The material I looked at is shown below. Some of it is not Corvair-specific and is more generic in nature, but it should help you to gauge the effort and to see if you feel that you are up for it.
The Clark's Corvair Parts online catalog pages 291-295 covers their convertible top materials. I would suggest clicking on the link below and then browsing through the pages to get a feel for the items that are offered. When browsing their online catalog, just click on any part number to display pricing and availability details.
As you can see below, Clark's indicates that a DIY installation is "not easy" but that 40-60% of their customers do it themselves in 6-8 hours.
CORVAIR CENTER: Replacing Convertible Top
Here is a link to a Car Craft magazine article that discusses a DIY installation at home, entitled: Install A New Convertible Top At Home
Here is a video that discusses this issue when performing a convertible top replacement, in this case on a 1969/1970 Cougar / Mustang
This Web site may also be helpful...
I have extracted the section of the 1966 Fisher Body Service Manual that applies to folding top work. I had to divide it into two parts to make the file size in Adobe Reader (.pdf) format small enough to upload to the Corvair Forum website. The information it contains may be useful to you.
I suspect that there are not a lot of members of the Corvair Forum who have tackled such a project. So if you decide to attempt this DIY project on your Corvair, here is my unofficial invitation to be a volunteer Corvair Forum Guinea Pig. If you decide to do it yourself, might I suggest that you consider providing us with some feedback as you complete your project. We would love to see you document your effort in pictures, video, and perhaps post a detailed write-up telling us of your experience. Such feedback could provide some valuable guidelines and information from your experience for other Corvair owners!
")

Brad Bodie
Lake Chatuge, North Carolina
 1966 Corvair Corsa Convertible
Lake Chatuge, North Carolina
1966 Corvair Corsa ConvertibleRe: The 64 convertable, chapter 2: top repair
Hi Tyler,
I forgot to mention that there is only ONE short bolt on each side. Also, the rubber spacers are what allows water to drain down into the channel below the trim stick, you do need to get some and put them in.
I forgot to mention that there is only ONE short bolt on each side. Also, the rubber spacers are what allows water to drain down into the channel below the trim stick, you do need to get some and put them in.
'64 Spyder Convertible
'63 Rampside (to be Rotisseried)
Toney, Alabama (just outside Huntsville)
'63 Rampside (to be Rotisseried)
Toney, Alabama (just outside Huntsville)
-
GriffinGuru
- Posts: 121
- Joined: Mon Aug 24, 2015 7:07 pm
- Location: Mount Joy, PA
Re: The 64 convertable, chapter 2: top repair
Hi again, here is my current update:
I have adjusted the top bracketry so that I can close both doors with the windows up and also roll up the quarter glass windows! I think the passenger side still needs to come up a little more, but it is a long way from where it was.
I removed the staples and trim strips from the back area so that I can work with the plastic window. Without the extra added tension and cloth in the way, I was able to work the zipper completely through and zip it into place. There were a few areas where the zipper teeth were missing or otherwise messed up and the zipper did not mesh in those areas. To avoid having to deal with that situation again I hand stitched across the zippers in those areas to prevent them from accidently pulling apart any further. I was not aware that it was recommended to manually fold down the back window each time you move the top down. That will not be an option for me, but since I am still dealing with an old window section that is torn at the bottom anyway, I am not too worried about putting the top down with the window still up. Now if that creates odd folding or binding issues when stacking the top I will cross that bridge at that time.
I can see my hydraulic cylinders do drift a little after running them up, but I think I have the lever arm adjusted enough that even when they sag to a settled position the door windows still clear the top bar. I plan on making a trip down to the Corvair Ranch on Thursday and plan to look into a manual top spring set and hold down clips (possibly in the Corvair, but we'll see if I can trust her that far). I'll at least explore my options and price feasibility, and also pick up some other items I need like the e-brake connector/tensioner that joins the two cables since my hardware is completely missing.
- Attachments
-
- passenger's side with windows up
-
- driver's side
-
- passenger side closer view: The window is hitting higher on the weatherstrip rubber and it is holding the window outward some
-
- The back plastic window in place and trim sticks removed. I also want to sand and prime/spray paint blank that inner area where the trim sticks will attach since there is a little surface rust starting there.
-
- A close up of the zipper stiches
It keeps me humble:
64 Corvair Monza convertible called Lucy (work in progress)
64 Corvair Monza convertible called Lucy (work in progress)

Re: The 64 convertable, chapter 2: top repair
Nice job making some forward progress
Jeremy (cad-kid)
Kronenwetter, WI (Central Wisconsin)
SOLD 9-2016 65 Monza 4spd/140
My 65 Monza thread
 My YouTube page
Kronenwetter, WI (Central Wisconsin)
SOLD 9-2016 65 Monza 4spd/140
My 65 Monza thread
-
Corventure Dave
- Posts: 450
- Joined: Tue Sep 06, 2011 8:35 am
Re: The 64 convertable, chapter 2: top repair
Nice thing about Early Convertibles, is the top frame can be power or manual. Not so lucky with the Late models.
I have read that using DOT 5 silicone brake fluid will avoid the paint damage with a leaking Hyd pump or pistons.
Getting the top frame aligned and the top installed and working, is not an easy job. It takes lots of trys to get things aligned right,
including the side windows. I have installed a few tops myself. It takes about 10 hours for me! I'm no pro but have been able to show
at least one convertible in concours, and score in the mid+ 90's. So I must have done something right!
Keep us posted on your progress.
Corventure Dave
-
GriffinGuru
- Posts: 121
- Joined: Mon Aug 24, 2015 7:07 pm
- Location: Mount Joy, PA
Re: The 64 convertable, chapter 2: top repair
Hi Dave,
Progress has been slow lately as I don't know if my plan to patch and re-attach the back curtain is actually feasible. I do not really want to spend the time replacing the top at this point since the body REALLY needs to be addressed first.
I went to the Corvair Ranch this past Thursday and was able to get some top material from a junkyard LM (and other needed parts, of course; that place is really cool by the way and if they don't have what you're looking for then I don't know who would). Most of the old tops in the junkyard are of course brittle and cracked after sitting in the yard and weather for decades, but the top I found was still pliable on this particular car, so I cut a 1' x 2' swath off from the roof section of that top. I am now at the point of trying to research what glue I can use to join a 4" strip to the bottom of my curtain. With my extra material I am going to do some glue tests. Since the top material is vinyl (I think, right?) I will try the two part PVC pipe cement with the purple primer. If that does not stick, then I will be looking at some other formula: Rubber based yellow adhesive, epoxy, superglue??? 
As I said I don't know if my plan to patch this is really feasible or not at this point, but now I have some material to work with so I'll give it a try and see what happens.
Progress has been slow lately as I don't know if my plan to patch and re-attach the back curtain is actually feasible. I do not really want to spend the time replacing the top at this point since the body REALLY needs to be addressed first.
I went to the Corvair Ranch this past Thursday and was able to get some top material from a junkyard LM (and other needed parts, of course; that place is really cool by the way and if they don't have what you're looking for then I don't know who would). Most of the old tops in the junkyard are of course brittle and cracked after sitting in the yard and weather for decades, but the top I found was still pliable on this particular car, so I cut a 1' x 2' swath off from the roof section of that top. I am now at the point of trying to research what glue I can use to join a 4" strip to the bottom of my curtain. With my extra material I am going to do some glue tests. Since the top material is vinyl (I think, right?) I will try the two part PVC pipe cement with the purple primer. If that does not stick, then I will be looking at some other formula: Rubber based yellow adhesive, epoxy, superglue???
As I said I don't know if my plan to patch this is really feasible or not at this point, but now I have some material to work with so I'll give it a try and see what happens.
It keeps me humble:
64 Corvair Monza convertible called Lucy (work in progress)
64 Corvair Monza convertible called Lucy (work in progress)
Re: The 64 convertable, chapter 2: top repair
Yes, in my opinion, I would say that your plan is really wise and feasible. However, I think you sould consider replacing your curtains with https://hovement.com/best-soundproof-curtains/. I understand that they respond best when reattached at whichever side. You may also find it helpful in minimising disturbance to the environs as you carry out your operations.GriffinGuru wrote: ↑Sun Sep 27, 2015 8:21 am Hi Dave,
Progress has been slow lately as I don't know if my plan to patch and re-attach the back curtain is actually feasible. I do not really want to spend the time replacing the top at this point since the body REALLY needs to be addressed first.
I went to the Corvair Ranch this past Thursday and was able to get some top material from a junkyard LM (and other needed parts, of course; that place is really cool by the way and if they don't have what you're looking for then I don't know who would). Most of the old tops in the junkyard are of course brittle and cracked after sitting in the yard and weather for decades, but the top I found was still pliable on this particular car, so I cut a 1' x 2' swath off from the roof section of that top. I am now at the point of trying to research what glue I can use to join a 4" strip to the bottom of my curtain. With my extra material I am going to do some glue tests. Since the top material is vinyl (I think, right?) I will try the two part PVC pipe cement with the purple primer. If that does not stick, then I will be looking at some other formula: Rubber based yellow adhesive, epoxy, superglue???
As I said I don't know if my plan to patch this is really feasible or not at this point, but now I have some material to work with so I'll give it a try and see what happens.
Cheers!
-
GriffinGuru
- Posts: 121
- Joined: Mon Aug 24, 2015 7:07 pm
- Location: Mount Joy, PA
Re: The 64 convertable, chapter 2: top repair
I forgot about this post. Well, I was not able to fully "patch" the curtain area, and since I am in the middle of doing lots of body work, I am not worrying about getting the top fully perfect at the moment. Here is what I did instead, and I hope it helps give others some ideas as to what to do with a torn top. I will eventually replace the entire top, but this will not happen until the car is painted.
- Attachments
-
- I used those pieces of top material and folded them into a loop roughly 8" long when folded. I glued the entire loop with Gorilla glue and clamped it flat sandwiching the curtain in between.
-
- I have 5 of these loops holding the curtain roughly into shape, 1 loop on each side, and 3 loops across the plastic rear window. This helps to keep the top in shape somewhat and slope back properly so that it doesn't look too bad when it is up. This setup has held now for almost 2 years.
It keeps me humble:
64 Corvair Monza convertible called Lucy (work in progress)
64 Corvair Monza convertible called Lucy (work in progress)
-
emceebrooks

- Posts: 34
- Joined: Thu Oct 19, 2017 3:41 am
Re: The 64 convertable, chapter 2: top repair
This was super helpful, at least enough to know that I'd probably do better to have a professional work on the top. We recently purchased a 64 Convertible, and the top looks to be in really good shape, but a previous owner (before the guy I purchased it from) it seems cut out/detached the top of the back window (the zipper that was sewn into the top). The window looks to be in excellent condition too- clear and not scratched. I've taken it to two upholstery repair places and they have said they "might" be able to repair it-- but both have said it requires removing the top, reattaching the zipper to the top, and then reinstalling it for between $400-500. Does that sound reasonable? I know it's labor intensive, it just sounds high, especially with other repairs I'm needing to do. But it's not very useful in cold weather without the rear window! Thanks in advance.
Marcus Brooks
Columbus, OH / Orlando, FL
'64 Monza Convertible
Columbus, OH / Orlando, FL
'64 Monza Convertible