John’s 65 sedan

Show of your ride, keep track of your project, watch as others progress on their projects
Project65
Posts: 409
Joined: Tue Dec 07, 2021 8:03 pm
Location: Pennsylvania

Re: John’s 65 sedan

Post by Project65 »

Spent a few hours today rebuilding the rear windows. I went to the length of replacing all of the vertical rollers on the window brackets along with the pieces of rubber between the brackets and the glass.

The Clark’s rollers definitely are not as let’s say “tight” as the original ones. Due to tolerances in the pieces, they have some play but definitely move with ease. The rivets, I decided to modify by shortening by putting each one in a vise and cutting it with a wafer wheel on a hand grinder. Shortening them reduced them splitting-out when I clinched them down.

I cleaned up all hardware and vertical channels in the media blasting booth, and painted everything with rust oleum silver.

Of all the rubber pieces that I bought from Clark’s and Amazon, none of them seemed just right. :think: I had an old bicycle inner tube which seemed to be the perfect thickness and allowed me to trim to size. Once cut to shape, I reassembled everything.

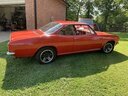
Here’s some photos of the rebuilt rear windows. :tu:
Attachments
Before
Before
After.  A much nicer passenger rear.
After. A much nicer passenger rear.
And drivers side rear.
John
1965 Monza Sedan “The Phoenix”. Rebuild in Progress.
Project65
Posts: 409
Joined: Tue Dec 07, 2021 8:03 pm
Location: Pennsylvania

Re: John’s 65 sedan

Post by Project65 »

Started cleaning up and repairing the window scissors. I started with the drivers rear side. I cleaned up the old grease with gasoline and a brush . One of the rollers was cracked badly so I replaced it. The roller rivet worked better on the scissors as the steel is thicker. No need to cut with the wafer wheel.

I bagged and taped off the crank mechanism then media blasted and painted.

I also media blasted the channels and that cleared out the old crusty grease. Then also painted the channels.

The other rollers were in good shape and with a little PB blaster, everything is rolling nicely!

The scissors and channels look great! Ready for grease and install. :tu:
Attachments
Before
Before
Cracked rolled.  Replaced with a new one.
Cracked rolled. Replaced with a new one.
Cleaned up.  Looks great.  (The brackets shown won’t be installed).
Cleaned up. Looks great. (The brackets shown won’t be installed).
John
1965 Monza Sedan “The Phoenix”. Rebuild in Progress.
Project65
Posts: 409
Joined: Tue Dec 07, 2021 8:03 pm
Location: Pennsylvania

Re: John’s 65 sedan

Post by Project65 »

I’ve restored all of the window mechanisms. Once installed, I’ll grease the tracks.

I moved on to restoring the parking brake assembly. My original worked but was completely rusted. I decided to harvest the one from the donor and use it.

After complete disassembly, media blasting, primer/paint, and reassembly, it looks 58 years newer! :tu: I’ll grease everything and install a new foot pad prior to install.

Cleaning this up was a trick. A bucket filled with gasoline and various brushes and picks to dig out all of the old grease. I even resorted to using some gun cleaning brushes and a .22 caliber bore brush to get into the tight areas. :assault:
Attachments
Dirty, greasy, and rusty donor before.  That was thick grease on the ratchet mechanism.
Dirty, greasy, and rusty donor before. That was thick grease on the ratchet mechanism.
Afterwards.  Much nicer!
Afterwards. Much nicer!
Another angle.
Another angle.
John
1965 Monza Sedan “The Phoenix”. Rebuild in Progress.
User avatar
Dennis66
Posts: 761
Joined: Sat Nov 12, 2022 10:23 am
Location: St Petersburg Fl.

Re: John’s 65 sedan

Post by Dennis66 »

That looks great. Gasoline as a cleaning agent. So many worry about that. Many years ago I worked in a mower shop. We each had a half gallon container on our benches filled with gasoline (back when it was REAL gasoline). Yes, there is a fire hazard. Yes it can be damaging to skin. Bottom line, follow some kind of safety and protective procedures. I used to have a friend who owned a mower shop (where I worked before). I could get as much "stale gas" as I wanted for cleaning purposes, unfortunately he sold the business and retired a few years back. I still get a little old gas now and then from fixing mowers for folks here and there. Gun cleaning kits come in handy too. I used a .22 cleaning rod to clean the passages on my crankshaft and it worked pretty good. Looking forward to more progress. Dennis
Project65
Posts: 409
Joined: Tue Dec 07, 2021 8:03 pm
Location: Pennsylvania

Re: John’s 65 sedan

Post by Project65 »

:woo:
The other day I received some progress photos of the car in the shop from my good friend and fellow club member. The wet sanding was underway. Getting closer to painting.

Tonight, the owner of the shop sent me photos of the car in paint. When I saw them, it took my breath away. I think it looks fabulous! Decided to go with the Madeira Maroon Metallic (N-N). 3 coats of base and 3 coats of clear. He just finished painting it tonight. Will give it a few days to cure. Final steps will include wet sanding and buffing. Needless to say that tonight I am all smiles! ::-):

Next will be the doors, hood, and engine cover.

Here’s a few photos.
Attachments
Madeira Maroon looks so good on you!
Another view
Another view
IMG_3907.jpeg
John
1965 Monza Sedan “The Phoenix”. Rebuild in Progress.
66vairguy
Posts: 4651
Joined: Tue Dec 21, 2010 3:44 pm

Re: John’s 65 sedan

Post by 66vairguy »

Looks great. I usually do three coats base, three coats clear. DO NOT wet sand for3-4 weeks. The clear hardens fast, but then it will continue to shrink just a little for weeks. Wet sanding and buffing results are better if the clear is fully cured. Just my 2 cents.
User avatar
Dennis66
Posts: 761
Joined: Sat Nov 12, 2022 10:23 am
Location: St Petersburg Fl.

Re: John’s 65 sedan

Post by Dennis66 »

YAAAAAAA-WOW!!!!! How did I miss this last night? Looking beyond great. Dennis
Beers
Posts: 178
Joined: Sun Jun 07, 2020 5:38 pm
Location: SF Bay Area, CA

Re: John’s 65 sedan

Post by Beers »

Outstanding! Color looks sharp John, congrats!
1963 Monza Spyder convertible
66vairguy
Posts: 4651
Joined: Tue Dec 21, 2010 3:44 pm

Re: John’s 65 sedan

Post by 66vairguy »

If you haven't polished the stainless trim yet I recommend this item from Harbor Freight. They are inexpensive and when the wheel gets loaded up just go to a new kit. See https://www.harborfreight.com/4-piece-b ... 43657.html

I don't like using a BIG polishing wheel on a shop grinder motor since it can "catch" the trim and bend it up badly!!

I tape the trim to a board (or big piece of cardboard) to keep the polishing wheel from catching the trim and use an electric hand drill you put the buffer wheel in. Spin the wheel on the compound bar (you don't need much) and polish the trim --- RED first, then finer WHITE. You'll be amazed how nice it comes out. Dents can be CAREFULLY pushed out, sanded level (like paint - 600, 1,000, 2,000 then polish). A LOT of labor, but it will look like chrome when done.
Project65
Posts: 409
Joined: Tue Dec 07, 2021 8:03 pm
Location: Pennsylvania

Re: John’s 65 sedan

Post by Project65 »

:ty:
Thank you all for the kind comments! I’m really excited about how this is progressing. It’s looking absolutely fantastic and can’t wait to see it all in paint. Then there’s the interior color and I can’t wait to see that also along with the exterior. I think the color combination will be striking. The interior will be fawn, so it will have “bronze” paint on the dashboard and doors. That along with the silver dash panels….

I haven’t polished any chrome trim yet. I may have some installed at the shop before I bring it home…like around the windows and rain gutters. So I’ll look into getting them all ready here in the near future.
John
1965 Monza Sedan “The Phoenix”. Rebuild in Progress.
66vairguy
Posts: 4651
Joined: Tue Dec 21, 2010 3:44 pm

Re: John’s 65 sedan

Post by 66vairguy »

Project65 wrote: Sun Nov 19, 2023 4:12 pm :ty:
Thank you all for the kind comments! I’m really excited about how this is progressing. It’s looking absolutely fantastic and can’t wait to see it all in paint. Then there’s the interior color and I can’t wait to see that also along with the exterior. I think the color combination will be striking. The interior will be fawn, so it will have “bronze” paint on the dashboard and doors. That along with the silver dash panels….

I haven’t polished any chrome trim yet. I may have some installed at the shop before I bring it home…like around the windows and rain gutters. So I’ll look into getting them all ready here in the near future.
Yes let the shop install the trim, that way if they scratch the paint, they have to fix it. Be forewarned the new paints are thicker and getting the drip rail stainless trim on can be difficult.

My four door has a fawn interior. Everyone liked the fawn color and it is cooler in the sun.
Project65
Posts: 409
Joined: Tue Dec 07, 2021 8:03 pm
Location: Pennsylvania

Re: John’s 65 sedan

Post by Project65 »

I’m going to have the shop install the front and rear windshields and trim, plus likely the rain gutter trim pieces.

So tonight I received a few more updates. Wet sanding and buffing is just getting started. Wow does the paint reflection look DEEP! It’s just getting started and I can’t believe it. :eek: From the photos, it’s like a mirror finish. It does have metallic flake in the paint. Should look great in the sun! :cool:

Click on the photo for better resolution.
Attachments
Look at the reflection.  Even the reflection of the rag on the top of the fender.  Wow!
Look at the reflection. Even the reflection of the rag on the top of the fender. Wow!
Another view.
Another view.
John
1965 Monza Sedan “The Phoenix”. Rebuild in Progress.
User avatar
Dennis66
Posts: 761
Joined: Sat Nov 12, 2022 10:23 am
Location: St Petersburg Fl.

Re: John’s 65 sedan

Post by Dennis66 »

That's beautiful. Dennis
66vairguy
Posts: 4651
Joined: Tue Dec 21, 2010 3:44 pm

Re: John’s 65 sedan

Post by 66vairguy »

That looks great. Clear coats are nice since you can sand and buff them without affecting the base color. While some clear coats look too shiny, if you wet sand and buff them they will look just the original acrylic lacquer. Of course that takes labor and costs more.

I've learned there are different clear coat types.
Low solids are less expensive, but easier to apply.
Mid solids are a good blend between ease of application and durability.
High solids are very durable, but not easy to apply without getting some orange peel and require top notch equipment and experience.

For a hobby car that will be garaged a mid solids clear coat is a good choice and will last decades.

Looking forward to seeing it all done.
Project65
Posts: 409
Joined: Tue Dec 07, 2021 8:03 pm
Location: Pennsylvania

Re: John’s 65 sedan

Post by Project65 »

Thanks guys. I was able to make a quick trip to the shop today. Progress continues between other jobs, but it really looks better in person. I didn’t even want to touch it! It’s half-way buffed out (first-pass). It looks gorgeous!

The car previously had the rear cove painted Corsa Argent Silver, and I wanted to go back with the same look. Also to add another little twist, I’m going with the Corvair script emblem on the front.

Here’s a few photos.
Attachments
Front
Front
Rear
Rear
Roof
Roof
Rear pillar (that I cut and welded back together.)
John
1965 Monza Sedan “The Phoenix”. Rebuild in Progress.
User avatar
doug6423
Posts: 399
Joined: Mon Jun 03, 2019 10:57 am

Re: John’s 65 sedan

Post by doug6423 »

Really beautiful!!

I personally like the silver cove on the LM's. Previous owner did it to my 110 and I really like it.
65 Monza
Cincinnati, OH
Post Reply

Return to “Member's Rides, Projects, and Builds”