Upgraded: Corsa Coupe 2.0
-
ncwitte
- Corvair of the Month

- Posts: 162
- Joined: Sat Jul 07, 2012 4:32 am
- Location: Lansing, Michigan
- Contact:
Re: Upgraded: Corsa Coupe 2.0
sailadams, glad you like the Ninety Eight. The only old car I've had longer is this Corsa; I bought the Ninety Eight in 1992. It's very original but I think after I've finished with the upgrades it will be time to do a resto on the Olds. It's well-loved in our family.
Norm Witte
Lansing, Michigan
'65 Corsas: 140 coupe and 180 convertible
http://www.wittelaw.com/personal
viewtopic.php?f=52&t=4208
Lansing, Michigan
'65 Corsas: 140 coupe and 180 convertible
http://www.wittelaw.com/personal
viewtopic.php?f=52&t=4208
-
ncwitte
- Corvair of the Month
- Posts: 162
- Joined: Sat Jul 07, 2012 4:32 am
- Location: Lansing, Michigan
- Contact:
Re: Upgraded: Corsa Coupe 2.0
Part 8: Pet-Proof Screen
March 14, 2015
We are back up at my mom's in Harrison and my brother Rich is here with his son Charlie from Tennessee to celebrate my mother's birthday. Our idea of fun is working on a project, so we are working on the package shelf.
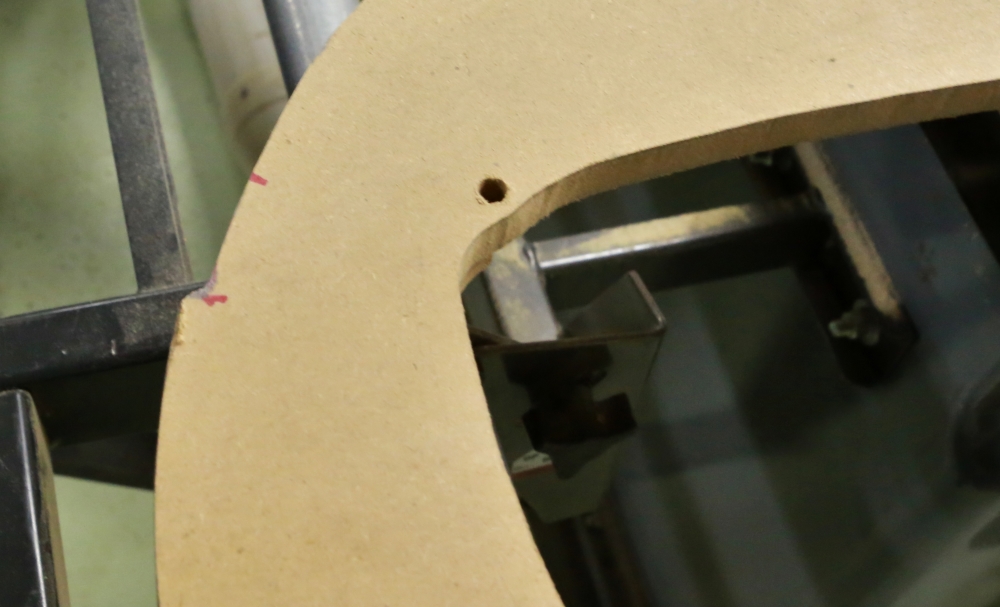
We started by clamping on the old cardboard, which we're going to use as a template for a Masonite replacement. For some reason, the cardboard is a little short, so we will have to modify the part slightly to fit.
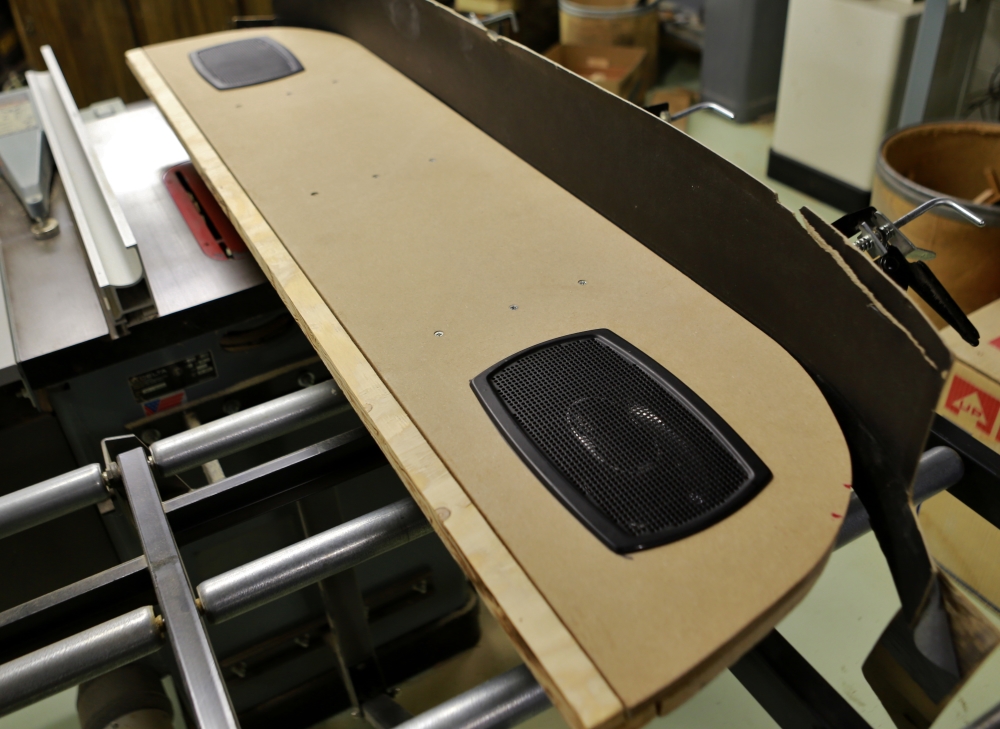
The red marks in the picture above show where the sheet metal on the body is tight against the shelf. If you look at the last picture on the previous page, you can see that the shelf is tight in against the metal where the little plastic trim pieces used to go on the cardboard. So that means the shelf will have to be relieved so that there is room for the Masonite. First step is marking the material to be removed.
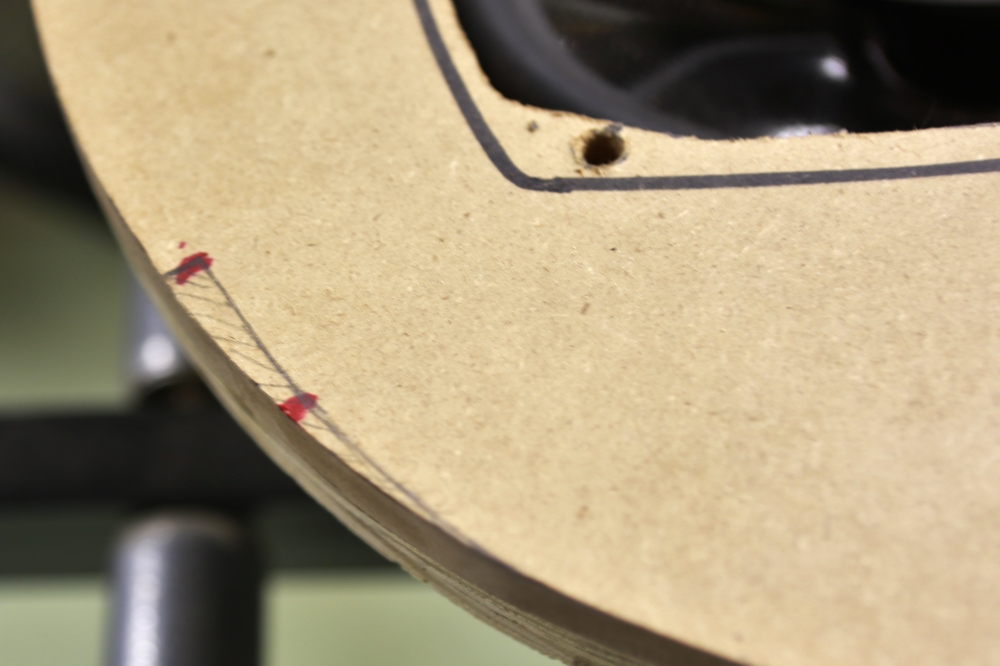
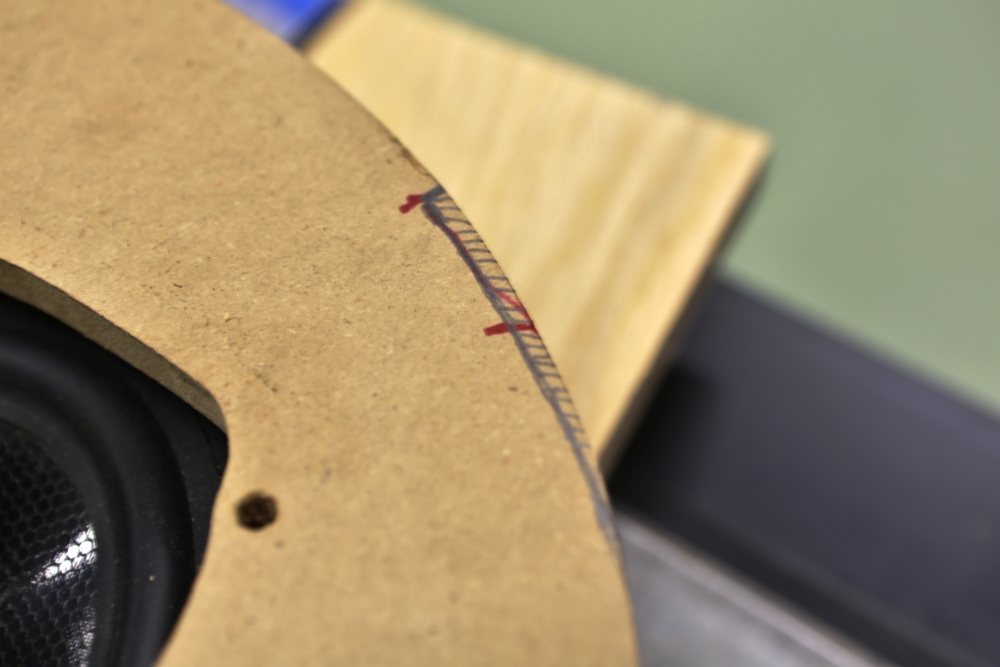
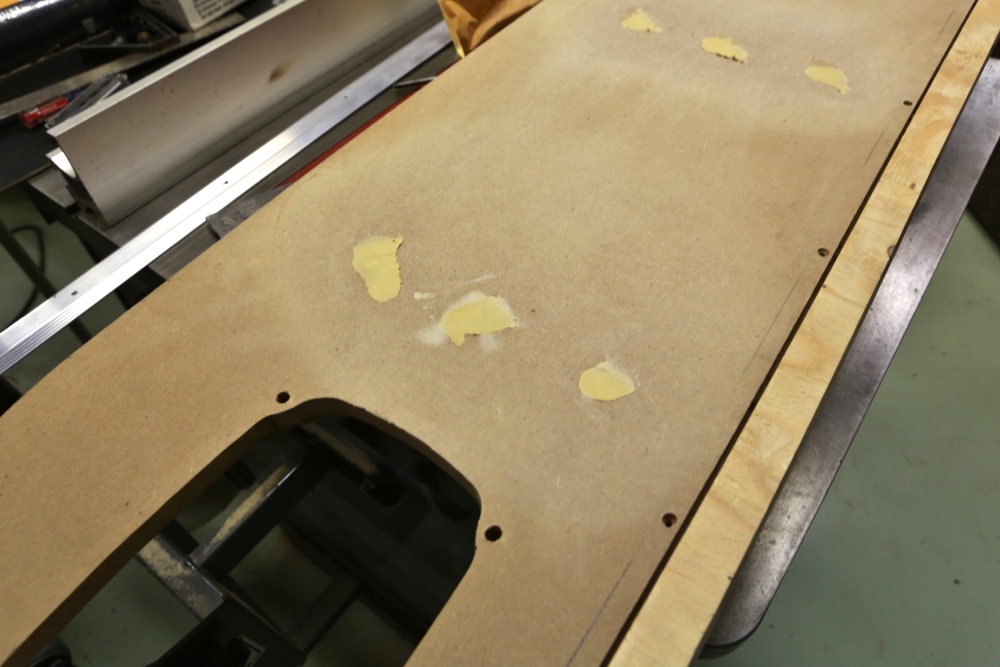
I used one of the large sanders to remove the marked areas.
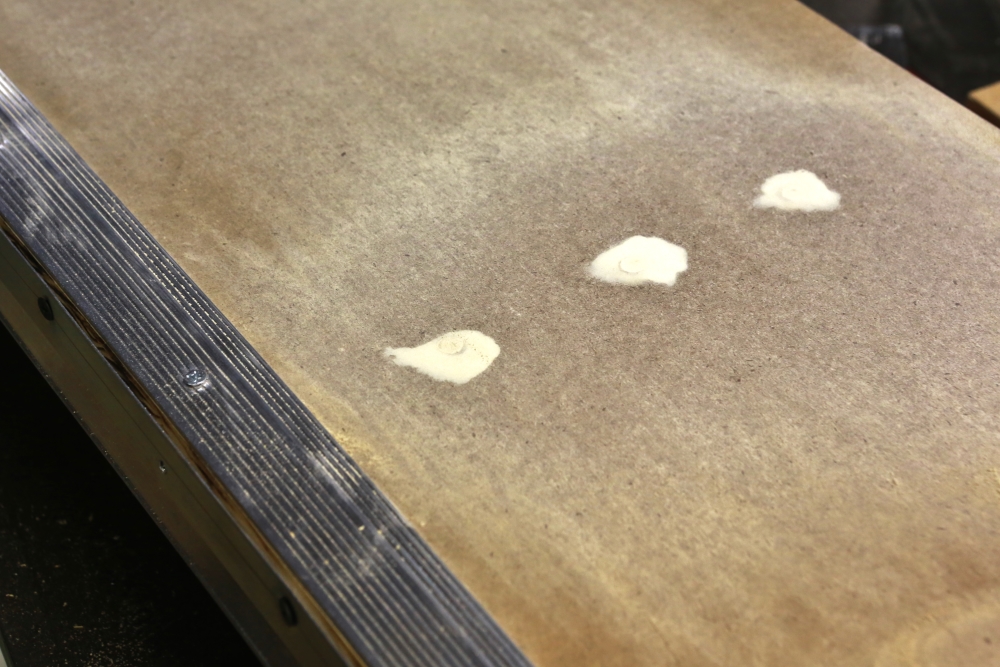
We got some wood putty and used it to cover the screw holes on the top of the shelf.
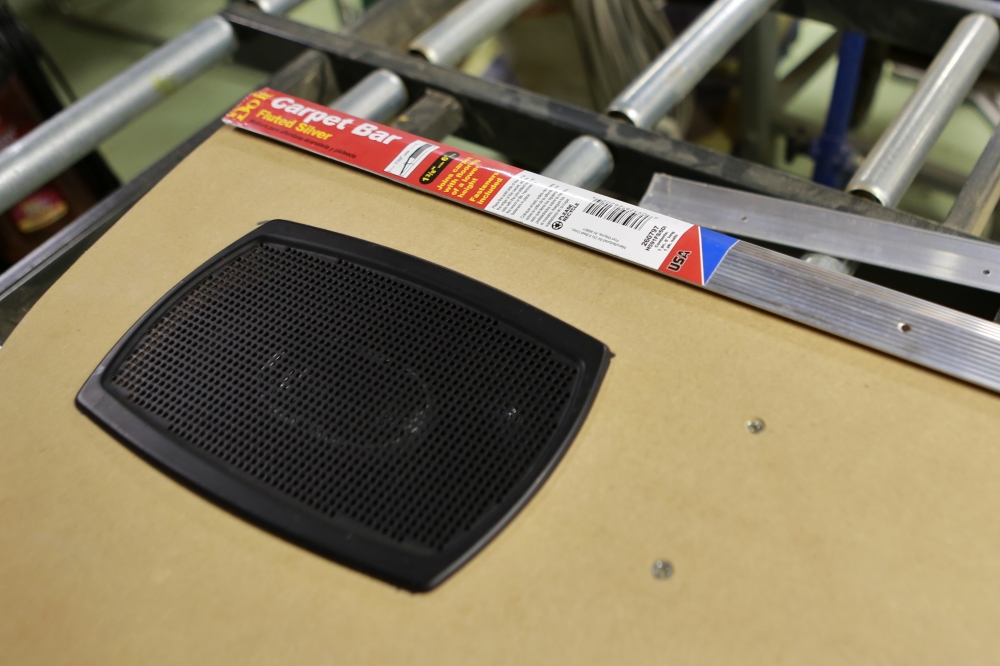
Rich and I went to the hardware store and we got some trim to use for the base of the vinyl transition piece at the front of the package shelf.
We're screwing the trim to the shelf rather than nailing. The screws will be covered with foam and then vinyl, but we still needed to work the trim a bit to make sure the screws won't be noticeable through the trim material.
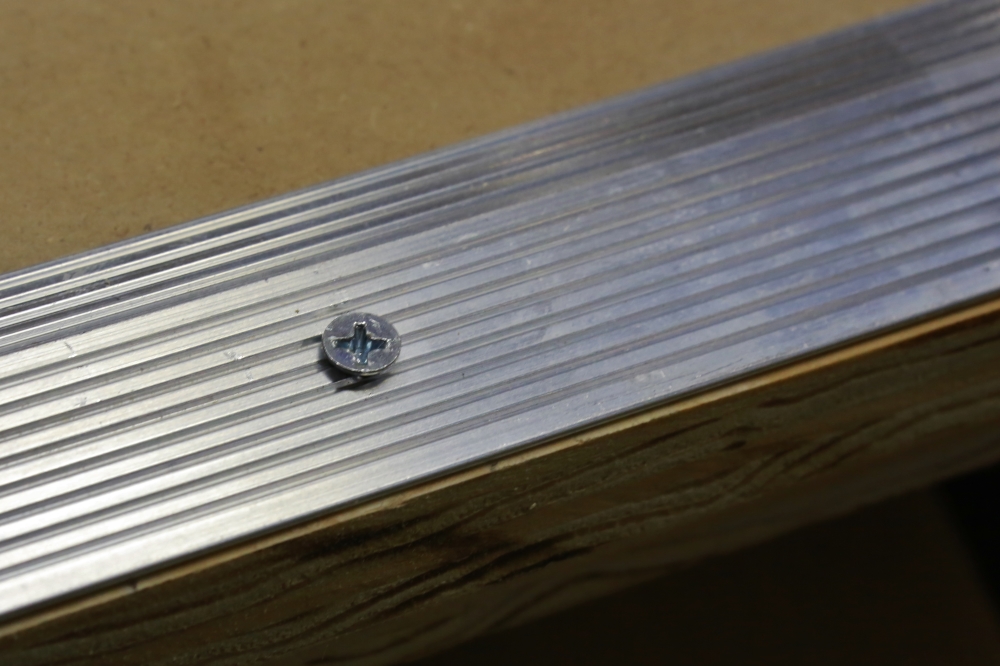
Here is one of the original holes:
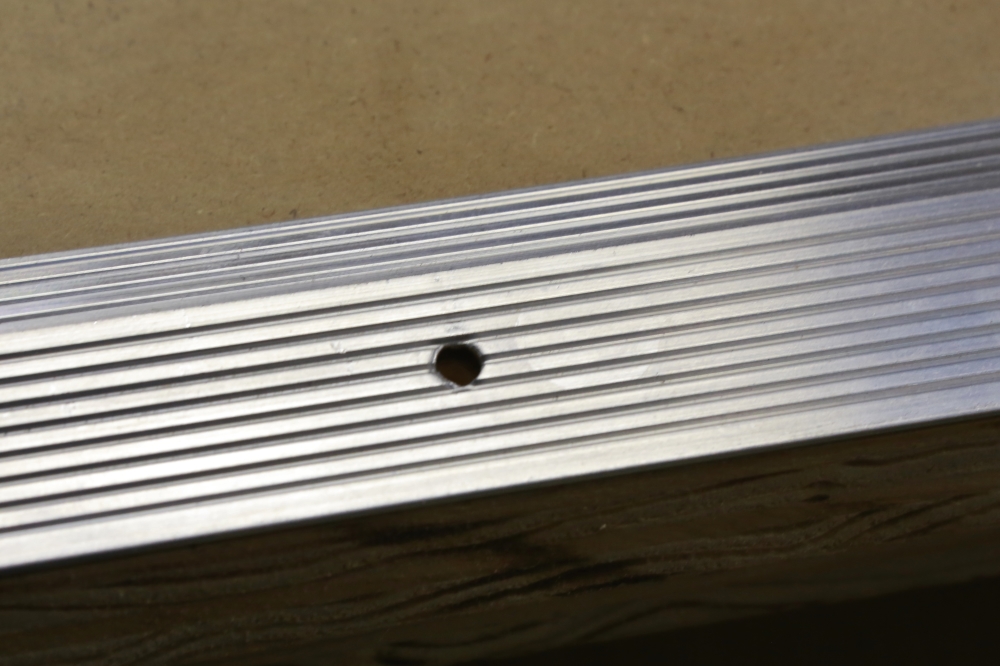
If we just used these holes as is, it would look like this:
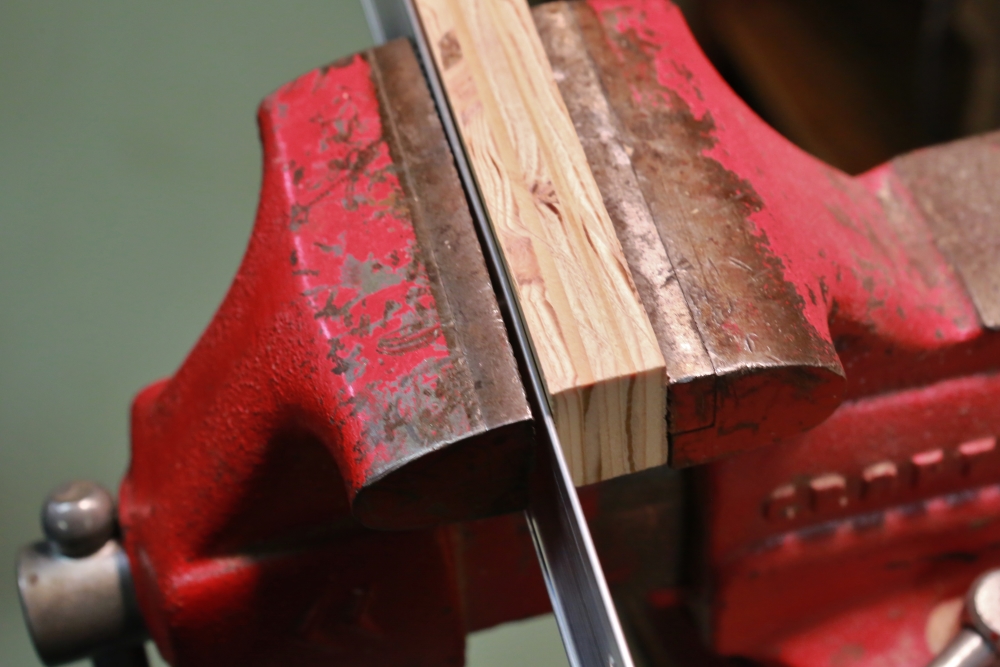
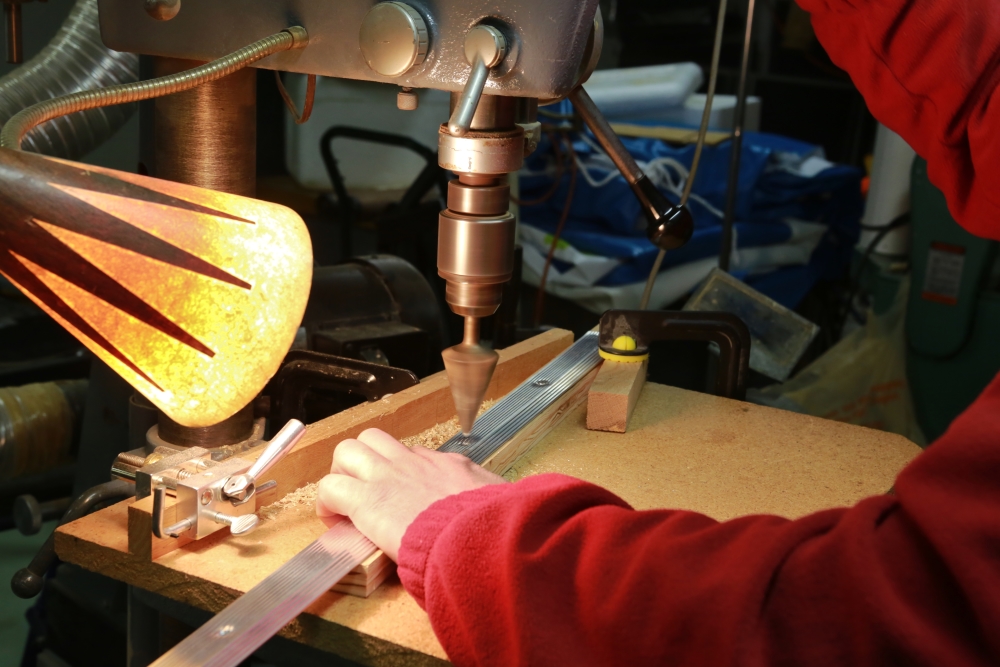
This would certainly be noticeable through the trim material. The first step to addressing this was to drill a hole in a small block. This was then used with a bench vise and one of the screws to bend the metal down around the hole.
After this Rich reamed the holes a bit to give them a little more bevel.
He used a belt sander on the back to dress the hole so that the trim would sit down flat.
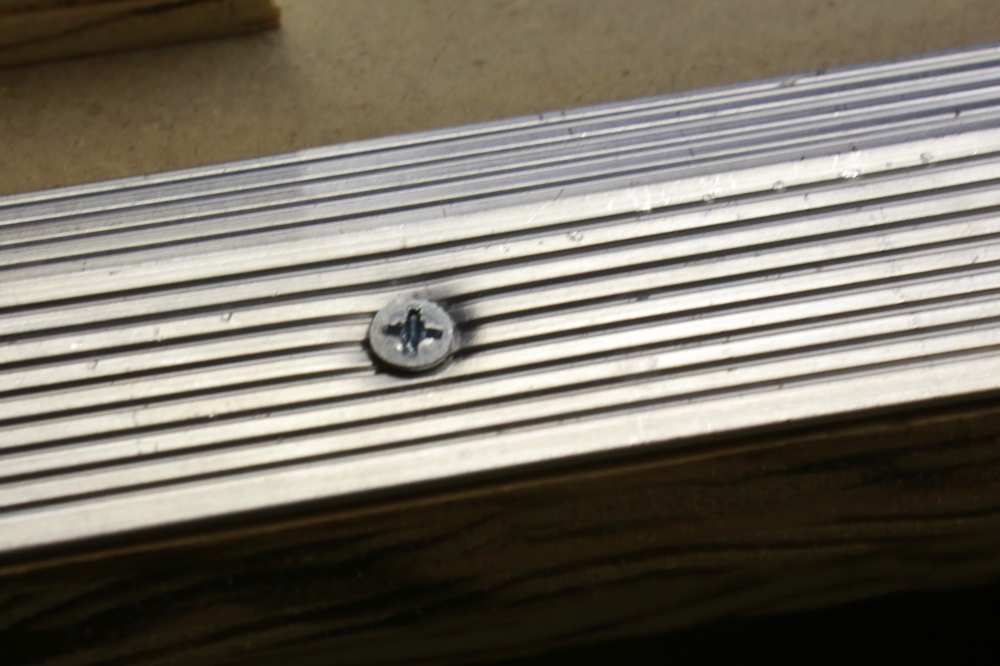
After these modifications the screws fit in like this:
Here is what the trim looks like when attached.
Here's Rich sanding down the putty.

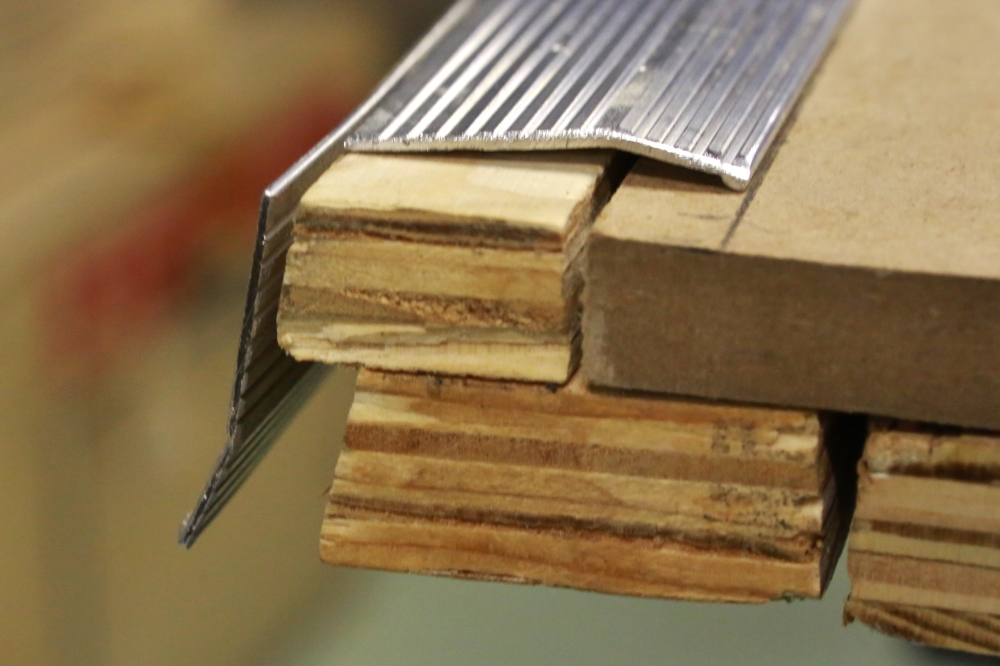
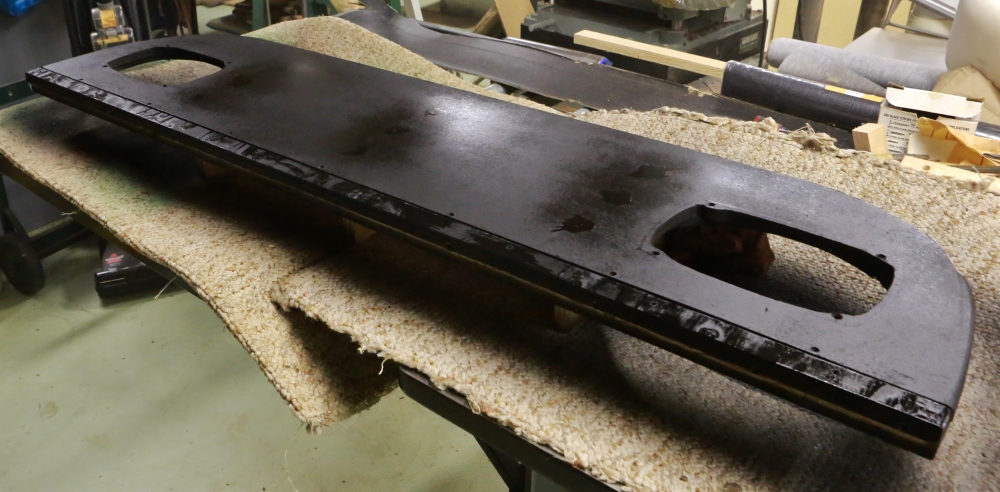
This next picture shows the top and front trim attached. The foam will cover the screw areas but will stop at the seam.
This end picture shows how there is an area to trap the front panel.
Progress on sanding down the putty.
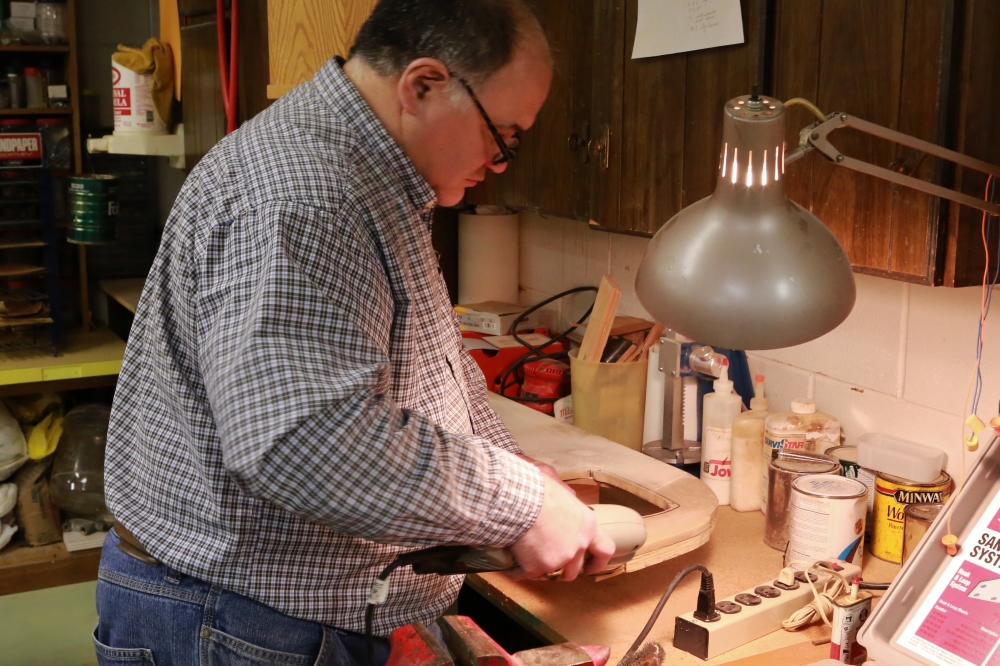
Because the shelf fits very tightly, we decided to radius the ends so that it will go in easier. Here I am working on it with a contour sander.
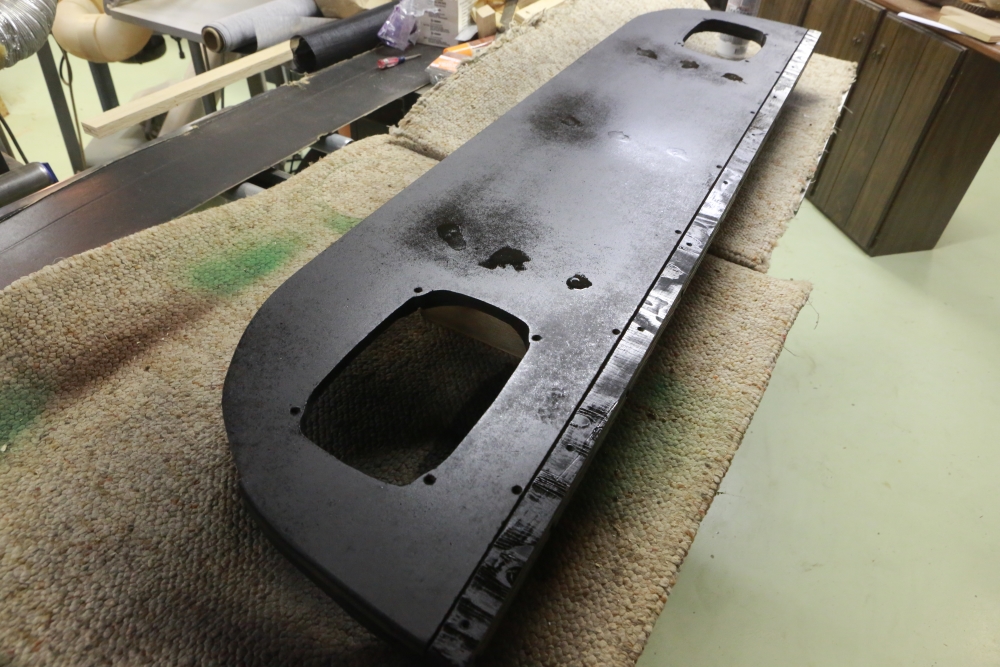
Next came a base coat of black paint.
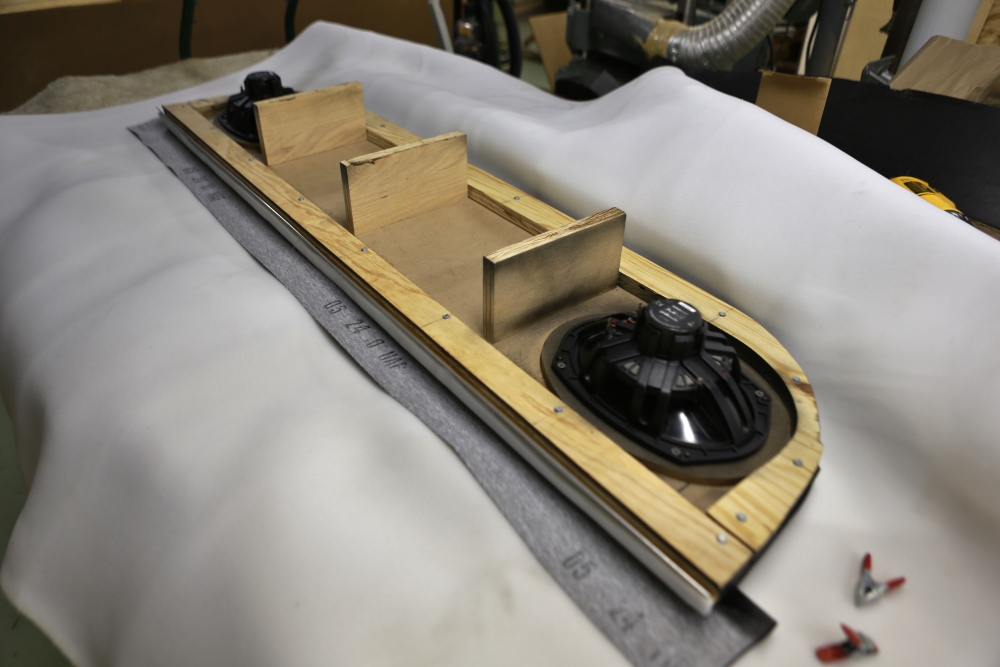
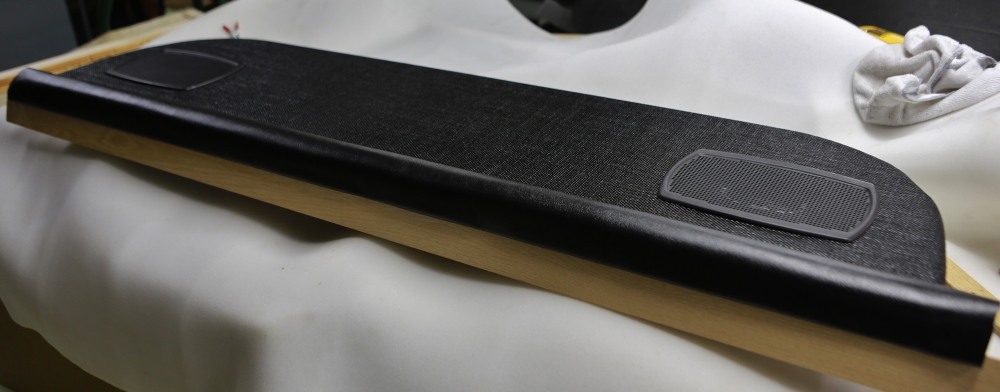
As previously mentioned, the plan was to cover the shelf with pet-proof screen, which seems to to do a nice job of approximating the material used on the package shelf of my '63 Olds. Unfortunately I didn't take pictures while we were applying the screen material, but we unscrewed the bottom trim, glued down the screen, and then wrapped it around the edges. These pictures show the end result after the bottom trim was reattached. We also screwed the top trim on and put on the speaker grilles just to add a little pressure while the glue is drying.
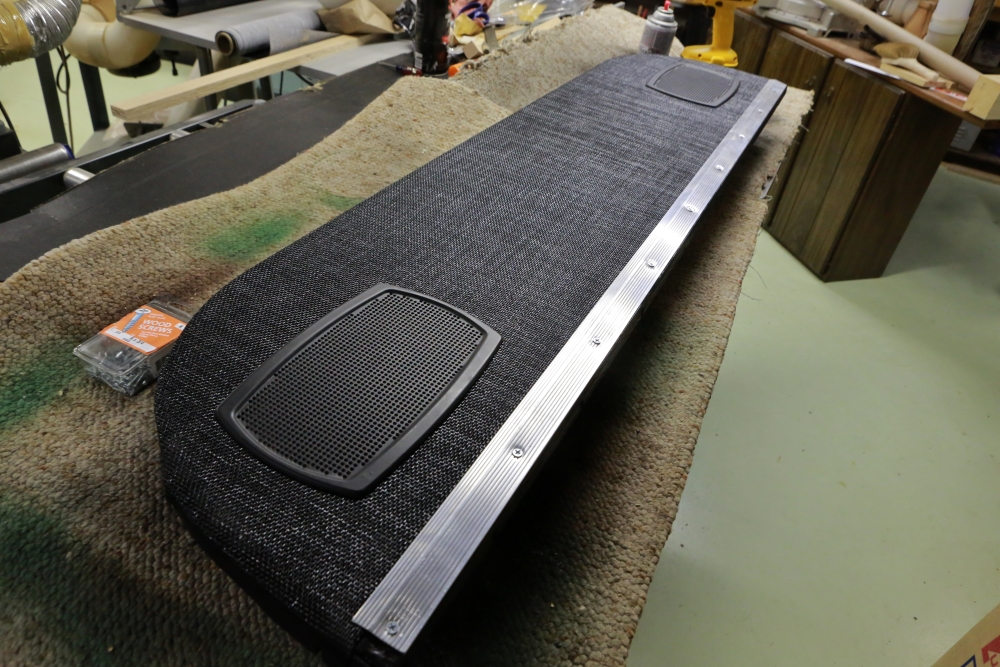
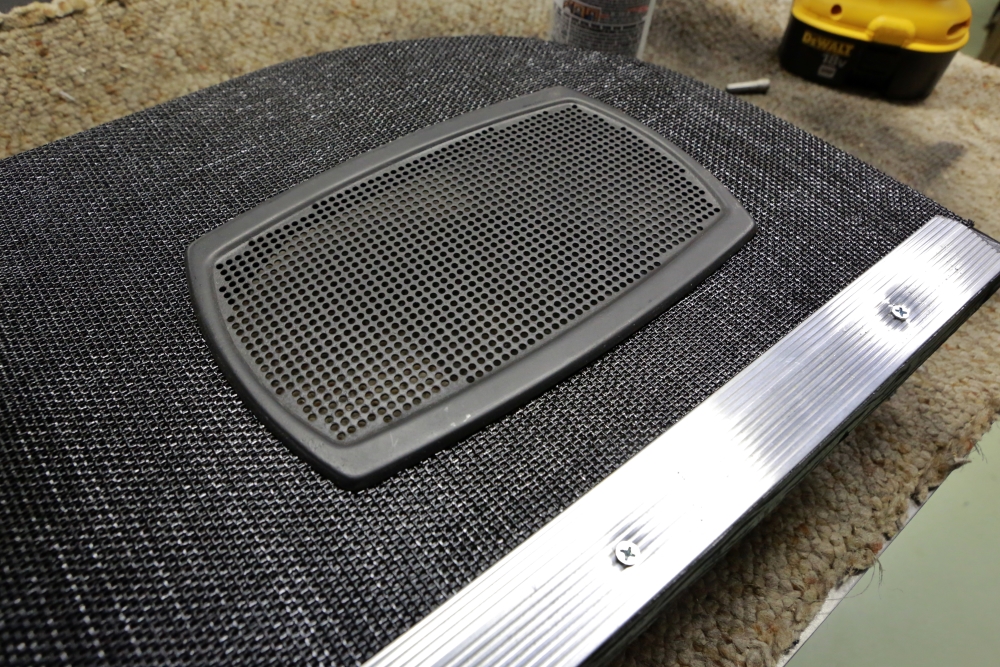
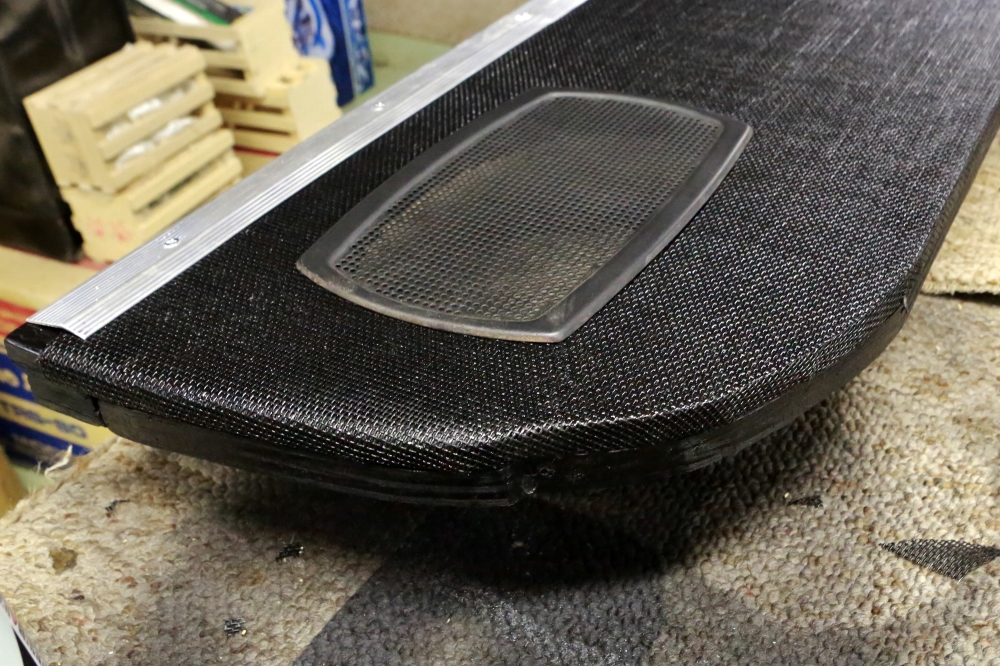
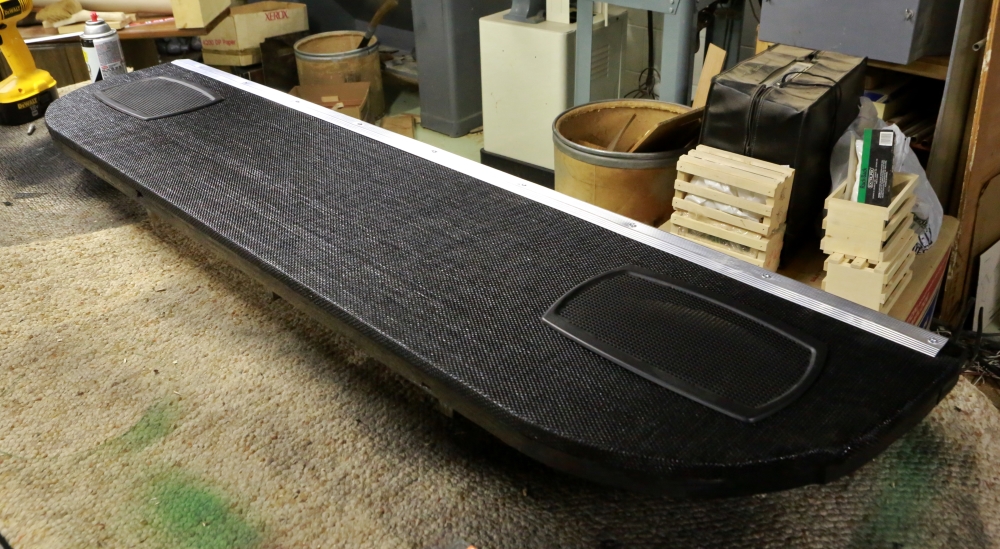
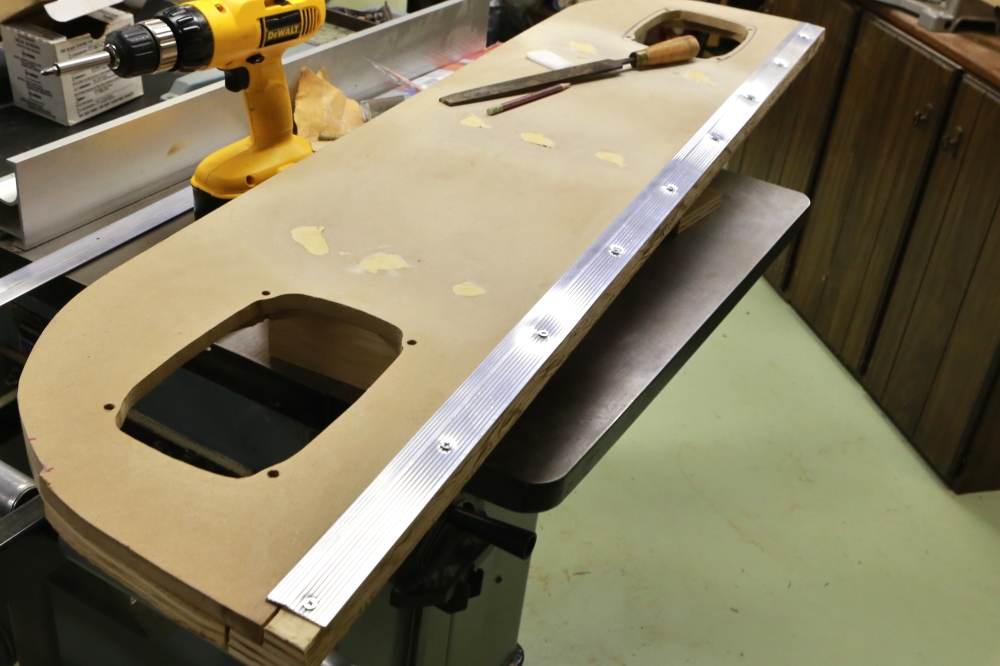
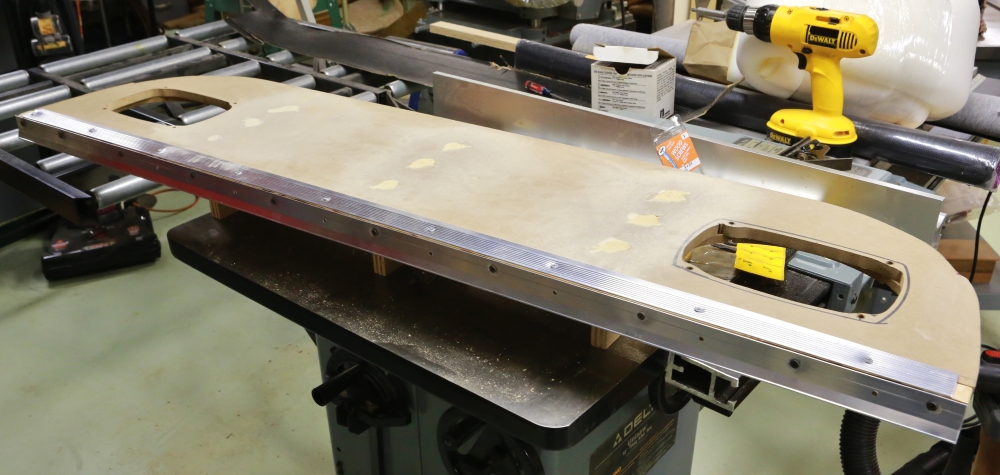
The next step was to cover the front edge with vinyl. We cut a strip of OEM vinyl 5 3/8" wide and stapled it to the wood at the leading edge. Then we fastened the metal trim over it.
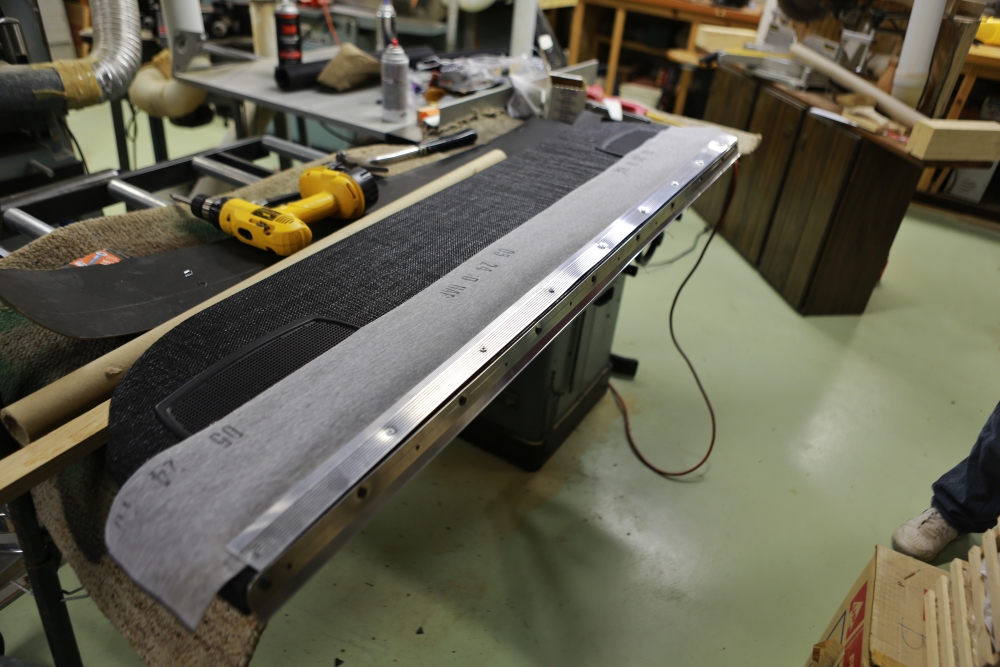
A two-inch strip of foam was glued over the edge.

The vinyl was wrapped over the top and glued inside the lip on the bottom.
We inserted a board in the slot in order to keep pressure on the glue while it cured.
March 14, 2015
We are back up at my mom's in Harrison and my brother Rich is here with his son Charlie from Tennessee to celebrate my mother's birthday. Our idea of fun is working on a project, so we are working on the package shelf.
We started by clamping on the old cardboard, which we're going to use as a template for a Masonite replacement. For some reason, the cardboard is a little short, so we will have to modify the part slightly to fit.
The red marks in the picture above show where the sheet metal on the body is tight against the shelf. If you look at the last picture on the previous page, you can see that the shelf is tight in against the metal where the little plastic trim pieces used to go on the cardboard. So that means the shelf will have to be relieved so that there is room for the Masonite. First step is marking the material to be removed.
I used one of the large sanders to remove the marked areas.
We got some wood putty and used it to cover the screw holes on the top of the shelf.
Rich and I went to the hardware store and we got some trim to use for the base of the vinyl transition piece at the front of the package shelf.
We're screwing the trim to the shelf rather than nailing. The screws will be covered with foam and then vinyl, but we still needed to work the trim a bit to make sure the screws won't be noticeable through the trim material.
Here is one of the original holes:
If we just used these holes as is, it would look like this:
This would certainly be noticeable through the trim material. The first step to addressing this was to drill a hole in a small block. This was then used with a bench vise and one of the screws to bend the metal down around the hole.
After this Rich reamed the holes a bit to give them a little more bevel.
He used a belt sander on the back to dress the hole so that the trim would sit down flat.
After these modifications the screws fit in like this:
Here is what the trim looks like when attached.
Here's Rich sanding down the putty.
This next picture shows the top and front trim attached. The foam will cover the screw areas but will stop at the seam.
This end picture shows how there is an area to trap the front panel.
Progress on sanding down the putty.
Because the shelf fits very tightly, we decided to radius the ends so that it will go in easier. Here I am working on it with a contour sander.
Next came a base coat of black paint.
As previously mentioned, the plan was to cover the shelf with pet-proof screen, which seems to to do a nice job of approximating the material used on the package shelf of my '63 Olds. Unfortunately I didn't take pictures while we were applying the screen material, but we unscrewed the bottom trim, glued down the screen, and then wrapped it around the edges. These pictures show the end result after the bottom trim was reattached. We also screwed the top trim on and put on the speaker grilles just to add a little pressure while the glue is drying.
The next step was to cover the front edge with vinyl. We cut a strip of OEM vinyl 5 3/8" wide and stapled it to the wood at the leading edge. Then we fastened the metal trim over it.
A two-inch strip of foam was glued over the edge.
The vinyl was wrapped over the top and glued inside the lip on the bottom.
We inserted a board in the slot in order to keep pressure on the glue while it cured.
Norm Witte
Lansing, Michigan
'65 Corsas: 140 coupe and 180 convertible
http://www.wittelaw.com/personal
viewtopic.php?f=52&t=4208
Lansing, Michigan
'65 Corsas: 140 coupe and 180 convertible
http://www.wittelaw.com/personal
viewtopic.php?f=52&t=4208

Re: Upgraded: Corsa Coupe 2.0
I was a little worried about that shiny strip you used but after you covered it up everything looks great! 
Jeremy (cad-kid)
Kronenwetter, WI (Central Wisconsin)
SOLD 9-2016 65 Monza 4spd/140
My 65 Monza thread
 My YouTube page
Kronenwetter, WI (Central Wisconsin)
SOLD 9-2016 65 Monza 4spd/140
My 65 Monza thread
-
ncwitte
- Corvair of the Month
- Posts: 162
- Joined: Sat Jul 07, 2012 4:32 am
- Location: Lansing, Michigan
- Contact:
Re: Upgraded: Corsa Coupe 2.0
Actually, I am not happy with it and have decided to redo it, so there will be more posts on this....cad-kid wrote:I was a little worried about that shiny strip you used but after you covered it up everything looks great!
Norm Witte
Lansing, Michigan
'65 Corsas: 140 coupe and 180 convertible
http://www.wittelaw.com/personal
viewtopic.php?f=52&t=4208
Lansing, Michigan
'65 Corsas: 140 coupe and 180 convertible
http://www.wittelaw.com/personal
viewtopic.php?f=52&t=4208
-
ncwitte
- Corvair of the Month
- Posts: 162
- Joined: Sat Jul 07, 2012 4:32 am
- Location: Lansing, Michigan
- Contact:
Re: Upgraded: Corsa Coupe 2.0
Part 9: Console Design
March 28, 2015
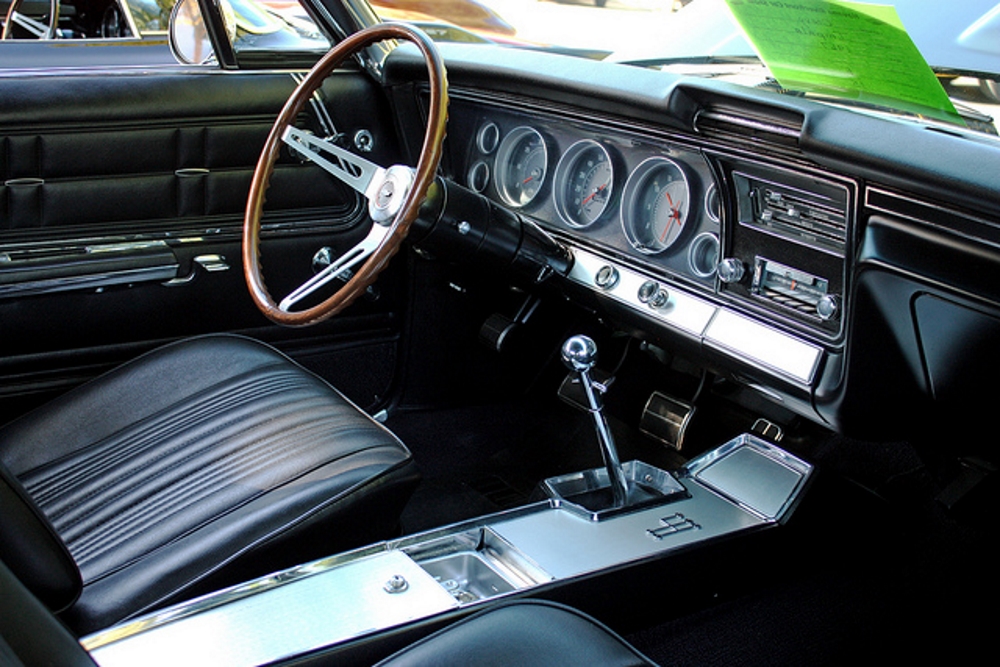
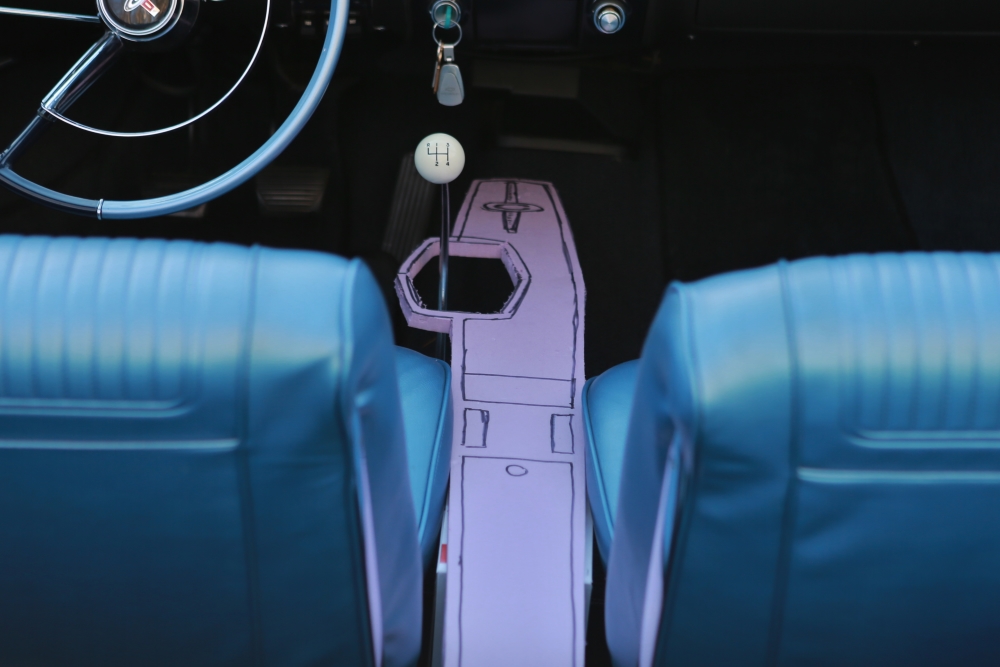
One of the projects for the red Corvair is to build a new console. Originally I was going to use one of the ones you can get through the vendors (I have two of them) but I don't care for the overall quality of those consoles and they don't have a factory look. I would like to build a console that looks similar to the '67 Impala 4-speed console, with some Corvair touches, made to fit our cars. The process begins with using some styrofoam to start making a mock-up of the console. Eventually I will make a plug so that I can make a fiberglass mold. The console will then be a two piece assembly made out of fiberglass with various metal trim, covered in matching vinyl. This will take a long time, so don't expect to see lots of progress fast.
This is the '67 Impala console that will loosely inspire my console.
I laid out my design on a piece of styrofoam. I'm using my '63 Olds work table for the project.
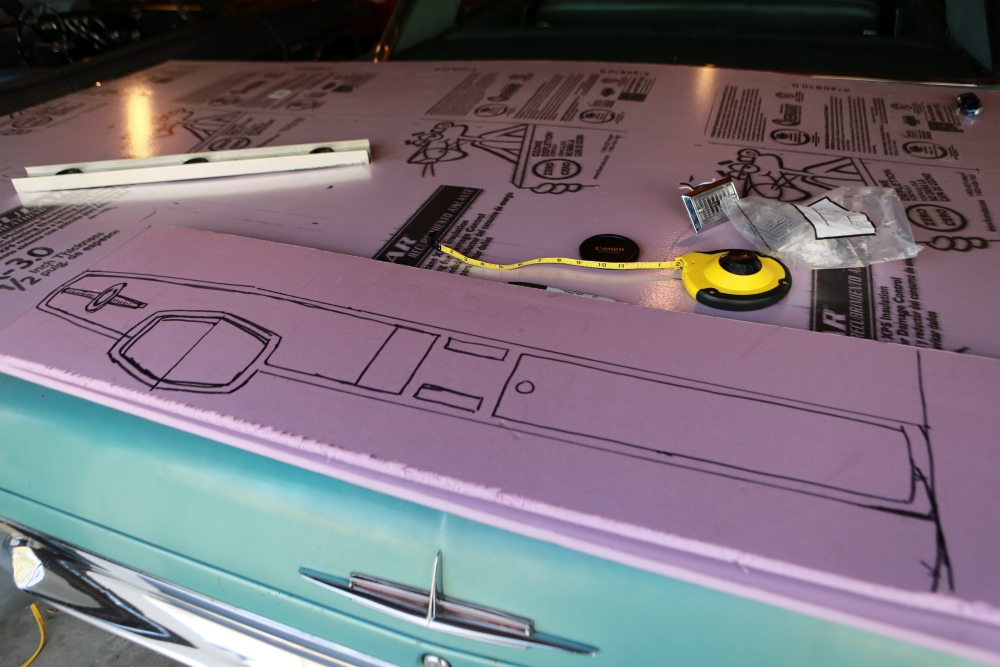
Although I'm building this for the coupe, the passenger seat is out of that car, so I am test fitting in the convertible. I like it enough that I will probably make one for this car as well.
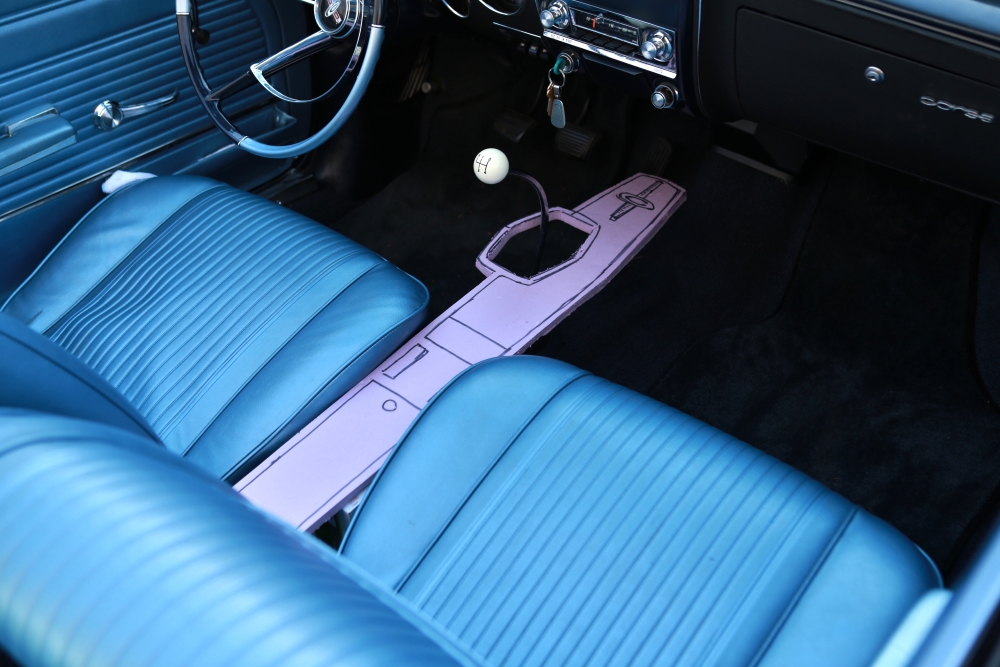
The two parallel rectangles will be holes for the seat belt buckles to rest in when not in use. Forward of that is a door that will cover some audio controls. The edges will be chrome while the interior parts will be painted in black wrinkle paint to match the dash.
I am currently thinking of attaching a Corsa emblem used on the side of the car to the far front of the console.
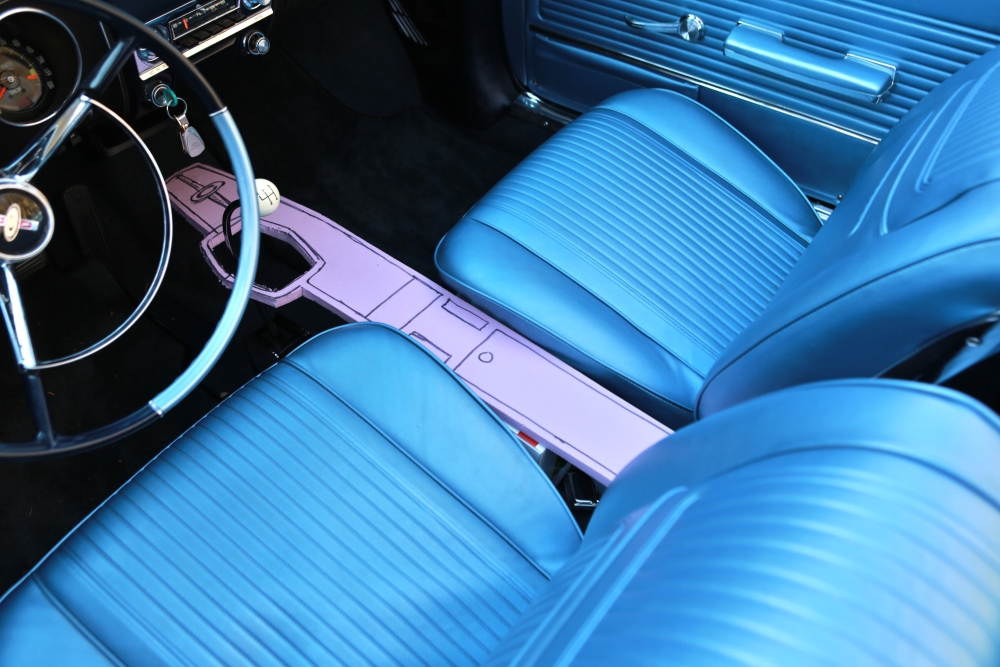
The hole for the shifter needs to move to the left about an inch, I think.
March 28, 2015
One of the projects for the red Corvair is to build a new console. Originally I was going to use one of the ones you can get through the vendors (I have two of them) but I don't care for the overall quality of those consoles and they don't have a factory look. I would like to build a console that looks similar to the '67 Impala 4-speed console, with some Corvair touches, made to fit our cars. The process begins with using some styrofoam to start making a mock-up of the console. Eventually I will make a plug so that I can make a fiberglass mold. The console will then be a two piece assembly made out of fiberglass with various metal trim, covered in matching vinyl. This will take a long time, so don't expect to see lots of progress fast.
This is the '67 Impala console that will loosely inspire my console.
I laid out my design on a piece of styrofoam. I'm using my '63 Olds work table for the project.
Although I'm building this for the coupe, the passenger seat is out of that car, so I am test fitting in the convertible. I like it enough that I will probably make one for this car as well.
The two parallel rectangles will be holes for the seat belt buckles to rest in when not in use. Forward of that is a door that will cover some audio controls. The edges will be chrome while the interior parts will be painted in black wrinkle paint to match the dash.
I am currently thinking of attaching a Corsa emblem used on the side of the car to the far front of the console.
The hole for the shifter needs to move to the left about an inch, I think.
Norm Witte
Lansing, Michigan
'65 Corsas: 140 coupe and 180 convertible
http://www.wittelaw.com/personal
viewtopic.php?f=52&t=4208
Lansing, Michigan
'65 Corsas: 140 coupe and 180 convertible
http://www.wittelaw.com/personal
viewtopic.php?f=52&t=4208
-
SyntheticBlnkerFluid

- Posts: 239
- Joined: Tue Jan 28, 2014 7:32 am
- Location: Chebanse, IL
- Contact:
Re: Upgraded: Corsa Coupe 2.0
I had commented on your post on the COG on Facebook, but is that Console going to hit your leg next to the shifter? The shifter seems pretty close to my leg in my '68.
1968 Monza 140 4-Speed Posi
Rob
Chebanse, IL
Rob
Chebanse, IL
-
ncwitte
- Corvair of the Month
- Posts: 162
- Joined: Sat Jul 07, 2012 4:32 am
- Location: Lansing, Michigan
- Contact:
Re: Upgraded: Corsa Coupe 2.0
It seemed to be ok in the mock up but I might be going a different direction after the comments I received there. I think I might try to adapt a 1966 Chevelle console instead. It is available as a reproduction part for a reasonable price and is very attractive.
https://www.opgi.com/chevelle/1966/inte ... e/CKW66MT/
https://www.opgi.com/chevelle/1966/inte ... e/CKW66MT/
Norm Witte
Lansing, Michigan
'65 Corsas: 140 coupe and 180 convertible
http://www.wittelaw.com/personal
viewtopic.php?f=52&t=4208
Lansing, Michigan
'65 Corsas: 140 coupe and 180 convertible
http://www.wittelaw.com/personal
viewtopic.php?f=52&t=4208
-
Corventure Dave
- Posts: 450
- Joined: Tue Sep 06, 2011 8:35 am
Re: Upgraded: Corsa Coupe 2.0
Love what you are doing. I stated to make a Camry out of my 65 4-door Monza. All went well until I saw I was about to inherit my Dad'Rampside
and only have a 2 car garage. So one Corvair had to go!
Corventure Dave
and only have a 2 car garage. So one Corvair had to go!
Corventure Dave
-
SyntheticBlnkerFluid
- Posts: 239
- Joined: Tue Jan 28, 2014 7:32 am
- Location: Chebanse, IL
- Contact:
Re: Upgraded: Corsa Coupe 2.0
I was looking at that one as well. It definitely looks like it could work. I'm still going to look at the '68 Camaro Center console, but I think it may be too wide towards the dashboard.ncwitte wrote:It seemed to be ok in the mock up but I might be going a different direction after the comments I received there. I think I might try to adapt a 1966 Chevelle console instead. It is available as a reproduction part for a reasonable price and is very attractive.
https://www.opgi.com/chevelle/1966/inte ... e/CKW66MT/
The Chevelle one looks like the shifter is placed just right, but I'm worried about it hitting my leg.
1968 Monza 140 4-Speed Posi
Rob
Chebanse, IL
Rob
Chebanse, IL
-
ncwitte
- Corvair of the Month
- Posts: 162
- Joined: Sat Jul 07, 2012 4:32 am
- Location: Lansing, Michigan
- Contact:
Re: Upgraded: Corsa Coupe 2.0
SyntheticBlnkerFluid wrote:I was looking at that one as well. It definitely looks like it could work. I'm still going to look at the '68 Camaro Center console, but I think it may be too wide towards the dashboard.ncwitte wrote:It seemed to be ok in the mock up but I might be going a different direction after the comments I received there. I think I might try to adapt a 1966 Chevelle console instead. It is available as a reproduction part for a reasonable price and is very attractive.
https://www.opgi.com/chevelle/1966/inte ... e/CKW66MT/
The Chevelle one looks like the shifter is placed just right, but I'm worried about it hitting my leg.
Rob, I don't think it's going to be a problem, because the console is low enough that it's below your knee. My knee tends to hit the shift lever, but that's up above where it will emerge from the console.
Norm Witte
Lansing, Michigan
'65 Corsas: 140 coupe and 180 convertible
http://www.wittelaw.com/personal
viewtopic.php?f=52&t=4208
Lansing, Michigan
'65 Corsas: 140 coupe and 180 convertible
http://www.wittelaw.com/personal
viewtopic.php?f=52&t=4208
-
SyntheticBlnkerFluid
- Posts: 239
- Joined: Tue Jan 28, 2014 7:32 am
- Location: Chebanse, IL
- Contact:
Re: Upgraded: Corsa Coupe 2.0
I guess that's true.
If thats the route you go, then let me know how it works out, because I will probably follow in your footsteps lol.
If thats the route you go, then let me know how it works out, because I will probably follow in your footsteps lol.
1968 Monza 140 4-Speed Posi
Rob
Chebanse, IL
Rob
Chebanse, IL
-
ncwitte
- Corvair of the Month
- Posts: 162
- Joined: Sat Jul 07, 2012 4:32 am
- Location: Lansing, Michigan
- Contact:
Re: Upgraded: Corsa Coupe 2.0
I'll keep you posted!SyntheticBlnkerFluid wrote:I guess that's true.
If thats the route you go, then let me know how it works out, because I will probably follow in your footsteps lol.
Norm Witte
Lansing, Michigan
'65 Corsas: 140 coupe and 180 convertible
http://www.wittelaw.com/personal
viewtopic.php?f=52&t=4208
Lansing, Michigan
'65 Corsas: 140 coupe and 180 convertible
http://www.wittelaw.com/personal
viewtopic.php?f=52&t=4208
-
ncwitte
- Corvair of the Month
- Posts: 162
- Joined: Sat Jul 07, 2012 4:32 am
- Location: Lansing, Michigan
- Contact:
Re: Upgraded: Corsa Coupe 2.0
Part 10: Wheel pondering and hanging out with Bruce
April 18, 2015
Since I last posted I've done some cogitating on what kind of wheels I want the car to roll on when it's finished. The tires have good tread, but they are about 12 years old and overdue for replacement. I think I want to put redlines on the car next time. The car currently sports Motor Wheel Spyders and I love them, but I'm not sure they have as stock a look as I want. Paradoxically, the more I deviate from stock, the more I am trying to make the car look stock. How weird is that?
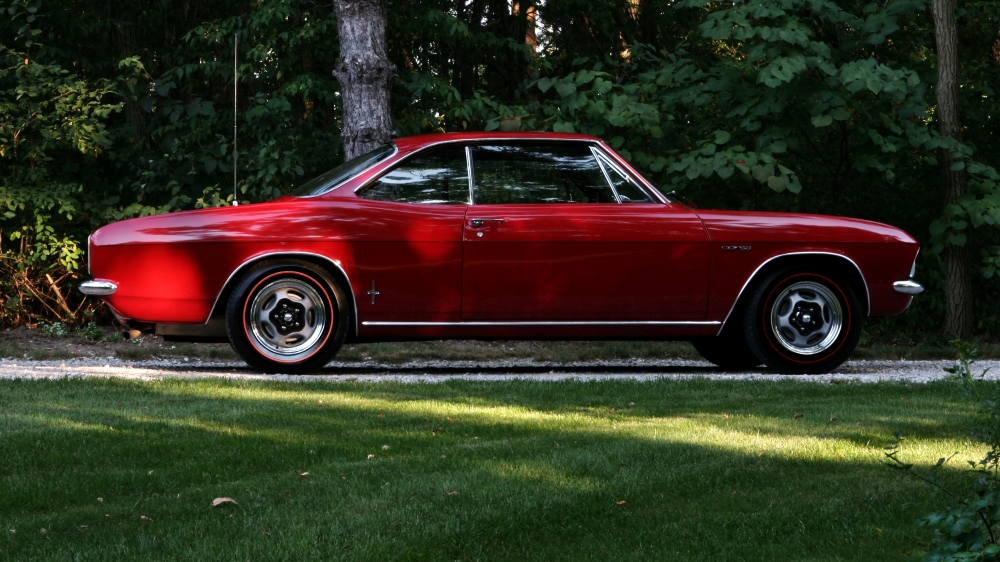
So the following three profile pictures give some options. This first picture shows the current look:
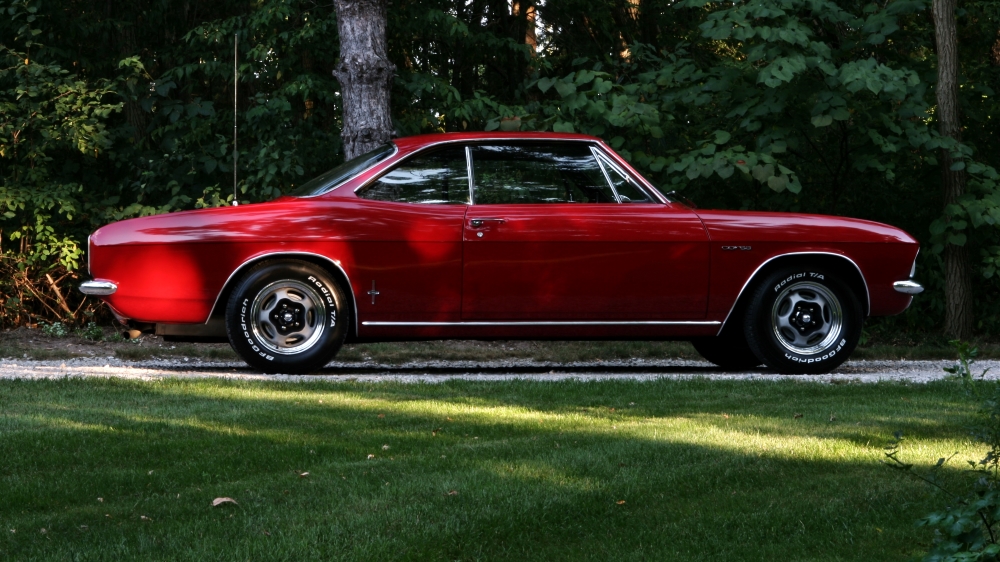
Next up, the Spyders with redline tires:
And this is what the car would look like with redlines and a set of 1969 Chevelle-style Magnum rims (I think Chevy called them "SS" wheels):
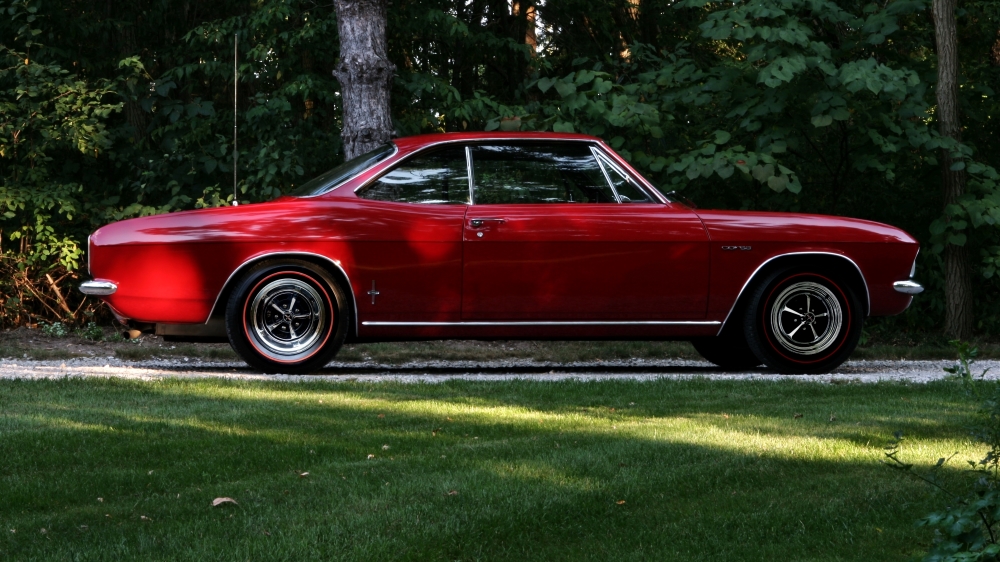
I think that is where I am headed.
I also have given more thought to the console project and decided not to reinvent the wheel. Instead, I am going to buy a reproduction '67 Chevelle console and adapt it to the Corvair. Here is a picture of the console:
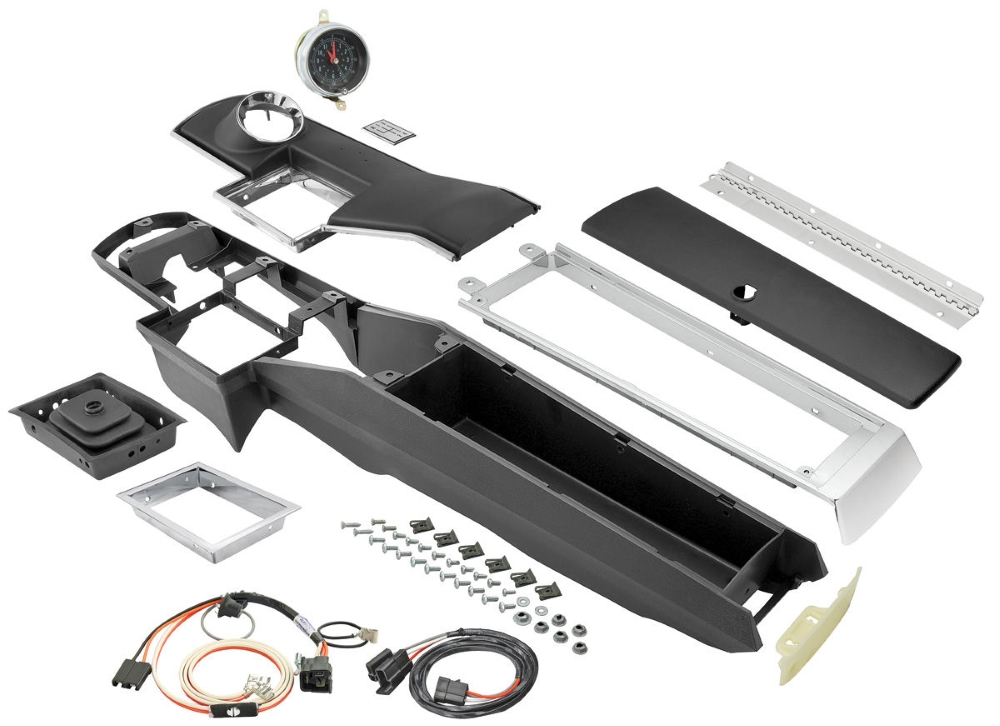
One thing that's hard not to notice in this picture is the big clock. The good news is that GM used the same font and probably the same lighting in this clock as the Corvair. The bad news is that the Corsa already has a clock.
So I had to fix that.
This brings us to yesterday's trip to Bruce Weeks' house. Bruce has several Corsa dashes and I had one extra. I've also bought an extra thermistor, and I decided I would replace the clock with another cylinder head temperature gauge, so I would have temps from both sides of the engine. So, field trip time.
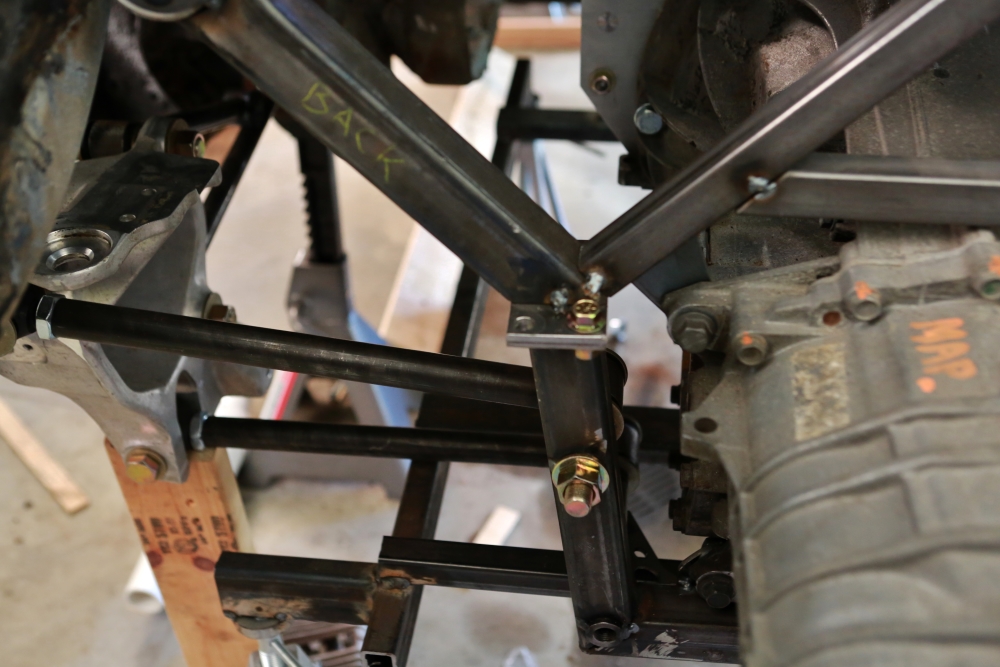
We started off with some pictures of Bruce's Monzter Corvair. He is building a V-8 Vair with a 350 mated to a Porsche Boxtster 6-speed transaxle. The rear suspension is coming along.
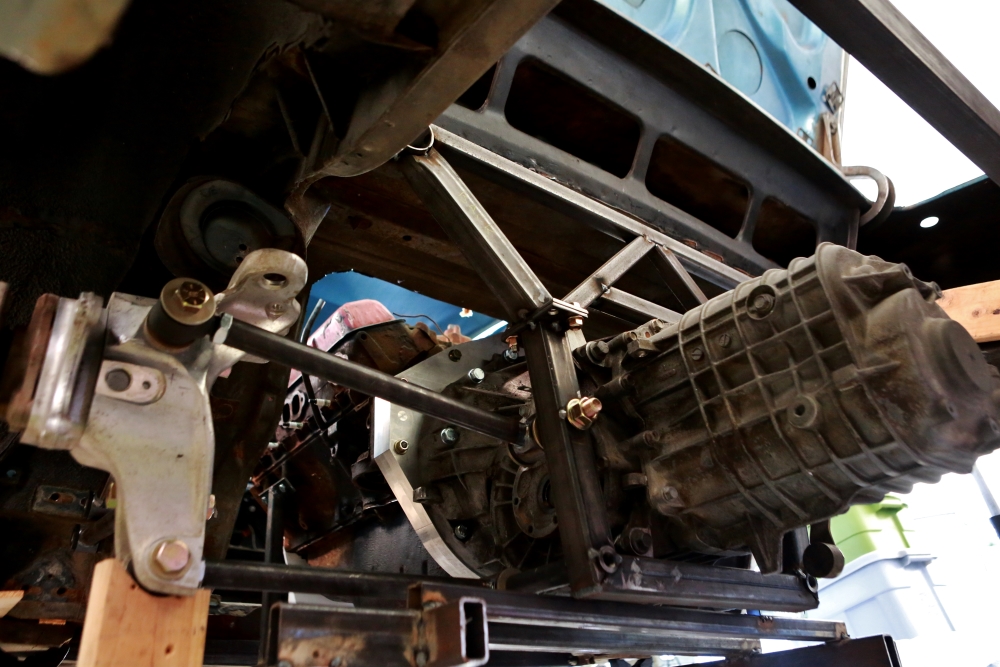
He says he is going to have to relocate the upper control arm to address some clearance issues.
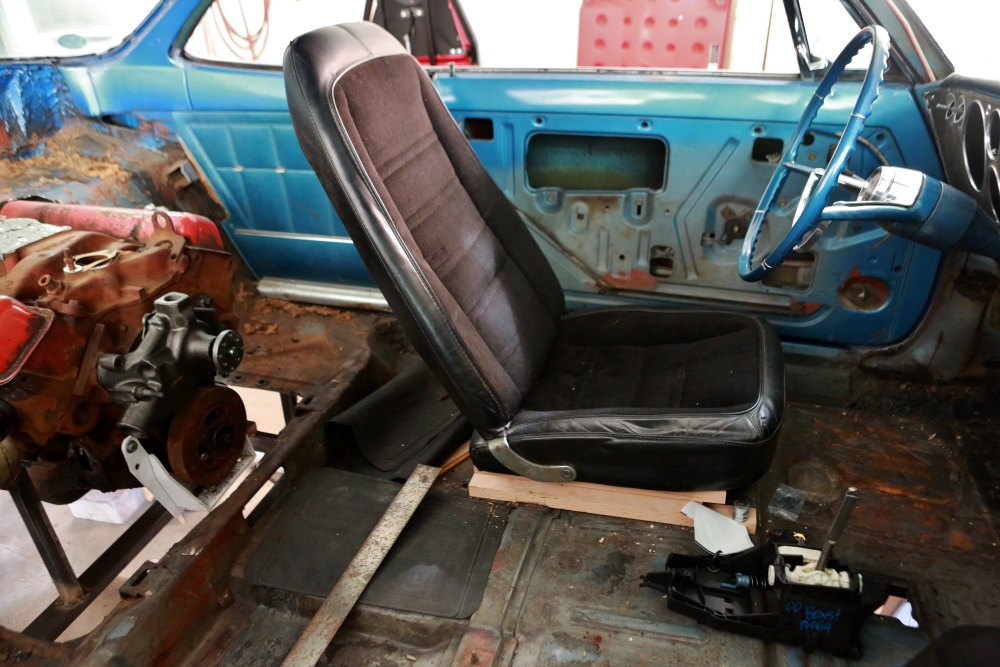
Bruce is working on getting the seat located. With the Boxster transaxle, the engine sits far enough aft that there is plenty of legroom.
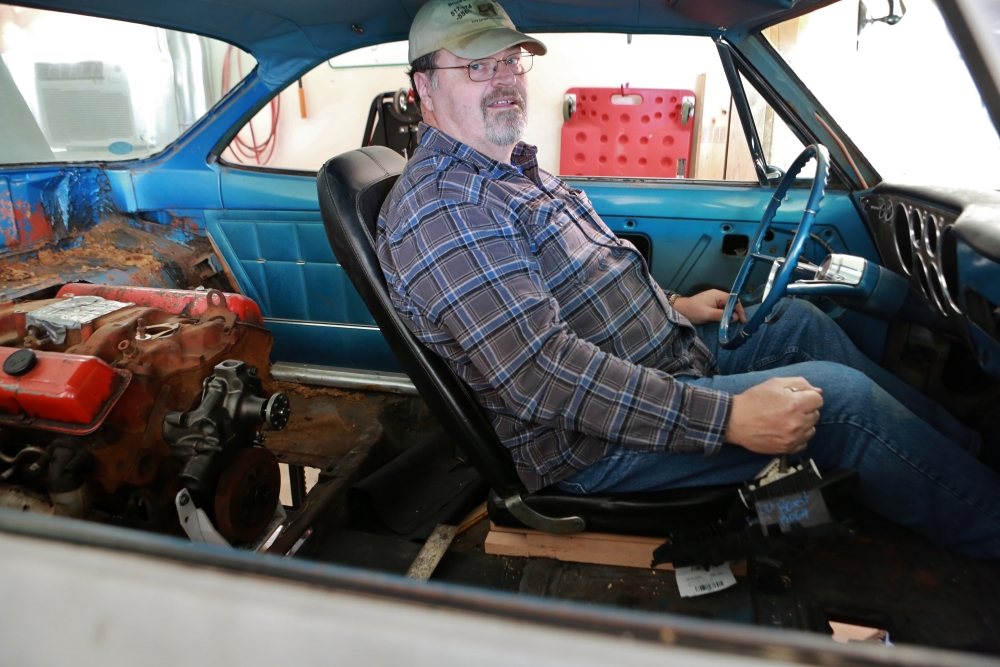
No problem fitting 6'2" Bruce in there. I thought the seat was pretty comfortable.
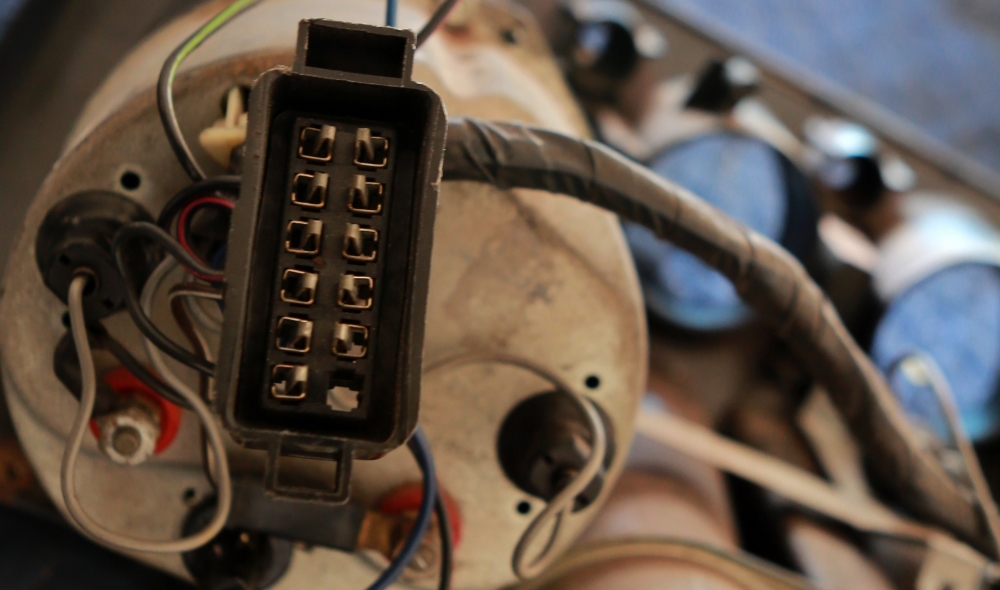
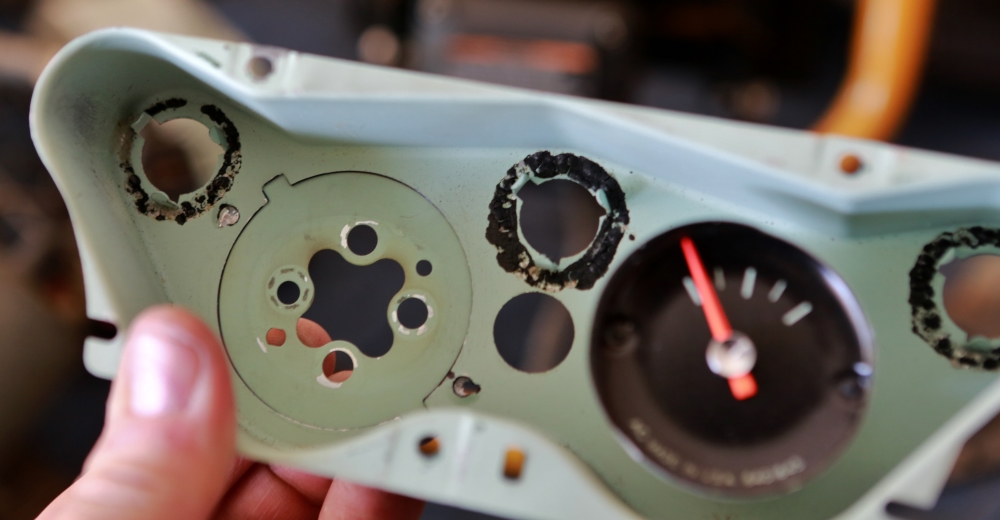
Next on the agenda was modifications to my instrument cluster. I plan on using this empty cavity in the cluster harness for the new thermistor wire.
I brought my rolling workbench with me, a/k/a my 1963 Olds Ninety Eight Holiday Sports Sedan. We had need of it for a later project.
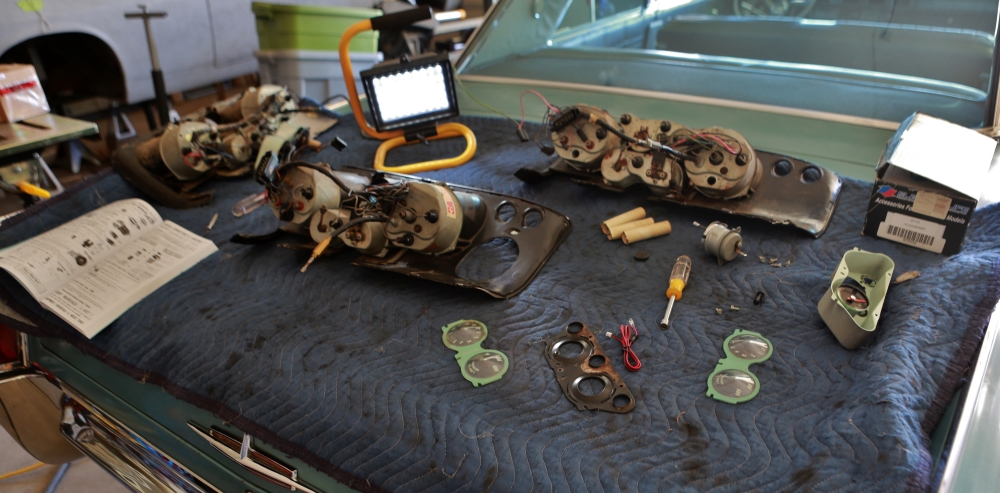
We lined up the temp and clock windows on the two lenses, and then marked where to cut based upon the overlap. You can see that the one nearest to the camera has been cut, while the other one is only marked.
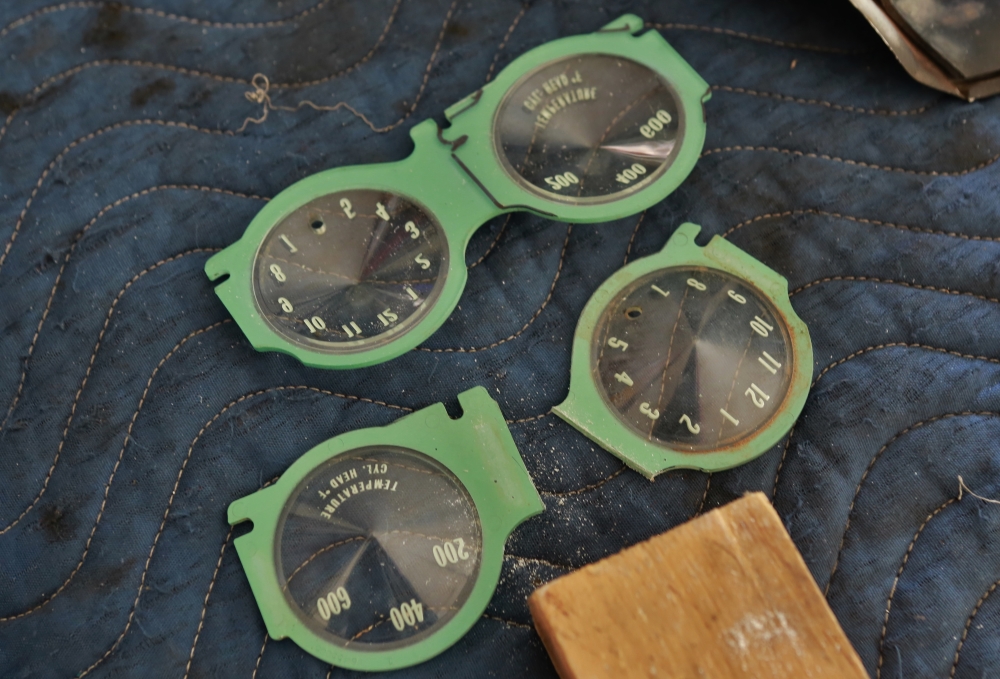
Look, they fit!
Checking for fit in the cluster.
A cluster of clusters. We had three parts clusters between us plus the one out of my red car. If you include the two in our other Corvairs, between Bruce and I we own six Corsa instrument clusters.
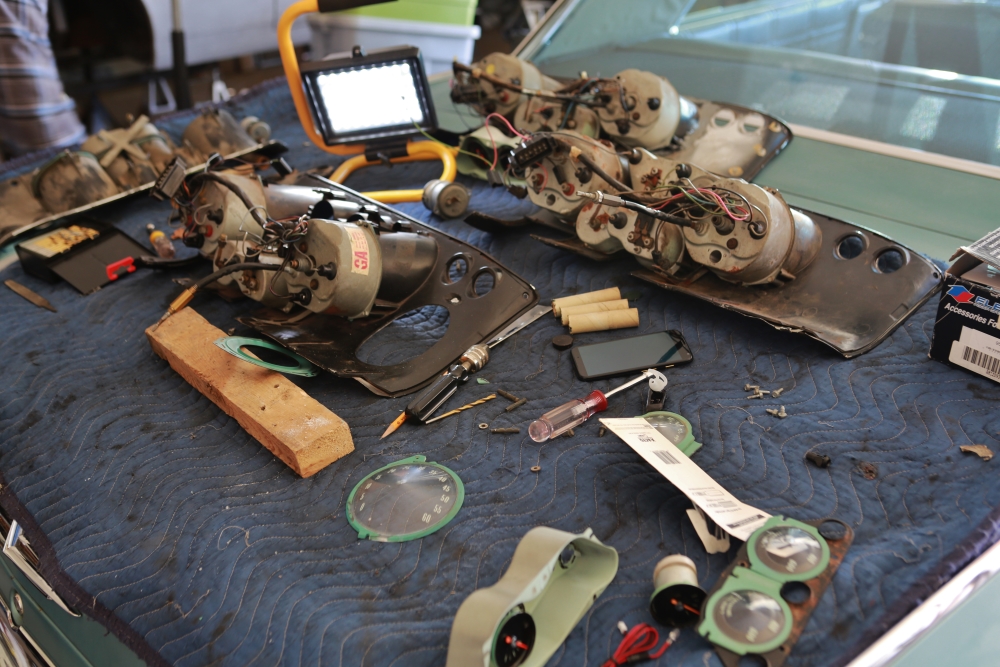
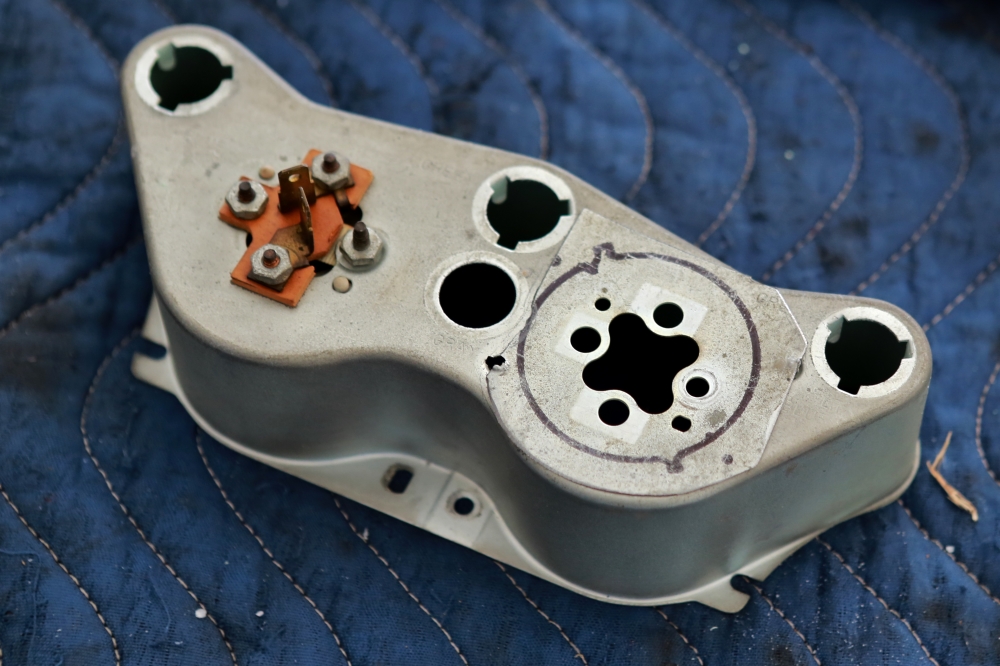
The can for the instruments has a large round hole for the clock on the left side. This doesn't provide any means of attaching the second temp gauge, so we cut out the back of another can to provide the missing metal.
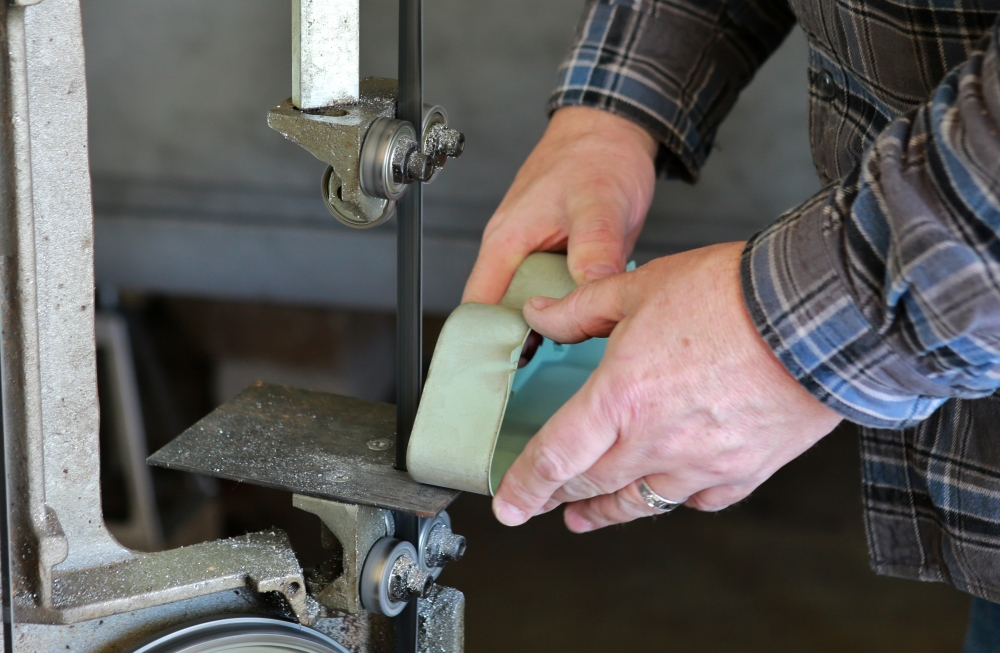
Cutting the back metal out of the donor can.
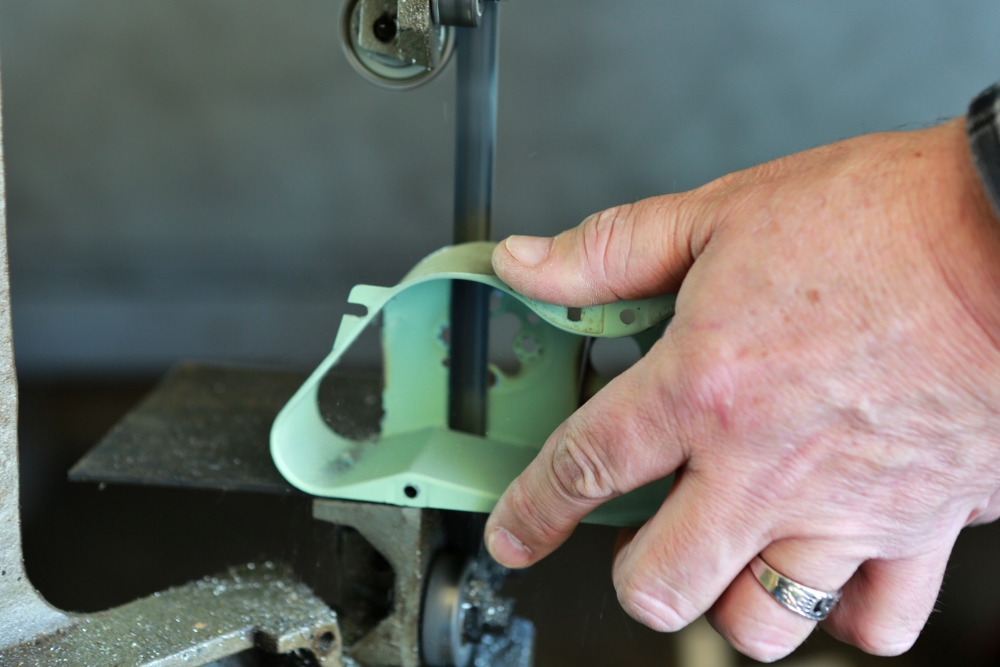
Trimming.
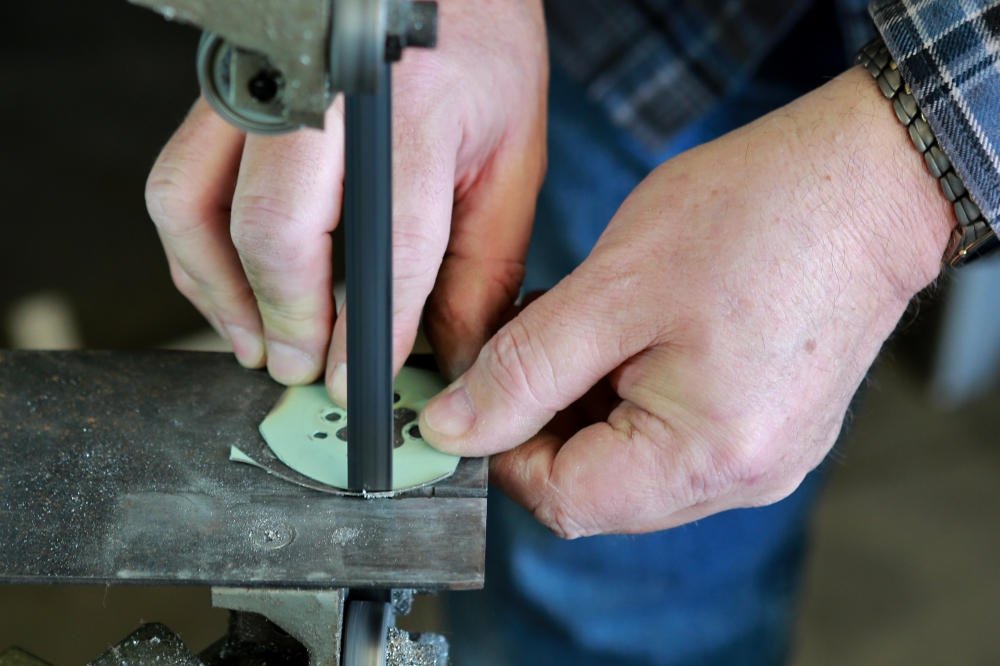
This is what the back will look like when the new part is attached.
Just have to add screw holes and it will be ready.
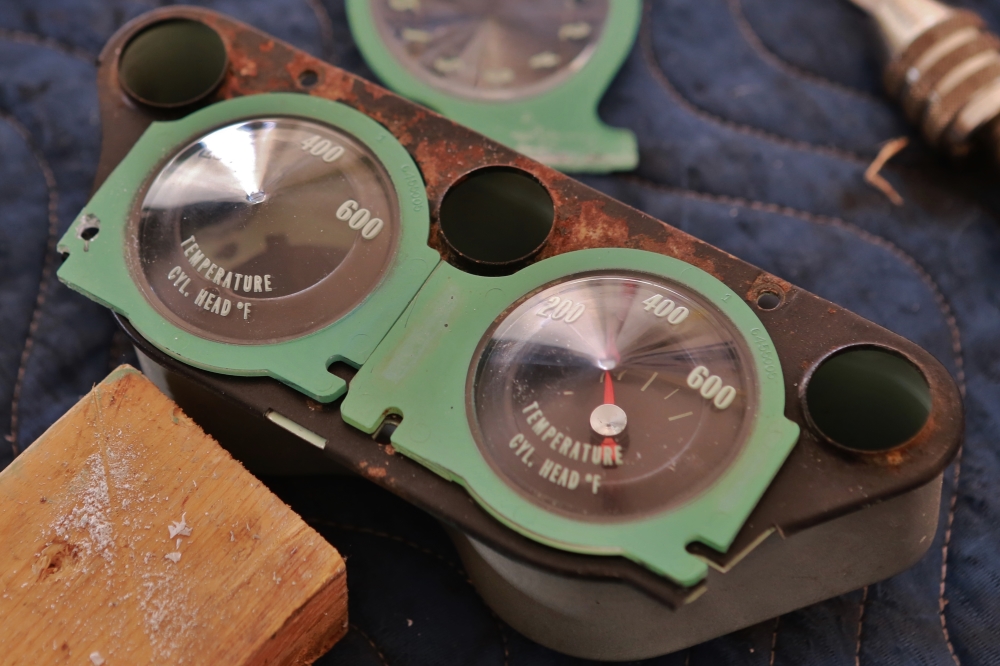
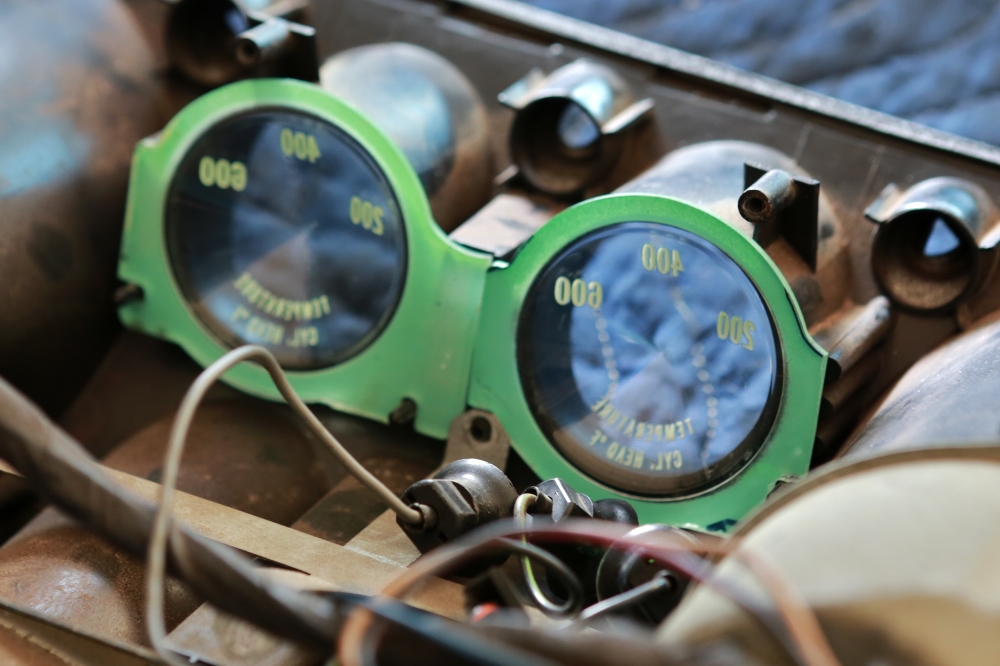
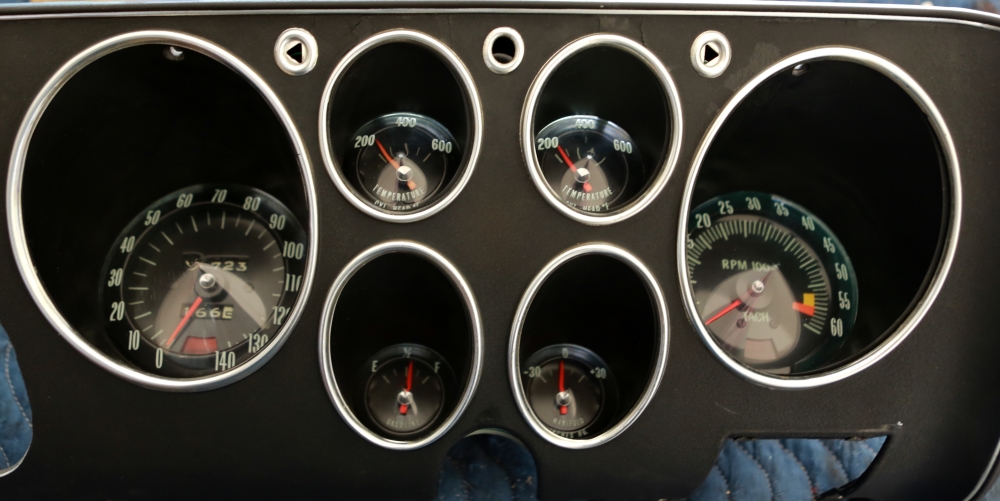
Here the second gauge is mounted. Looks like it belongs there.
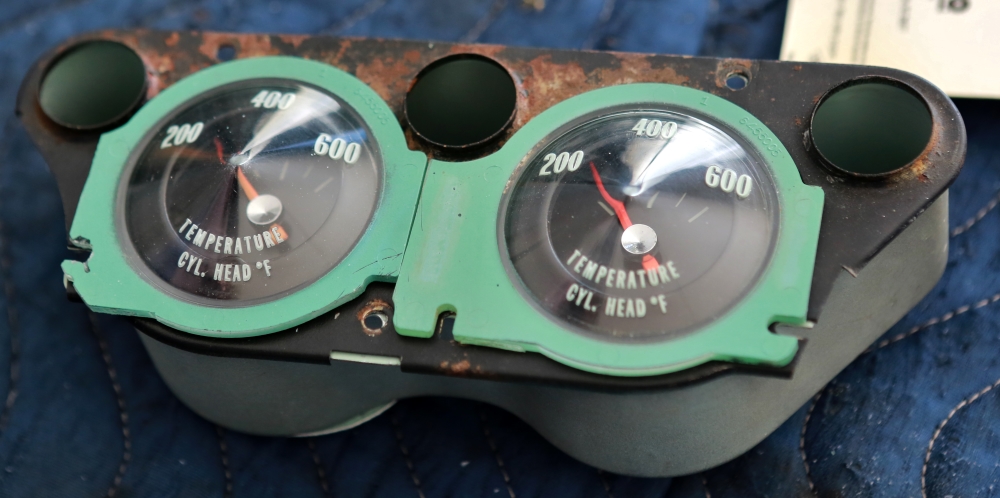
Finished!
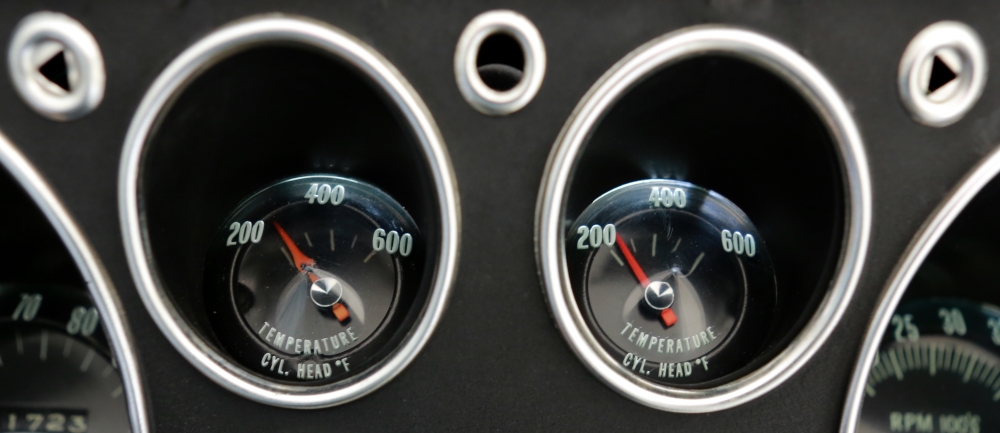
A wider view of the panel.
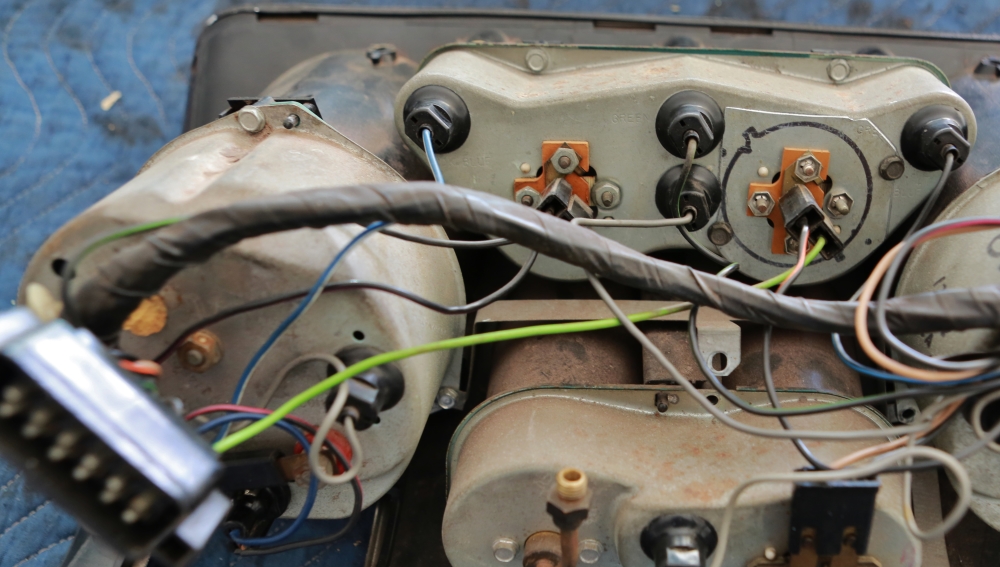
I used the green wire from a '66 panel for the thermistor lead, but it isn't long enough so I will have to make a new one. Power comes from the clock's old connector.
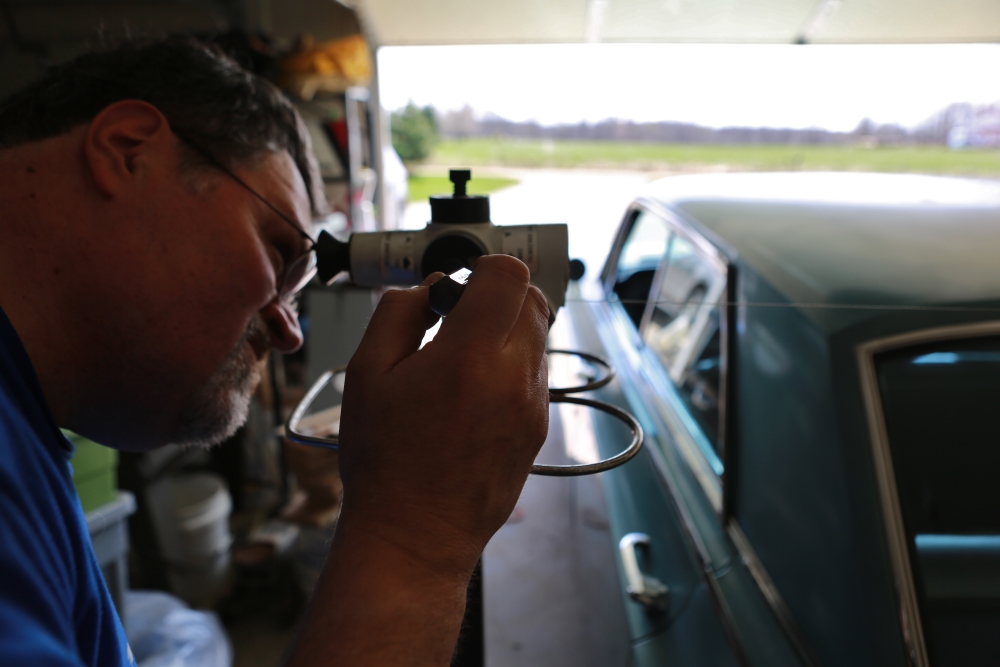
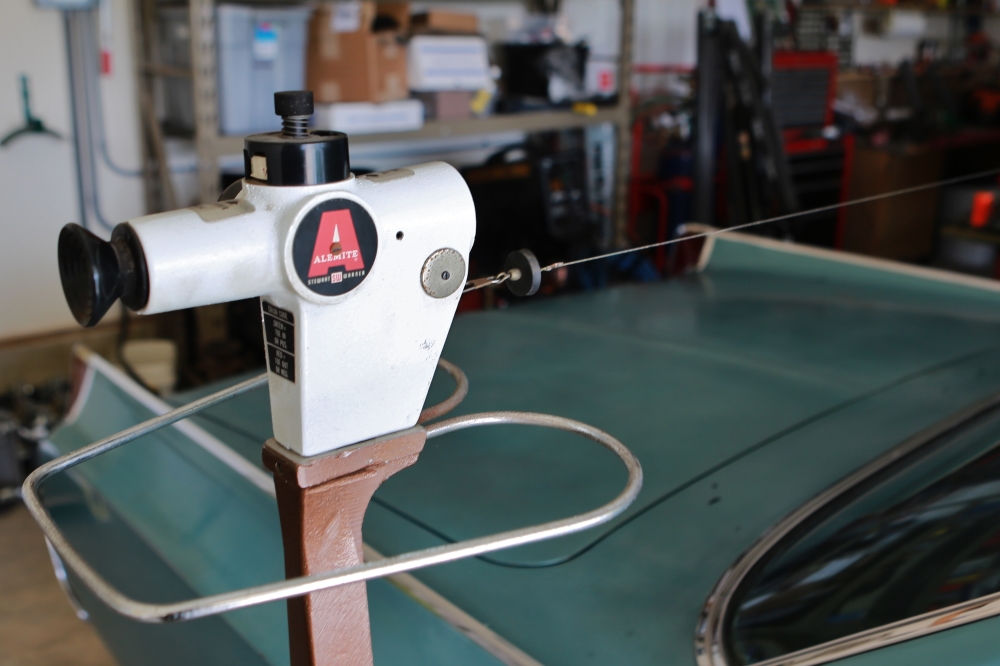
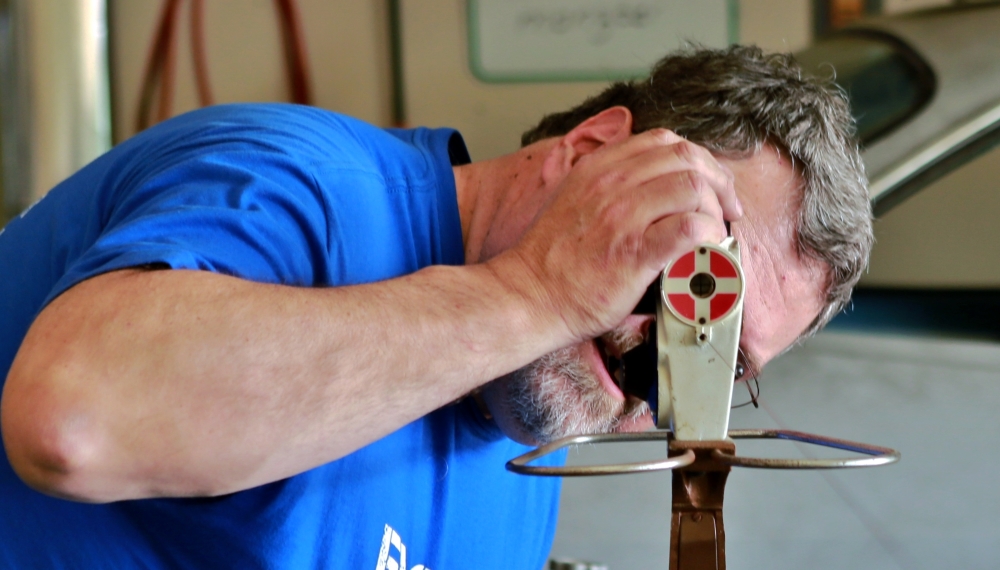
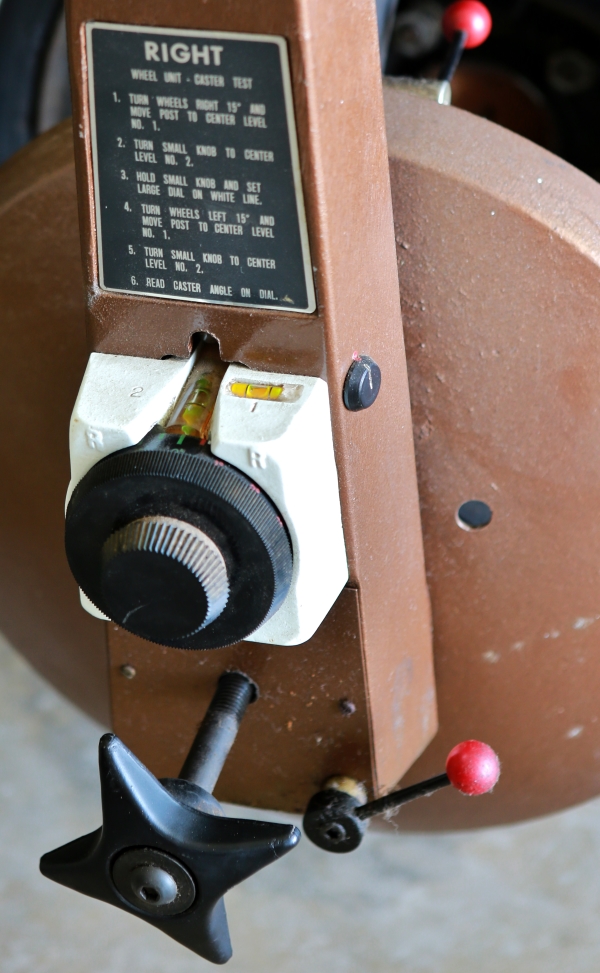
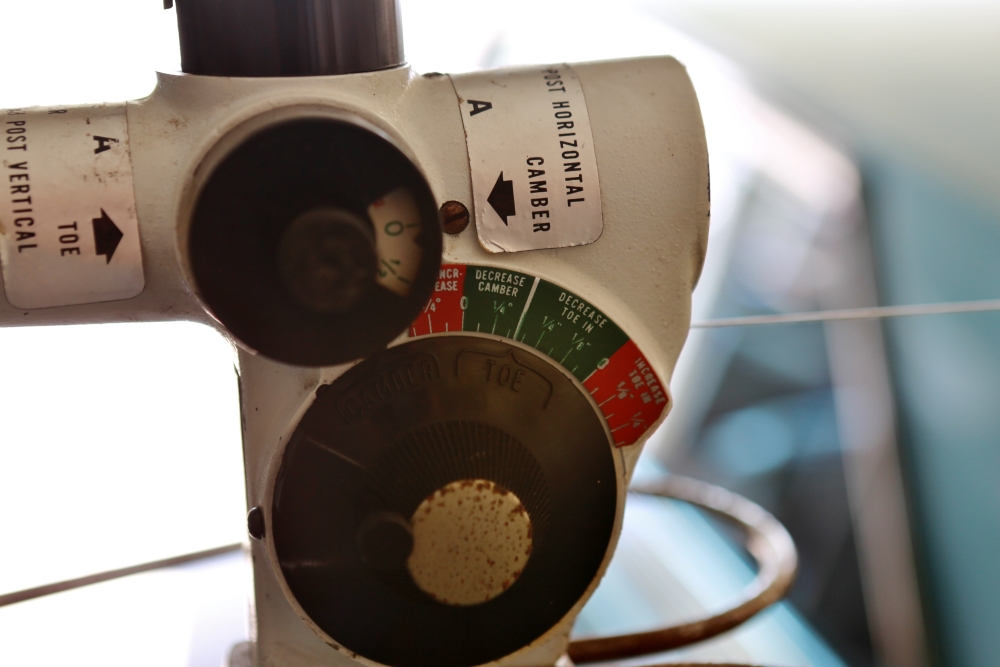
After we got done with the panel, we played with Bruce's new alignment machine. It's a '62 Alemite system. Bruce wanted to check it against a car with a live axle to see how accurate it was. That's where the '63 came in.
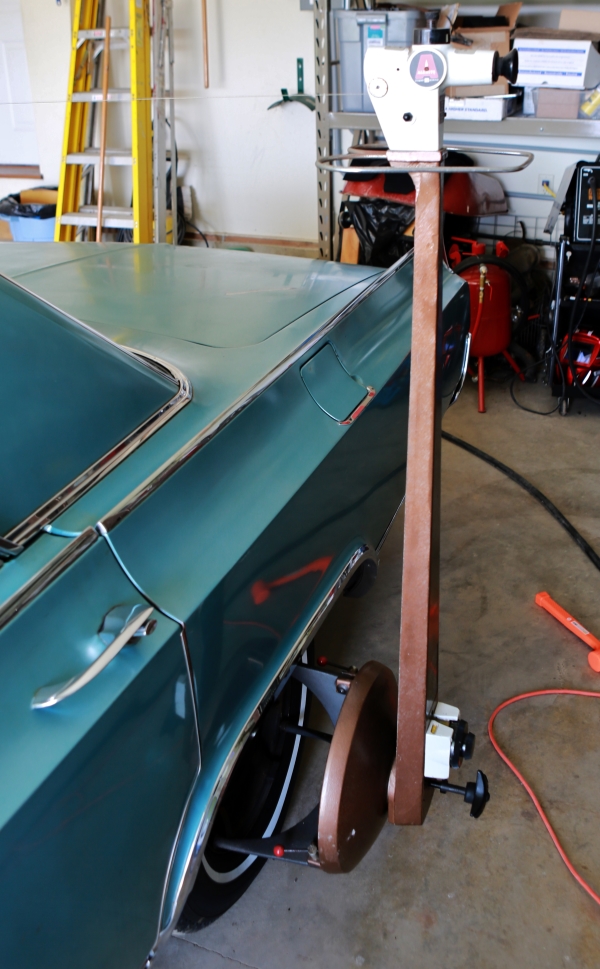
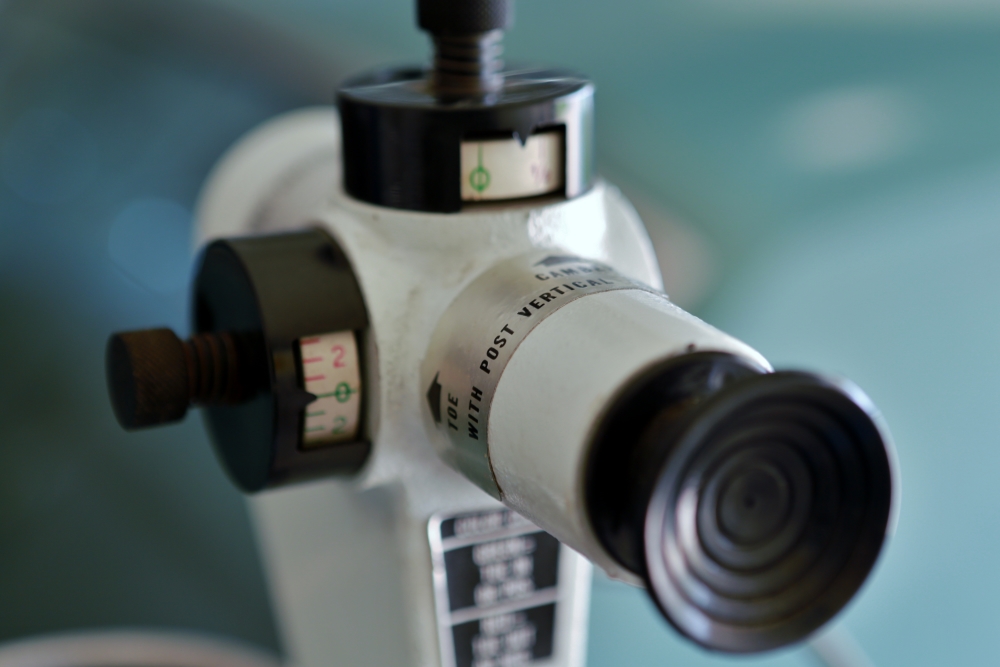
Each of the units has a sight through which you look at the other side.
Adjusting the sight.
This is the right side sight.
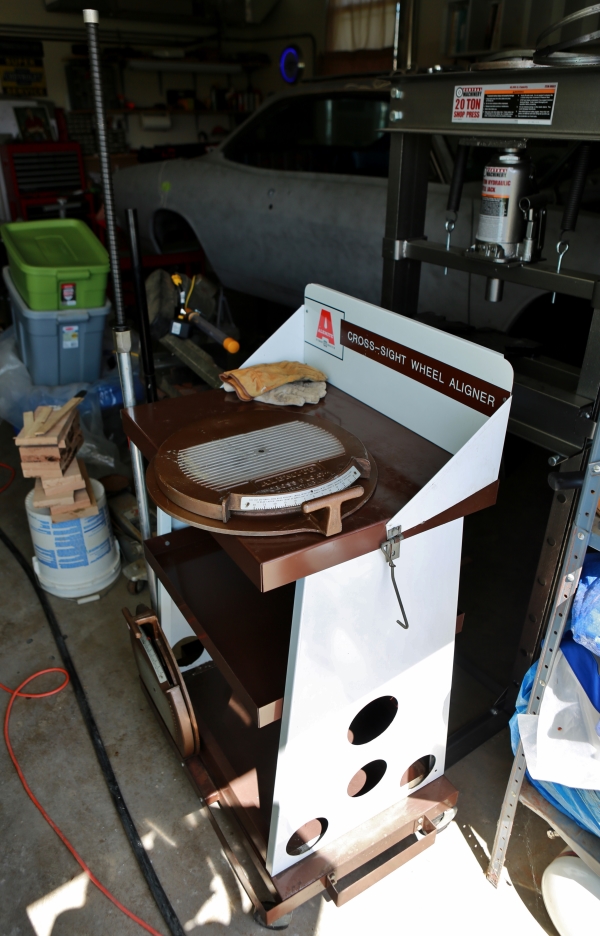
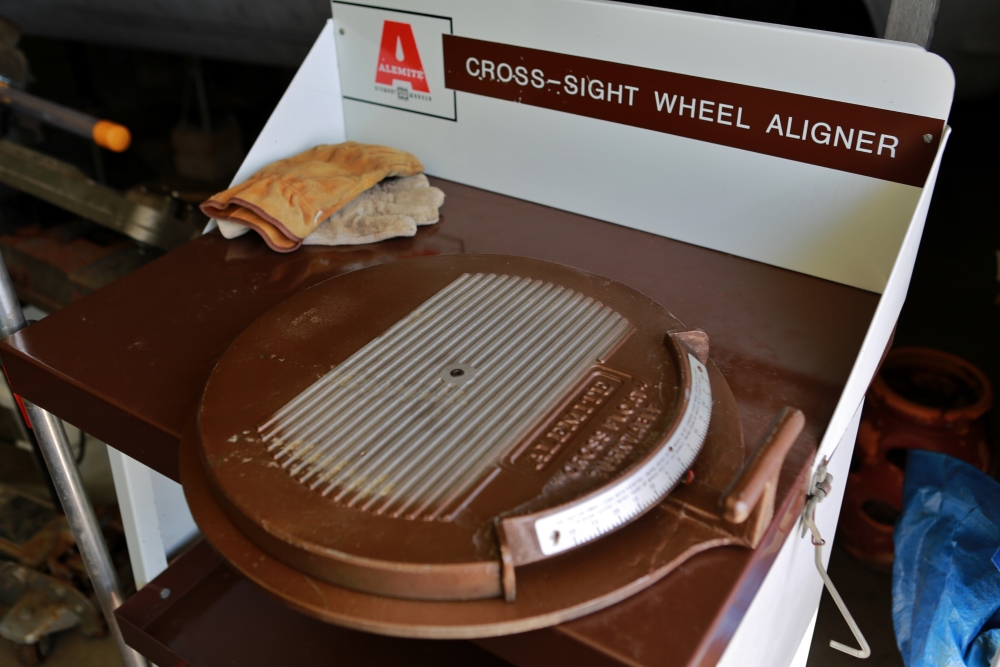
This is the rest of the kit. It's in amazingly pristine condition.
These pads allow adjustment when the wheels are turned.
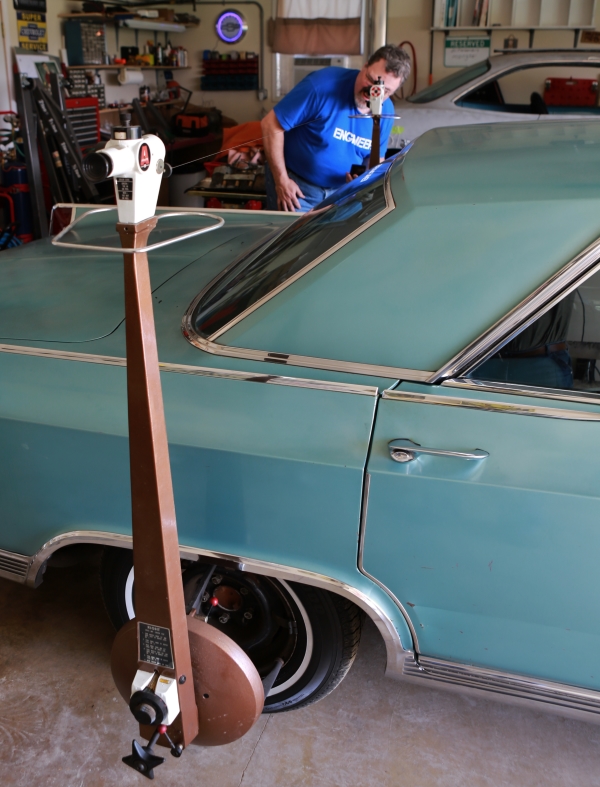
This is what the driver's side read when dialed in.
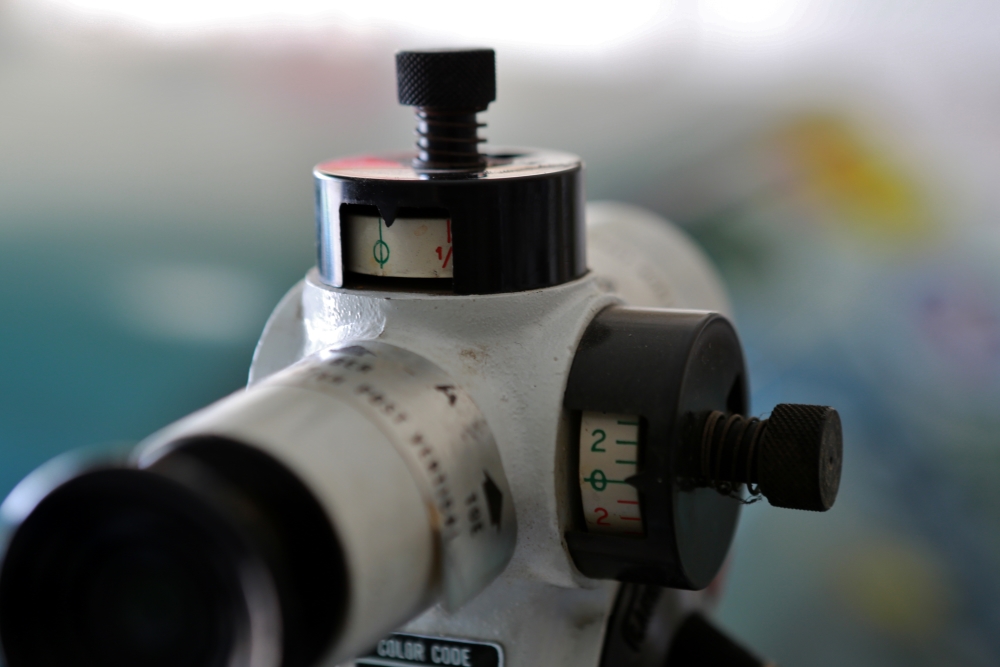
This is what the passenger side read when dialed in. Obviously we hoped it would be exactly accurate. Probably it will be a good idea to check it against the rear axle of the Imperial to see if it's the car or the gauge.
Peek-a-boo!
It attaches to the wheel with simple tension.
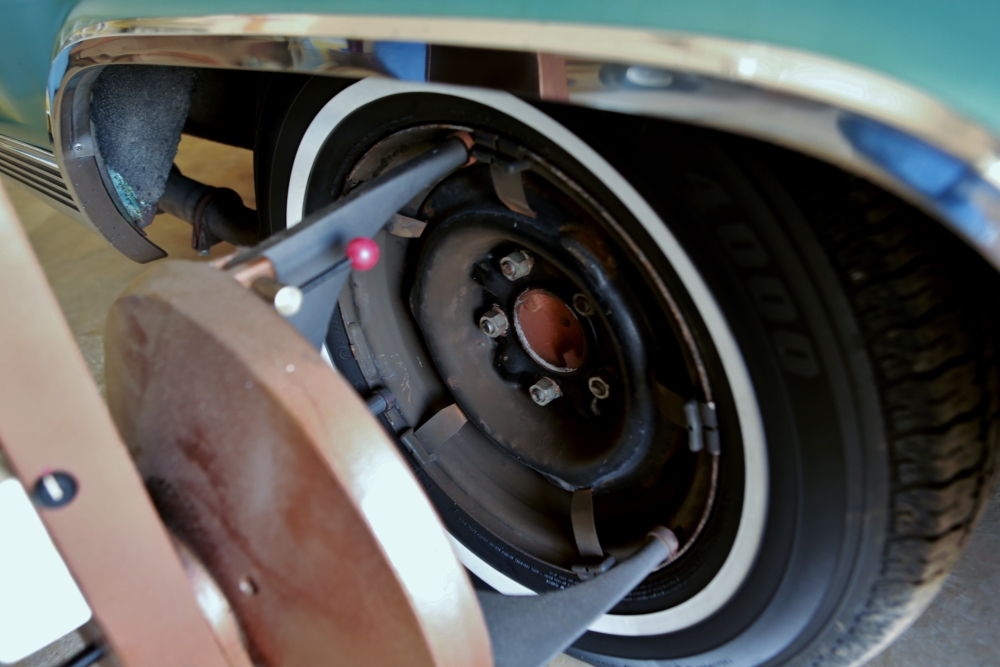
Adjustments for level.
Side view of the driver's side sight.
April 18, 2015
Since I last posted I've done some cogitating on what kind of wheels I want the car to roll on when it's finished. The tires have good tread, but they are about 12 years old and overdue for replacement. I think I want to put redlines on the car next time. The car currently sports Motor Wheel Spyders and I love them, but I'm not sure they have as stock a look as I want. Paradoxically, the more I deviate from stock, the more I am trying to make the car look stock. How weird is that?
So the following three profile pictures give some options. This first picture shows the current look:
Next up, the Spyders with redline tires:
And this is what the car would look like with redlines and a set of 1969 Chevelle-style Magnum rims (I think Chevy called them "SS" wheels):
I think that is where I am headed.
I also have given more thought to the console project and decided not to reinvent the wheel. Instead, I am going to buy a reproduction '67 Chevelle console and adapt it to the Corvair. Here is a picture of the console:
One thing that's hard not to notice in this picture is the big clock. The good news is that GM used the same font and probably the same lighting in this clock as the Corvair. The bad news is that the Corsa already has a clock.
So I had to fix that.
This brings us to yesterday's trip to Bruce Weeks' house. Bruce has several Corsa dashes and I had one extra. I've also bought an extra thermistor, and I decided I would replace the clock with another cylinder head temperature gauge, so I would have temps from both sides of the engine. So, field trip time.
We started off with some pictures of Bruce's Monzter Corvair. He is building a V-8 Vair with a 350 mated to a Porsche Boxtster 6-speed transaxle. The rear suspension is coming along.
He says he is going to have to relocate the upper control arm to address some clearance issues.
Bruce is working on getting the seat located. With the Boxster transaxle, the engine sits far enough aft that there is plenty of legroom.
No problem fitting 6'2" Bruce in there. I thought the seat was pretty comfortable.
Next on the agenda was modifications to my instrument cluster. I plan on using this empty cavity in the cluster harness for the new thermistor wire.
I brought my rolling workbench with me, a/k/a my 1963 Olds Ninety Eight Holiday Sports Sedan. We had need of it for a later project.
We lined up the temp and clock windows on the two lenses, and then marked where to cut based upon the overlap. You can see that the one nearest to the camera has been cut, while the other one is only marked.
Look, they fit!
Checking for fit in the cluster.
A cluster of clusters. We had three parts clusters between us plus the one out of my red car. If you include the two in our other Corvairs, between Bruce and I we own six Corsa instrument clusters.
The can for the instruments has a large round hole for the clock on the left side. This doesn't provide any means of attaching the second temp gauge, so we cut out the back of another can to provide the missing metal.
Cutting the back metal out of the donor can.
Trimming.
This is what the back will look like when the new part is attached.
Just have to add screw holes and it will be ready.
Here the second gauge is mounted. Looks like it belongs there.
Finished!
A wider view of the panel.
I used the green wire from a '66 panel for the thermistor lead, but it isn't long enough so I will have to make a new one. Power comes from the clock's old connector.
After we got done with the panel, we played with Bruce's new alignment machine. It's a '62 Alemite system. Bruce wanted to check it against a car with a live axle to see how accurate it was. That's where the '63 came in.
Each of the units has a sight through which you look at the other side.
Adjusting the sight.
This is the right side sight.
This is the rest of the kit. It's in amazingly pristine condition.
These pads allow adjustment when the wheels are turned.
This is what the driver's side read when dialed in.
This is what the passenger side read when dialed in. Obviously we hoped it would be exactly accurate. Probably it will be a good idea to check it against the rear axle of the Imperial to see if it's the car or the gauge.
Peek-a-boo!
It attaches to the wheel with simple tension.
Adjustments for level.
Side view of the driver's side sight.
Norm Witte
Lansing, Michigan
'65 Corsas: 140 coupe and 180 convertible
http://www.wittelaw.com/personal
viewtopic.php?f=52&t=4208
Lansing, Michigan
'65 Corsas: 140 coupe and 180 convertible
http://www.wittelaw.com/personal
viewtopic.php?f=52&t=4208
Re: Upgraded: Corsa Coupe 2.0
Cool stuff! You have been busy
Jeremy (cad-kid)
Kronenwetter, WI (Central Wisconsin)
SOLD 9-2016 65 Monza 4spd/140
My 65 Monza thread
My YouTube page
Kronenwetter, WI (Central Wisconsin)
SOLD 9-2016 65 Monza 4spd/140
My 65 Monza thread
-
ncwitte
- Corvair of the Month
- Posts: 162
- Joined: Sat Jul 07, 2012 4:32 am
- Location: Lansing, Michigan
- Contact:
Re: Upgraded: Corsa Coupe 2.0
Long way to go! :)cad-kid wrote:Cool stuff! You have been busy
Norm Witte
Lansing, Michigan
'65 Corsas: 140 coupe and 180 convertible
http://www.wittelaw.com/personal
viewtopic.php?f=52&t=4208
Lansing, Michigan
'65 Corsas: 140 coupe and 180 convertible
http://www.wittelaw.com/personal
viewtopic.php?f=52&t=4208
Re: Upgraded: Corsa Coupe 2.0
Not sure if this helps you but I found this on corvaircenter.com Maybe this will help you with designing yours, it looks to be the same?? Good luck! I love your thread!
- Attachments
-
Ormston