How to: LM Corvair Tachometer

Need to know how? Want to show how?
User avatar
91blaze
Posts: 446
Joined: Thu Jan 09, 2014 11:35 pm
Location: Indiana

How to: LM Corvair Tachometer

Post by 91blaze »

My '66 Monza came with a 4 speed but no tachometer. I always like having a tach to keep an eye on my engine so I went about researching a way to fit a tach in the dummy clock position. For some reason every post I read said to use a 3 5/8 tach, but I soon find out that was wrong. I used a 3 3/8" Sunpro Super Tach II. I did not want something that stuck out like a sore thumb like most other tachs, so I unbolted the rear cover of the dummy clock and began figuring out how to attach the tach to it.

1. I was able to completely disassemble the tach by prying off the chrome bezel, unscrewing the rear screws, and unscrewing the front face screws. The front face was a bit difficult to remove because the needle is not removable so I had to cut apart the face.

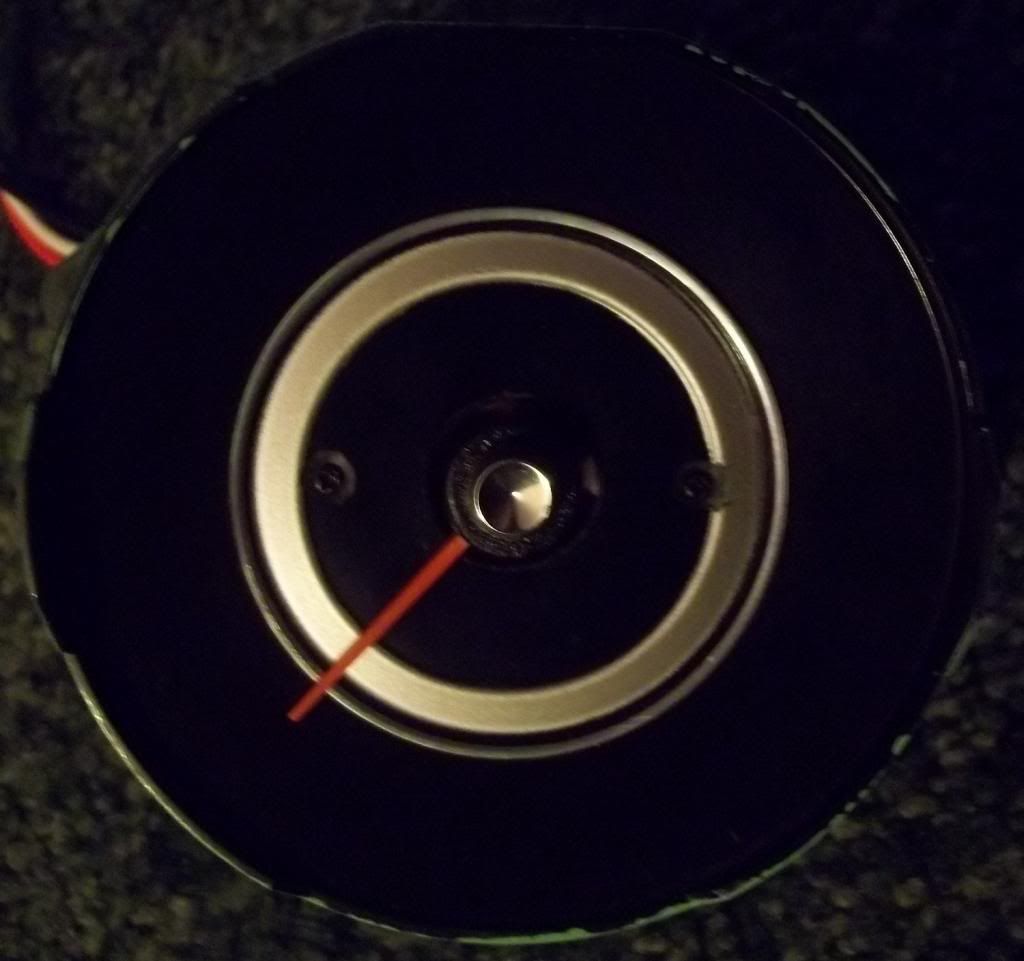
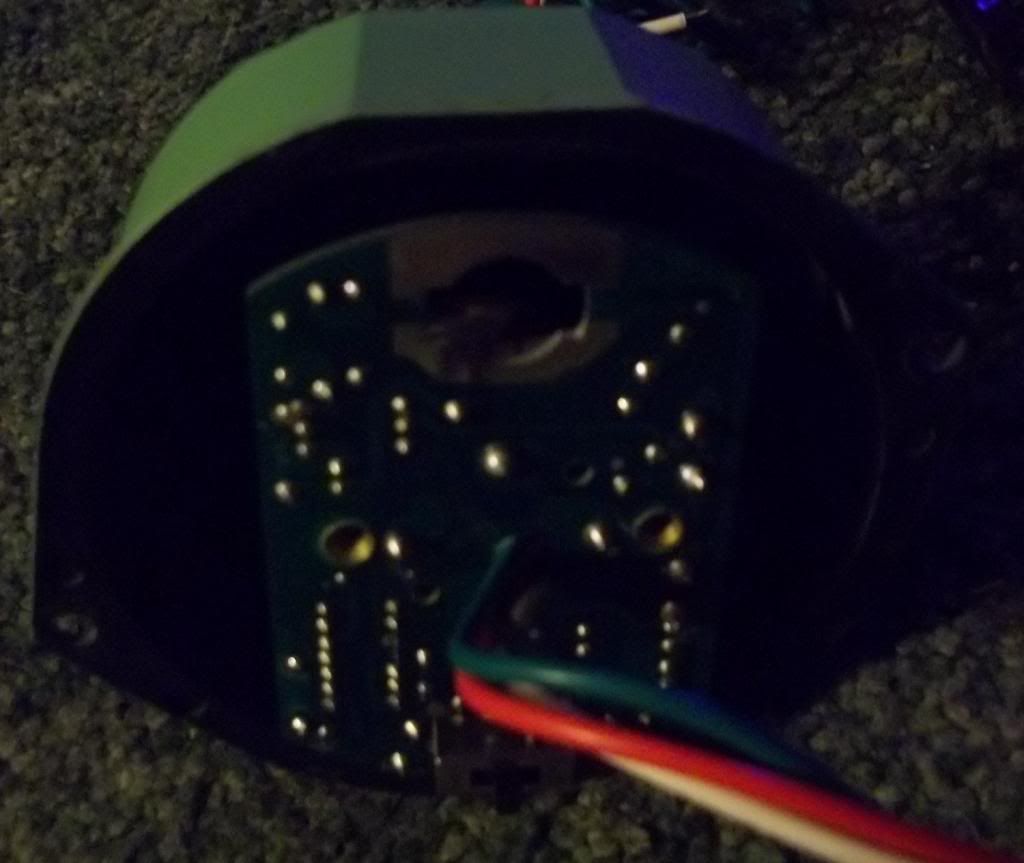
2. Had to modify the clock face by removing the little chrome center piece (it just pulls out with a little persuasion). Then I enlarged the center hole to about 5/8" to allow the needle to slip through. I also had to drill two small holes for the screws. The screw holes need to be countersunk so the needle won't hit them. (see pictures below)
Image

Image

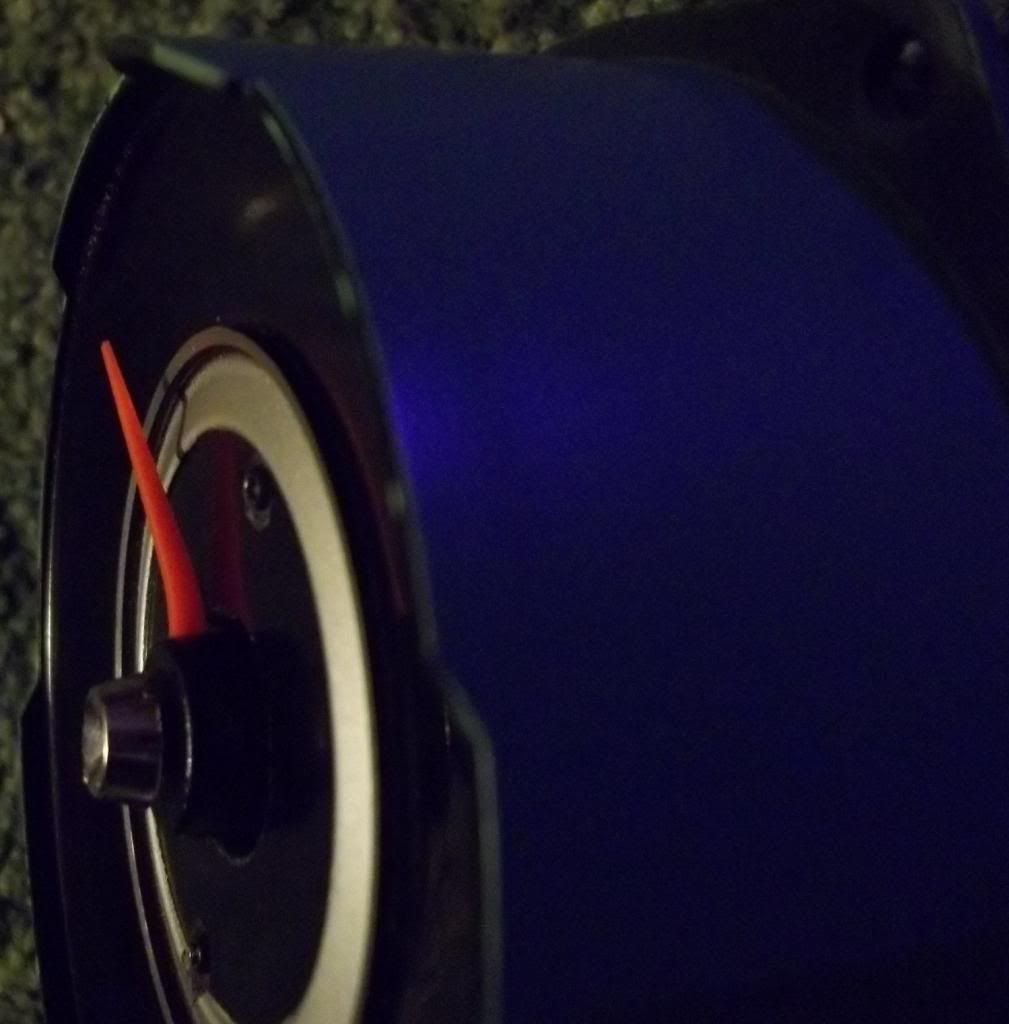
3. The needle must be bent upward to clear the chrome ring of the clock face. I did this by carefully heating it up just enough to bend the needle up. Be very careful not to heat up and damage the electronics. From the top it still looks normal and it doesn't interfere with it working. I also trimmed down the center chrome part and epoxy it to the center needle part (see pictures below).
Image

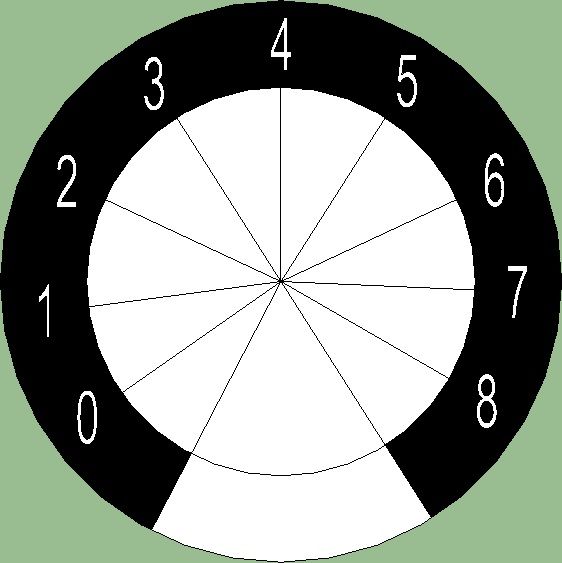
4. I have included below all the pictures from the build including the parts to print out. The first is a template to cut out and use to mark the RPM lines. The second is to be cut out and attached to the inside of the glass original glass, much like how the speedometer is labeled. Use the old tach face to line up the screws and mark a zero RPM line to line up the template to. To print these correctly, open in Paint, set the page orientation to portrait, and set left/right margins to 2.62". When you cut the templates, you should be left with only the outer "ring" as you can see in my finished pictures. I only made the tach to go up to 6k rpm but if you would like to make it higher, it shouldn't be too difficult to modify my templates or make new ones.
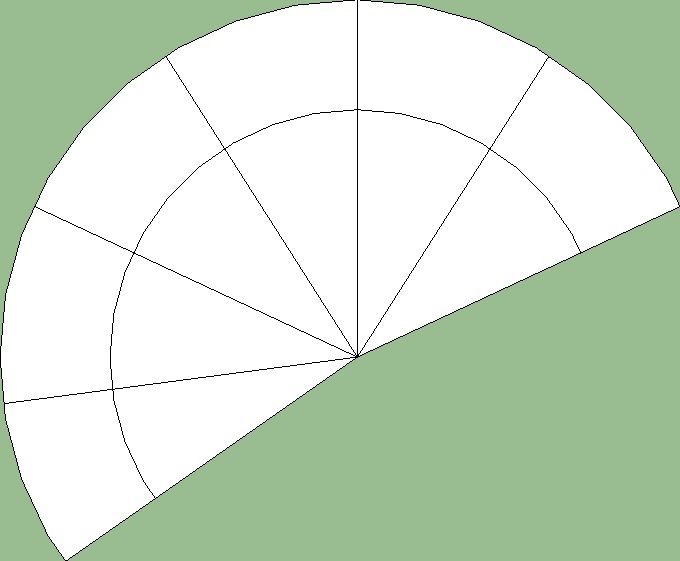
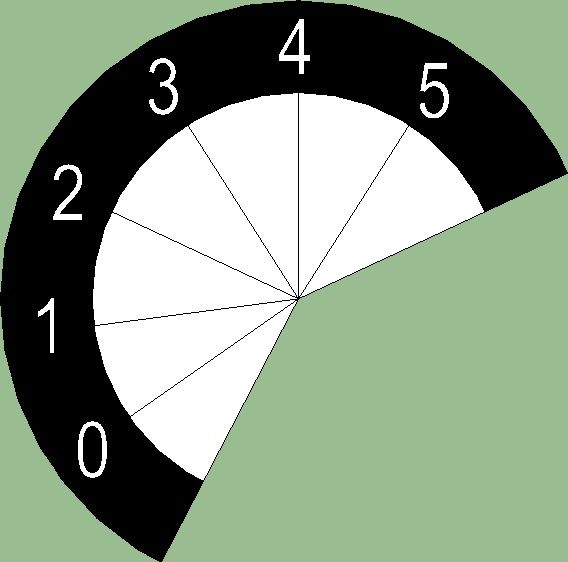
Image

Image

5. Once that's all done you can simply bolt the tach into place in the clock position and re-install the instrument panel. I know I'm no professional, but here it is completed:
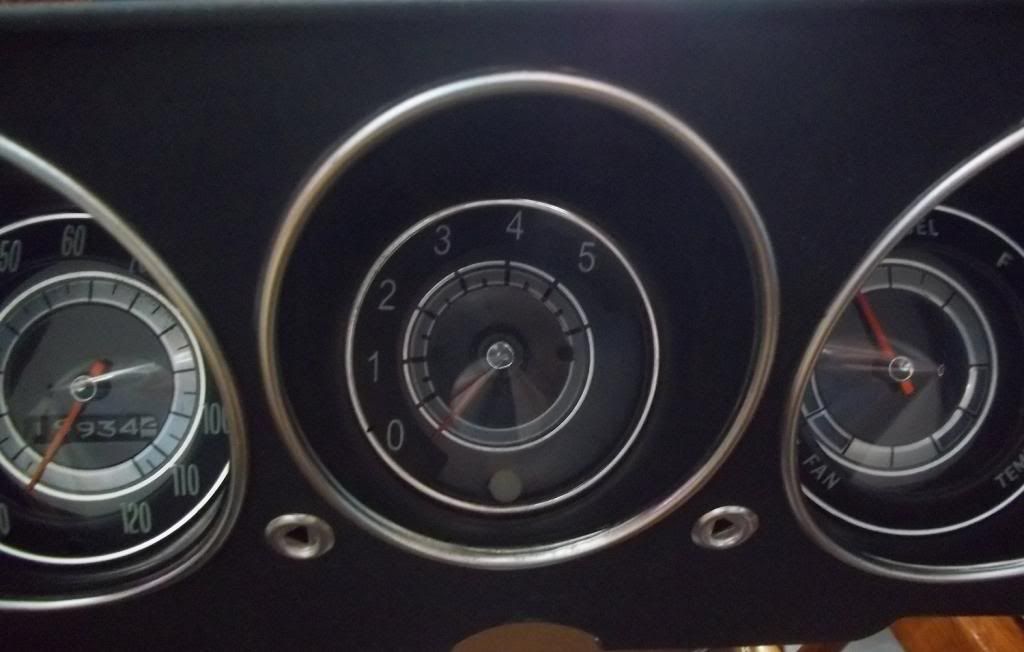
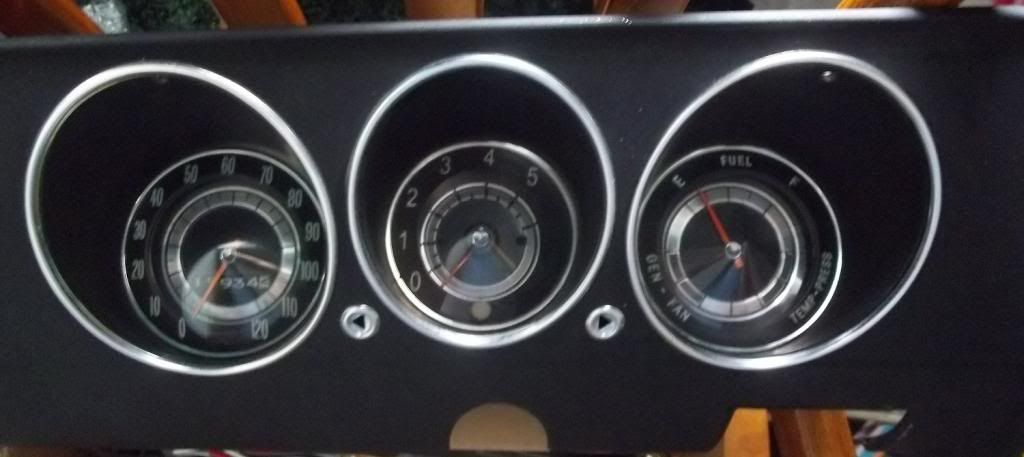
Image

Image

Follow the included instructions on hooking up the electronics, it's only the positive, ground, and signal wire since the light in the tach won't be used. I may go back and make a new printout with numbers that match the speedometer better, and make the lines a little nicer, but it will work fine for now. I might also add a little peg to keep the needle form going below 0 RPM just because it bugs me. Any questions or comments please reply below. Sorry if this write up isn't too great, this is my first "how to".
'66 Monza Coupe Project: viewtopic.php?f=52&t=7188" onclick="window.open(this.href);return false;
User avatar
UNSAFE
Corvair of the Year
Corvair of the Year
Posts: 2006
Joined: Fri Dec 11, 2009 1:19 pm

Re: How to: LM Corvair Tachometer

Post by UNSAFE »

Nice job :tu:

I put a tach in a Monza years ago - I think I used a 3 5/8 and I just epoxied it in place.

Now I have a Corsa dash in my 65 Monza - The 6000 rpm tach wasn't enough so I mounted an 8000 rpm unit and replaced the speedo with a 120 mph .

Again, they are just epoxied in place .
Attachments
dash a.JPG
Kevin Willson
1965 Monza 3.1
Juneau Alaska
User avatar
MBlaster1
Posts: 335
Joined: Sun Jul 14, 2013 6:25 pm
Location: Lake City Fl

Re: How to: LM Corvair Tachometer

Post by MBlaster1 »

Looks great. one question do you think the template could go to 8000 and turned to so the needle stopped at zero.
Thank for the info.
Don Howard
Lake City Fl.

66 140 Convertible
User avatar
91blaze
Posts: 446
Joined: Thu Jan 09, 2014 11:35 pm
Location: Indiana

Re: How to: LM Corvair Tachometer

Post by 91blaze »

I did end up making mine go to 8k. I wouldn't turn the template to match 0 rpm because it would throw off the rest. When electricity is applied to the gauge, it moves to zero. I just glue a little black peg on the face so the needle can't go below zero, it's easy enough since everything is already apart. Here's the template for 8k rpms, just cut out the white parts you don't need:

I would suggest using clear glue to keep the numbers in place since it likes to fall out of place.

Image
'66 Monza Coupe Project: viewtopic.php?f=52&t=7188" onclick="window.open(this.href);return false;
User avatar
MBlaster1
Posts: 335
Joined: Sun Jul 14, 2013 6:25 pm
Location: Lake City Fl

Re: How to: LM Corvair Tachometer

Post by MBlaster1 »

OK, Thank you did not know the needle moved when power applied.
Don Howard
Lake City Fl.

66 140 Convertible
User avatar
flat6_musik
Posts: 2659
Joined: Sun Apr 04, 2010 10:03 am
Location: Hesperia, CA

Re: How to: LM Corvair Tachometer

Post by flat6_musik »

Very nice. I'll bet there could probably be a market for those.
User avatar
MBlaster1
Posts: 335
Joined: Sun Jul 14, 2013 6:25 pm
Location: Lake City Fl

Re: How to: LM Corvair Tachometer

Post by MBlaster1 »

Ok one more question How did you mark and line up the holes for the face, they are very small on the plastic tabs or did you remove the tabs and line up with the holes for where the outer case screws on. See picture below.
IMG_20140421_133135.jpg
Attachments
IMG_20140421_145413.jpg
Don Howard
Lake City Fl.

66 140 Convertible
User avatar
91blaze
Posts: 446
Joined: Thu Jan 09, 2014 11:35 pm
Location: Indiana

Re: How to: LM Corvair Tachometer

Post by 91blaze »

I used the tach face that I took off to line up the holes. Just make sure it is straight compared to the indentation on the clock cylinder. I used the plastic tabs to attach the tach. You can see where I had to remove some material to get the screws to reach through the plastic.

The tach will move when the power is applied, much like newer cars where the gauge needles move to where they should when you turn the key.
'66 Monza Coupe Project: viewtopic.php?f=52&t=7188" onclick="window.open(this.href);return false;
Post Reply

Return to “DIY - Explanations and Demonstrations”